Installation Time
(approx) 4 Hours
Difficulty Level:
Mechanical expertise or professional installation required.
FREE 2 or 3-Day Delivery on 10,000+ Items. Details
$1,797.99 (kit)
FREE Shipping Market Price $2,049.99 You Save 12% ($252.00)Saved - View your saved items
We're sorry. We couldn't save this product at this time.
or use
Justin: The Teraflex Falcon Sport Leveling System here might just be one of the nicest options in the category for 2015 and newer F150 owners who are looking to level their trucks through premium adjustable dampers. Now, this kit will include a pair of front monotube shocks, in addition to a pair of rear adjustable piggyback shocks, new bump stops, roost guards, and all of the hardware needed for the installation. Now, because this kit does include a number of nice components, the price is going to be a bit more than say your typical puck style leveling kit at right around 1,500 bucks. But the performance, the ride, the adjustability, all will be worth the price of admission. Now, because the nature of this job and because the Falcons do reuse your factory front springs, expect a full-blown three out of three wrenches on the difficulty meter here, as you will need to incorporate a spring compressor to swap over the fronts. But if you hang with me for a bit, we'll show you how it's done later in the video.First thing's first, I do wanna say don't let that tow or haul name fool you here in the Falcon system by Teraflex name because the reality is this kit is so much more than something that's just going to improve solely your towing or hauling capabilities, instead also gonna give you the ability to choose your front-end ride height. It's going to drastically improve both your on and off-road ride quality and will offer simple adjustment for the rear compression when needed. Now, all of this, of course, with, yes, adding some much-needed stability when towing or hauling heavy.But what do you say we break down some of the components here? And let's start with the fronts. And on the surface, guys, you're looking at two and a quarter inch monotube shocks. Now, unlike the Fox 2.0 system, which I feel like this kit will compete directly with, the Falcons do not include any springs. Instead, they will reuse the factory springs, which will maintain a slightly more comfortable albeit firmer ride quality. Now, also because there is no spring or adjustable threaded body or collar system like a traditional coilover, the front-end adjustments or at least your ride height adjustments are done using the snap ring here and the included billet spring cups. Now, the fronts are gonna come preset for a leveled ride height, but there are also settings, as you can see if we move the spring cup out of the way, for a stock front-end ride height, a medium front-end ride height, which is gonna be roughly a half-inch to an inch over the stock, in addition to the level setting, which again you're preset at about two inches over the factory height. And then finally, up above, on the top here is going to be what they call a heavy accessory setting, which is gonna be for truck owners out there running heavy steel bumpers up front, maybe a winch and other stuff that might otherwise help you suffer from some front-end sag. Now, those front shocks are made from T6 billet aluminum and do feature, again, a two and a quarter inch diameter, which is loaded, by the way, with a 3/4 inch hardened shaft and anodized piston. Now, Falcon does point out that this diameter, the two and three-quarter, is the largest diameter body that you can put in the stock location before you have to start making some other modifications. So, you're certainly getting more girth, if you will, out of your front-end components when compared to all of your stock hardware.But let's switch our focus to the rears here, which in my opinion are gonna be the star of the show, thanks in part to the matching two and three-quarter inch body, along with your piggybacks, and more importantly, the three-way fast adjustment knob. Now, this guy is going to allow for super-fast adjustments without needing any tools or without needing to jack up the truck. Your first setting, which we're currently on now, is basically gonna be just for on-road comfort, daily driving, things like that, and is going to reduce the compression firmness overall. Now, your second setting, guys, if we can go right there, is going to be for some light hauling, light towing, things like that, maybe some off-roading. And then your third and final setting, which is all the way over here, is going to be for those heavy loads, heavy towing, or if you're just looking to jump your truck, and you want all the compression, that's what you go to, that third setting. Now, basically with this third setting, you're going to be increasing the compression damping of the actual shock itself and, in turn, adding a lot more control and a lot more stability when towing, preventing the shock from basically bottoming down or bottoming out, slamming down, and essentially loading up the tires.Now, the Falcons also feature what is called VOD, that's volume optimized damping, and the ZRT technology, which is zone rate tuning. The latter is going to help ease any concerns truck owners might have about reusing your factory springs and altering the preload through raising the spring on the body of the shock itself. ZRT tech here is essentially going to manipulate that factory spring rate, guys, allow for a more exaggerated spring curve in off-road situations but remains very comfortable on-road or in normal drives zone situations.Both the front and rears are filled with Red Line synthetic shock oil, which also contains anti-wear and lubricant properties to help promote better thermal stability and just reduce cavitation and fade when really getting worked hard. Now, the dampers are fully serviceable and rebuildable and can be used with aftermarket airbags in the rear for the ultimate towing one-two punch. Now, the shocks are built and assembled right here in the good old US of A. And Teraflex does back everything with a pretty solid three-year warranty.But now we wanna get into the installation, which, again, will be a little bit more involved compared to your standard puck style leveling kit. And to give you a better idea of what you're in for in the garage or driveway, here's our detailed walkthrough along with a quick tool breakdown.Man: Tools required for this installation: pry bar, push pin removal tool or a flathead, 3/8 drive, 1/2 inch drive with various extensions. This is a 3/8 universal swivel. We're gonna use a 4-millimeter Allen key socket, a 5-millimeter Allen key socket, as well as an 8-millimeter Allen key socket. Then we're gonna use sockets ranging from 8 millimeters all the way up to 21, 15-millimeter wrench, 18, and 21-millimeter wrench, a vacuum pump to get our IWB out of there, a ball-peen hammer to knock our upper ball joint out and same with our outer tie rod. Air ratcheting wrench is optional as well as this half-inch impact and this 3/8 electric impact.All right. Thanks, Justin. So, as you can see, we are gonna start on the rear. I do have the vehicle lifted up on our four post lift, and I do have our back wheels and tires off. Now, you don't have to remove your wheels and tires off the rear, but I highly recommend you do remove your wheels and tires because you'll be able to get into these bump stops and remove these shocks just that easier. So I have my impact with a 13-millimeter socket. I'm gonna take my bump stops out first. All right. Then I'm gonna switch up my socket to a 15 and get this shock out next.All right. Moving on to the shock, we're gonna start on the rear so we can disconnect this and just let it swing out of the way. I've got an 18-millimeter wrench here and a 15-millimeter socket on my impact. All right. Let's pull this bolt out, and we're just gonna let this shock just hang there for a second and then get that 15 out of the top.All right. Next, we're gonna go after this 15-millimeter bolt. On the top of our shock, there is a locking nut on the back. So you don't have to worry about getting a tool back there. Let's just zip this off. All right. And then get that locking tab out of there and pull our shock. Repeat these steps on the passenger sides. Remove your bump stop and shock.All right. Now, before we can get these new rear shocks onto our truck, there is a little bit of assembly we have to do, and we have to attach our roost guards to the bottom of our shocks. Now, we're gonna back out this hardware right here and attach it. Now, there's a little trick to sliding these guys on there. These threads are pretty long.All right. So we're gonna take one of our roost shields right here, and we are going to slip it on and turn it while it's in there and slide it through until those holes line up to where our hardware can just easily slip through. Let's go ahead and start a couple of these just finger tight. As you can see, that one fell right into place.So now we're gonna tighten these up with our 4-millimeter Allen key. Now, I have one on the end of my socket. If you just have a regular Allen key, that's fine. We're not gonna over-tighten these though because this is a plastic shield going into an aluminum mount. So you don't wanna over-tighten these. All right. Now, do that for both shocks, and then it'll be ready to be installed on the truck.All right. So before we install our shocks, we're gonna install our new bump stops, and we're gonna use the supplied 8-millimeter Allen key hardware that they gave us. And I'm just gonna start these threads and finish it up with my impact. And since we're returning our vehicle back to stock, I'm not using Loctite on this. But I highly recommend using the supplied thread locker that they give you just so it doesn't move or go anywhere. All right. Now we're gonna take our bump stop and jam it up in there. Just like that. And I'm gonna move it so the Falcon logo's out there and clean it up because I got a lot of grease on there.All right. Let's go ahead and get our shock reinstalled here. We are gonna reuse our factory hardware. I'm gonna start at the top here, slip this into place. There we go. Slip the bolt in first and then get that locking nut on the back.All right. So this is what I wanted to show. You wanna make sure that this nut is seated on there correctly. So I'm just gonna push this bolt through a little bit and start those threads, and then I'm gonna finish it up with my air impact. I just wanna make sure that that is threaded on there right. All right. Now, let's get the bottom bolted up.All right. Now it's time to mount the lower portion of our shock to our axle. And I do have this set at the softest setting so it'll be easy to just push up on it. But if you don't have the strength, you can use a pry bar to get some leverage. Just put it on the perch here. So I'm just gonna press up, slide it over. We are reusing our factory hardware. So when it gets into that spot, you just turn your bolt a little bit and have those threads start popping out a little bit. And then you can put your nut on and tighten it the rest of the way with the 18-millimeter wrench and your 15-millimeter socket. All right. Now, repeat these steps on the other side to get your shock and bump stop installed.All right. Guys, so looking at the rear shocks, you can see right here we are in the softest setting. So if you did have a load in the bed of your truck, you can put it right there to number two, or if you had a really heavy load or you're trailering, number one right there. That's gonna be your firmest setting.All right. So moving on to the front, our first step is to get some breathing room for our brake lines, our wheel speed sensor line, and this vacuum line right here. So I have an 8-millimeter and a 10-millimeter socket. 8-millimeter is gonna go right here for our wheel speed sensor. Let's take this out. Then I'm gonna switch to this 10. All right. Now with our 10-mil, let's take these brake lines out of here. And then I'm going to grab a trim panel removal tool or a pushpin removal tool, and I'm going to just pry up on these vacuum lines right here and behind here just to give some extra room.All right. So what we're gonna do now is remove the two 21-millimeter bolts that are holding our whole caliper assembly onto our steering knuckle here. So this is a 21-millimeter bolt. I'm gonna try to break it free first. You'll need a couple threads on that so it just doesn't fall and do this bottom one here. Now, it's very important that you grab a bungee cord to support this caliper. When you bring it out of the way here, we're gonna tie it off to the frame. So just slide it off your rotor. Just like that. And then get a bungee cord, go through your bolt hole here and attach it to the frame. All right. Now we're gonna remove the rotor and set that off to the side. And then we're gonna take our 8-millimeter socket and take these three bolts holding this dust shield in place. All right. And just slide this out of the way.All right. Now we're gonna take a deep 18-millimeter socket on an extension on my 3/8 impact drive. We're gonna remove our 18-millimeter nut that attaches our lower sway bar end link to this lower control arm. All right. Now we're gonna take this 21-millimeter nut off the outer tie rod for our steering just attached to our knuckle right here. So this is a 21, and I have this on my impact for a little extra torque. And that just popped right out. Perfect.All right. Now we're gonna go after our 18-millimeter nut on the upper ball joint. For this one I'm just gonna use a regular wrench on, see if I can break this free, and it looks like it's coming. And you actually watch the distance between the upper control arm and our spindle right here increase. So, now we're spinning on it. I gotta get a 10-millimeter wrench on this to hold it in place. So this is actually an 8-millimeter diameter. So now with that held, we can still loosen this up. I'm gonna get an extra hand in here in a second to help push down this control arm to increase this. So with a pry bar, right here, we can lower our control arm just a little bit to help us remove it. I'm gonna get that 8-millimeter back in place there.All right. So I brought a floor jack in to help support the lower control arm. And watch when I put a little tension on there, this right here is not moving at all. So there's a lot of tension on that nut. So if I release that, that upper control arm is just gonna shoot up, and this spindle is gonna drop forward. So, I'm going to release some of that tension just by jacking up, and you can watch this control arm and spindle separate a little bit. Just like that. And in my hand, I have that air ratchet. So I'm gonna actually put that on the bottom with that 8-millimeter socket, and I have it on the righty-tighty setting because it's actually opposite. So, let's get that upper control arm out of there. I am gonna still support it with a pry bar because it is gonna go up pretty quick. So, I'm just gonna stick this in between a coil there and press down. And if we go up a little bit on that jack, maybe we can get that control arm up. All right. So, that nut is off, and I'm going to, there we go, remove this pry bar. And now our spindle is free. So let me get the tension off the jack, bring that control arm down. Just like that.All right. Now we're gonna remove our dust cap to expose our axle nut. Now, I just have a flathead here. I'm just gonna pry it in a couple different directions here until it pops out. Like that. All right. So what this here is a vacuum pump, a hand-operated vacuum pump. And we're gonna remove this vacuum line from the back of our hub here. It just pulls straight out. Then we are going to use the biggest prong on the backside of there and put our vacuum line to that and then crank it up to 27 inches of vacuum. And what that does is releases the hub from the axle shaft itself. So, wanna pump this up right to that 27 mark. I'm just gonna put this back here out of the way.Now, when I release this 13-millimeter nut and bring that axle through, I'm gonna be sure not to hit my threads on that axle seal on the way out because, again, that is what holds vacuum. Now, when your truck is on, that vacuum pump is running, opening up that, allowing it to free spool, I'm sorry. And then when you hit that four-wheel drive actuator, that's what locks in. It releases that vacuum, locks in your four-wheel drive. So we don't wanna mess that up because it's about $150 part to repair. So let's get that 13 out of the way.Now, I'm gonna grab the axle shaft on the backside. I'm gonna pull the spindle towards me. And you can actually hear something release there. Still have my vacuum. It's coming out. Let me get a screwdriver just to open up that gap a little bit more. All right. Here it comes. Again, I'm grabbing that axle shaft just to make sure that I don't hit that seal on the way out. And I'm gonna put this axle to the side here.All right. So you can see there's a little tension on my wheel speed sensor line. There's not a lot but I don't want there to be any. So I'm just gonna remove it. And this just pull straight out. And I'm going to put that right next to our rotor there. So what I have here is an 18-millimeter socket. I'm gonna go ahead and get the nuts off the bottom of our strut assembly here. All right.All right. So our F150 is already equipped with the traditional spacer leveling system, and this Teraflex system is 10 times better. But with that being said, the bolts that are on top are an 8-millimeter Allen key head. For your factory one, you're gonna have a stud that comes up with a nut on top. I'll let you know the size of that nut when I get the spacer out of here because that is gonna be factory hardware underneath there. Let's get the spacer out of here now. Make sure I get this tool out of here, and there's gonna be three total on the top. I'm gonna try to break free the last one. All right. This is our last bolt coming out of the top of our strut.Next, I'm gonna get a pry bar and pry down on that lower control arm separating the top of our strut from that pocket there. That way we can slide it up and out of there. I am gonna need an extra hand. So I'm gonna grab someone real quick. All right. So I have a buddy over here, Joe. He's going to push down on that lower control arm. I'm pushing up at the same time, trying to clear these studs from the bottom of it. Just like that. And then the top will just slide out. As you can see, we have that spacer on there that we're gonna take out.All right. So what we're gonna do next is take this spacer off the top of it because we need to reuse this top hat for our new Falcon strut. So it's being held on by three 17-millimeter nuts. Let's get those out of here. All right. Let's get that out of here, then we're gonna reveal the top of our factory strut. So let's take this over to our spring compressor and get that top hat out of there.All right. So you can see that we're at a wall-mounted spring compressor. You're most likely not gonna have one of these at your house, but you can go down to your local auto parts store and rent a floor spring compressor. Now, don't use an impact on this. Go very slow with a regular ratcheting socket wrench. This, however, you can see that I have it as level and as flat as I can. I'm down on the most lowest ring I can. I don't wanna get too close to that bottom, but I'm on the top hat as well. So I'm gonna compress this down just a little bit until it frees up the nut here, and then I'm gonna release that. That is an 18-millimeter nut. Let's put some pressure on these springs. Let's see if we can release that nut on top. All right. That should be good there. Now, I'm also gonna hold the bottom of the strut just to make sure it doesn't drop completely out. I just wanted to make sure that nut spins freely first. All right. There it goes. And if I pull this out, I can release my strut. Now, I'm going to release the tension on the spring here just by backing off this compressor. Let me take that nut out of there. And you can hear it coming up, that tension, it's crazy. So I'm gonna leave that just like that for right now. I'm gonna go get that Teraflex strut, bring it into place, line everything up, and then put that nut back through.All right. Now, bringing the new Teraflex strut into place, I'm gonna put the bottom seat over the shaft here. And you can see there are three different settings. There's gonna be stock, medium level, and then heavy accessory. We're right on that level tab. If you had a front bumper or a winch, you would wanna put that ring on to the top. However, we don't have a bumper. So we're gonna leave it right there.Next, we're gonna put our spring perch onto the bottom, followed by our bump stop. The cone is going to be facing down. Just like that. And then let's remove our nut. I'm actually gonna compress the spring a little bit more then bring this strut up. And remember, your zerk fitting on the bottom is gonna face out towards the tires just like the writing here. And we can press this a little bit more. All right. That should be good there. Now, I'm going to carefully bring up my strut from the bottom to the top, making sure my bump stop fits through that sleeve there, and my spring sits on the bottom. Just like that. I'm gonna feel how many threads I have at the top there. Not many. So I'm actually gonna crank down on this a little bit more. Make sure that shaft goes through the top hat. I can feel that stud just protruding at the top. Get a little bit more on that compressor. Let me see if I can put a couple threads on to that. I got a couple threads on there. Let me crank down on it just a little bit more. All right. Now let me tighten up that nut. It is going to be a 19-millimeter nut on the top of that top hat. All right. You just want a few threads showing through the top of that. And let me release the tension on this new Falcon strut. Okay. And there you have it, our new strut.All right. Now we're gonna install our new Falcon strut. As you can see, we have our zerk fitting and the writing out. That is the orientation that we want. Now, I'm gonna get the top hat in here first. And we are reusing our factory hardware on the top. So, I'm just gonna start this while I can. If you start one nut and get it high enough, you'll have enough threads on the others expose that you can start those as well. All right. So I have my 17-millimeter socket. Let's tighten up this hardware on the top here. It's gonna be a little tough to get to but quarter turn at a time.All right. Moving on to the lower portion of our strut, we are gonna thread in some new hardware. Now, these are already threaded towards the bottom. So we're just gonna push it into place here and bring our bolt up and attach it to our lower mount here. [inaudible 00:28:42]. Just gonna get a couple turns onto that. All right. Now, that actually brought my other one right into the place I need it to be. So let's get that other bolt up and in and then tighten that as well.All right. Now, with our strut completely mounted, top and bottom, we're gonna work on our CV axle and getting that through our hub there. Again, we're gonna make sure we pull back in so we don't mess up that IWB. And I'm gonna pull back on this spindle while at the same time lifting up on that axle, making sure not to touch any of the bearings that are inside of there or those gears for our CV and four-wheel drive. So, you can actually push in the axle just a little bit.All right. Now, with the axle through the center of the hub, lift up on that spindle, making sure that it goes all in nice and even. I'm gonna try to push up a little bit on that and then set my nut right there. All right. So what I'm gonna do now is just make sure that my CV is seated all the way around that seal over there. Looks like we're good. So, I'm gonna make sure that this is torqued down to spec and then work on our upper ball joint and our knuckle.All right. Next, we're gonna reattach our upper control arm to our spindle, starting with our ball joint here. So I'm gonna get our spindle worked right into the general area where we're gonna be, and then I'm going to bring the control arm down just a little bit, make sure that my ball joint sits in there. Then I'm going to regrip with my pry bar and give it a little bit more tension so I can start that nut right here. You'll wanna get like two or three threads on there. If you get any less, it may pop off. So, just like that. Then we can get either an impact or something on there just to tighten that ball joint up, or you could even put a little bit more extra force on there, thread it on even more, make it even easier. So I'm gonna leave that there. Grab an 18, tighten up that ball joint.All right. So I got my pry bar, and I got my 18 on my air ratchet. I'm going to tighten this up. I may need to get that 10-mill back out here shortly. There we go. So let me tighten up that with a regular 18 wrench. All right. All right. Now, let's attach our outer tie rod to our spindle right here. We're gonna be reusing our 21-millimeter nut we took off earlier. And I have my half-inch impact here. Just going to drive it right on there.All right guys, I just wanted to show you real quick what this vacuum pump was actually doing. You see here on this hub, I can spin it freely with that vacuum in place. Now, when I release it like the truck's not on and it's off, it's just sitting there in the parking lot, it locks up that hub. So that's why we put vacuum to it, so you can get that axle out of there nice and smoothly, not damaging that seal. So, let's remove this vacuum pump now. We're gonna reattach our factory vacuum lines and start working on our brakes, and we'll finish this thing up.All right. So what we're gonna do next is start attaching all of our lines, starting with this speed sensor right here. And this was that 5-millimeter Allen key we pulled out a little while ago. I'm just gonna start those threads and then hit it with my impact on the lightest setting because I don't wanna crack this speed sensor. It is plastic.All right. Then I'm gonna switch up my tool to a 10-millimeter socket, and we're gonna start attaching our brake line brackets back up to our frame right here, starting with this guy. That's a 10-mil. Hit that with the impact there. All right. And then this is our vacuum line right here. We can attach that to our axle down here. All right, make sure that seats all the way to the bottom. You don't want any leaks there, or you're not gonna have a good time. And then this is an 8-millimeter. I'm gonna add wait to attach this until I attach our rotor back to our spindle.All right. Now, let's start assembling some of our braking components, starting with this dust shield first. Slide this on and then reuse those 8-millimeter bolts. All right. Now we're gonna add our rotor, followed up by our caliper. So for the caliper, again, I had that bungee cord helping support these lines and not put any extra unwanted tension on them. This is kind of tough because you got to push the rotor with your hand with one and then with the other side, make sure the caliper and the brake pads are seated on that rotor the way they came off. Sort of like that. Now, I'm gonna get behind it and start my bolts.All right. So, what I'm doing here is just button up a couple things, these ABS lines, these wheel speed sensor lines. And we have to put our last 10-millimeter bolt into there. But what I'm gonna do now is finish up our sway bar end link on the bottom here where it connects to the control arm. This is that 18-millimeter nut we took off earlier. Just gonna zip this on. Okay. All right. One of our last bolts for our brake line bracket here. Just put that on. It is a 10-mil. Let's tighten that up.All right. So that's gonna wrap up my install of the Teraflex Falcon Sport Tow Haul Leveling System for this F150. For all things F150, keep it here at americantrucks.com.
Subscribe to our YouTube Channel
Features, Description, Reviews, Q&A, Specs & Installation
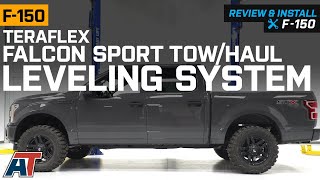
Versatile Performance. Want better on and off-road performance from your ride? You need to upgrade to the Teraflex Falcon Sport Tow/Haul Leveling System. This leveling system is perfect for towing, hauling, and sporty handling on rough trails, while giving you the most comfortable ride on the road. It features rear adjustable piggyback shocks, Zone Rate Tuning (ZRT), and Volume Optimized Damping (VOD) that delivers ultimate stability and enhanced control and responsiveness in any driving condition.
Adjustable Piggyback Rear Shocks. This Tow Haul Leveling System features a rear fast-adjust knob with 3 compression settings for lard damping adjustments. You can switch between Heavy Tow/Haul, Moderate Tow/Haul, and Comfort and Control modes for improved dynamic roll control and low-speed damping.
Premium Build. Each part of this Falcon Sport Leveling System has been fine-tuned and precision-engineered for your vehicle. The body is manufactured from 6061-T6 aluminum alloy that resists wear and protects the internal parts, while providing improved heat dissipation and wear protection. It also has undergone 1,000 hours of salt spray testing to check corrosion resistance.
Professional Installation. The installation of this Falcon Sport Tow/Haul Leveling System should only be done by a trained and qualified mechanic. Please follow the installation instructions carefully. This kit requires the use of a spring compressor to install the spring onto the Falcon Shocks.
Limited Warranty. Teraflex offers a limited warranty that guarantees the Falcon Leveling System to be free of defects in material and workmanship. The warranty stands for as long as the original purchaser owns the vehicle on which the products were originally installed, unless otherwise specified. Please visit the Teraflex website for terms and conditions.
Application. The Teraflex Falcon Sport Tow/Haul Leveling System is compatible with any 2015 to 2023 Ford F-150, excluding Raptor models.
Application Note. Please don’t use tow/haul modes while unladen. The increased rear stiffness could upset the balance between the front and rear of your F-150, which could lead to loss of vehicle control. Never exceed your factory tow/haul ratings. It is not Compatible on trucks with Continuously Controlled Dampening (CCD) Suspension.
Shop All Truck Parts And Accessories
Shop All Truck Shocks And Struts
Shop All Truck Suspension
Fitment:
Falcon Shocks 05-04-32-400-002
CA Residents: WARNING: Cancer and Reproductive Harm - www.P65Warnings.ca.gov
Installation Info
Installation Time
(approx) 4 Hours
Difficulty Level:
Mechanical expertise or professional installation required.
What's in the Box
10 More Questions