Installation Time
(approx) 3 Hours
Difficulty Level:
Light to Moderate mechanical skill required.
Guaranteed Free Delivery by 12/24! available on most items - Details
$2,150.75 (kit)
FREE Shipping Market Price $2,473.36 You Save 13% ($322.61)Saved - View your saved items
We're sorry. We couldn't save this product at this time.
or use
Merideth: If your 2014 to 2020 4-wheel drive F-150 is due for an upgrade when it comes to performance on and off-road, this BDS 2-inch Coil-Over-Suspension Lift Kit with Fox 2.0 Shocks will be a great one to consider. Now, I would like to mention that this will exclude the Raptor model, so just keep that in mind when you're taking a look at this kit.Now, nonetheless, for you non-Raptor owners out there, this will do a fantastic job at replacing those squishy factory shocks in your suspension that you currently have with a premium set of Fox Coil-Overs and shocks to improve your on-road ride quality if you're driving your truck day-to-day. Now, being comfortable on-road and responsive, this set will also offer that edge off-road, offering better clearance and the ability to fit up to a 35-inch tire for better capability for whatever off-road style driving that you're getting into.This kit will feature, again, front coil-overs, rear shocks, and you're also gonna get a set of upgraded upper control arms for a smooth ride and instant response that will outperform and outlast your factory components. Now, the combination of these components will offer you a big step up in ground clearance, which is going to be especially helpful to raise up that front end to have the ability to clear obstacles in your path while simultaneously creating a more aggressive presence to the truck aesthetically.Now, with raising the truck, this kit will also be corrected for when it comes to some of that thrown-off suspension geometry, thanks to the included upper control arms to help maintain that comfortable drivability and reduce any excess wear. Getting into the construction, this kit will be tough and able to withstand the abuse that you throw at it.Now, the coil-overs and shocks will have a 2-inch extruded and machined 6061 T6 aluminum body, an IFP or internal floating piston, and a 5/-inch hard chrome plated heat-treated alloy shaft. Now, in a nutshell, that means that these will have great heat dispersion to allow the shock to keep a cooler temperature for better performance, reduce any cavitation or foaming that forms inside the shock when it's worked really hard, which is that shock fade that you may be currently feeling with your factory setup, which is that like squishiness feeling. And this is also going to be able to reduce any chips or damage on the surface. Now, the front coil-overs are also preset, tuned, and pre-assembled for a super easy install.Now, the upper control arms here will be tough too with a 1.5-inch outer diameter heavy wall tubing and gusseting for extra strength. Now, the ball joint here will be sturdier than factory while also maintaining a neutral position for, again, that comfort factor, thanks to the corrected angles. And you'll be able to rely on these OE-style bushings and brake line mounting tabs for a factory-like fit.This will be a more premium option at around $2,300. Now, compared to other systems, at first glance, this system seems pretty simple, but with the robust construction, the performance that will not only benefit you, but also last throughout your toughest adventures in years to come, and the fact that this is going to remain incredibly comfortable for on and off-road driving, it's just a no-brainer in my opinion. Now, I think if you're looking to invest in a quality kit that you can rely on for probably the entire ownership of your truck, then this is going to be a great one to consider.Install will be a two out of three wrenches on the difficulty meter and should take you about three hours to get the job done with the right tools and the right setup. At this point, we can head over to the shop and check out a detailed breakdown on how to get this onto your F-150 at home. So, that's gonna wrap it up for me. Let's go ahead and get into it.Man: Tools required for this install include an air gun, an impact gun, a ratchet, a hammer, a rubber mallet, 15-millimeter, 18-millimeter, and 27-millimeter wrenches, 15-millimeter, 17-millimeter, 18-millimeter, and 21-millimeter ratcheting wrenches, 8-millimeter, 10-millimeter, 15-millimeter, 17-millimeter, 18-millimeter, 19-millimeter, and 21-millimeter sockets. A couple swivel adapters, an extension, a pry bar, and pole jacks or jack stands. What's up, guys? Today we're installing a lift kit on our F-150, so let's get started.So to remove our front struts, the first thing we're going to do is remove our two brake line brackets from the knuckle and the frame, as well as our ABS bracket. So to remove our brake line brackets, we can grab a 10-millimeter socket to remove our bolt. And we'll pop our bracket out of the way. Throw our bolt back in the hole so we don't lose it. We can do the same thing for the one on our knuckle. And then we can switch to our 8-millimeter socket for the bolt holding our ABS line in.Next, we can disconnect our tie rod end. We have a 21-millimeter nut. So we'll grab a 21-millimeter socket to loosen that up. And then we can take a hammer and strike the side of the knuckle here to pop our ball joint loose. And then we can finish removing the nut and pop our tie rod out of the way. Next, we can come down below our lower control arm. We have two 18-millimeter nuts holding on our strut, and then on the other side, we have another 18-millimeter nut that's holding our sway bar end link.So we'll take an 18-millimeter socket to get these off. And now we can get the other nut for our strut removed as well as the nut for a sway bar end link. Now, at this point, you want to remove the nut for your sway bar end link on the other side so that you can raise your sway bar to get this out of the lower control arm. So now, once you have your sway bar end link unbolted on both sides, you can take a pry bar to raise the end link out of the lower control line.Next, we can come to the top of our strut and loosen up the three 15-millimeter nuts. So I've got a 15-millimeter ratcheting wrench that we'll use to loosen these up. Next, we're going to remove the bolts from our lower control arm pivot points. Now, these can slide back and forth, so to make sure that you get your alignment where it was before, you might want to take a marker and just make a mark where it's centered on the metal.So once you do that, we'll take a 21-millimeter socket on our bolt side and a 27-millimeter wrench on our nut side to loosen this up. And then we'll do that same thing on the other side. And now we can remove our two bolts and drop our lower control arm down and out of our studs in the strut.So now we can go back up to the top of our strut tower and finish loosening up those nuts. Just be careful with that back nut, not to drop it into the pit of no return. And then once our nuts are removed, we can slide the strut out of place. So now with our strut removed, we can raise our lower control arm back up into place and put our bolts through.Next, we can loosen up the nut on our upper control arm ball joint. So we'll take an 18-millimeter socket to do that. And then with our nut loosened up, we can take a hammer and hit the knuckle to pop our ball joint free. And then once our ball joint pops, we can remove our nut the rest of the way. So now with the pole jack on our lower control arm, we can raise that up and then remove our nut.So now, to remove our upper control arm, we can take an 18-millimeter ratcheting wrench on our bolt side and a 21-millimeter ratcheting wrench on our nut side to work these loose. And then we can do that same thing on the other side. Now with both of our bolts loosened up, we can slide those out. And then with those removed, we can wiggle our upper control arm out of place.So before we install our upper control arms, it's important to note that we do have a grease fitting at the top. To cover that, we have this little cover that just presses in. Now, on both sides, there's a little cutout for a flathead screwdriver to be able to pop this cap off.So we're just going to angle that towards the front to make it easier to grease these in the future. And then you'll just press that down into place and we can get our upper control arms installed on the truck. So now we're ready to install our new upper control arms.So we'll get this slid into the slot and then we can get our bolts through. Then once we have our bolts through, we can get our nuts on the other side. And now once we have our bolts installed, we can get an 18-millimeter ratcheting wrench on our bolt side and a 21-millimeter ratcheting wrench on our nut side to tighten that down.So now we can connect our upper control arm ball joint to our knuckle. So we'll grab a pry bar on the lower control arm to raise it up into place. And then we can grab our washer and our nut and install that onto our stud. Next, we can take an 18-millimeter ratcheting wrench to tighten down our nut. Next, we can come back to our lower control arm and remove the two bolts to swing our lower control arm down so we can get our strut into place.So now we're ready to install our strut. So we'll get it up underneath the upper control arm. We can raise it up into place and grab our washer and our nut. Next, we can raise up on our lower control arm to line up the holes for our strut. And now we can reinstall the two bolts in our lower control arm and get our nuts on the other side.Next, we can come to the top of our strut tower and take a 17-millimeter ratcheting wrench to tighten down our nuts. Next, we can come back down under our lower control arm to tighten down our two lower strut bolts. We'll take a 19-millimeter socket to tighten these down. Next, we can tighten down our lower control arm bolts. So we'll grab that 27-millimeter wrench and 21-millimeter socket. And then we can line that up with our alignment mark by pulling on the wrench and tighten that down. And then we'll do the same thing for the other one.And now we can reinstall our tie rod end into the knuckle and reinstall our nut. And then we'll take a 21-millimeter socket to tighten that down. Now we can reconnect our two brake line brackets and our ABS bracket. And then we'll use our 8-millimeter socket to tighten down our ABS bracket. And then we'll switch to our 10-millimeter socket for two brake line brackets. Now, at this point, when we only have the sway bar end link left to connect, you're going to repeat that whole process on the other side until the sway bar is the only thing left so we can put those through the lower control arms together to make it easier on ourselves.Now, once you have everything lined up on both sides, we can press our sway bar all the way in. And then we can go underneath to reinstall our nut and tighten it down. And now we can come underneath our lower control arm and reinstall our nut. And then we'll take an 18-millimeter socket to tighten that down. And then you can do that same thing on the other side.So to remove our shock in the rear, we have a 15-millimeter bolt with an 18-millimeter nut on the bottom mount. On the top, we have a 15-millimeter bolt and a nut with a tab on it. So we don't have to get a wrench on the backside on this side. However, on the passenger side, there's an 18-millimeter nut that you'll need an 18-millimeter wrench for.So now for our bottom mount, we can take a 15-millimeter wrench on our bolt side and socket on our nut side to take this off. Now, coming to our upper mount, we have a 15-millimeter bolt that we'll grab a 15-millimeter socket to remove. And then we can do that same thing on the other side. So now with our shocks removed and our axle supported by pole jacks, we can remove the four 21-millimeter nuts for our U-bolts. So we'll take a 21-millimeter socket to do so. And then we'll do that same thing on the other side.Now, before we reinstall our new shocks onto the truck, we're gonna have to press in our bushings. So we'll slide these into the holes. You can use a rubber mallet to tap them into place. And then we'll get our sleeves and slide those inside our bushings.So now we can take our bushing and drop that into place. And then take our rubber mallet and just to top it down. And then once we have our bushing popped into place, we'll take our sleeve and then tap that in. And then we can do the same thing for the bottom and the same thing for our other shock. So now we're ready to get our shock into our upper mount.Now, on the driver's side, we have our bolt and our nut with the tab welded onto it. On the other side, it's just going to be a bolt and a nut. So we'll raise this up into place, get our bolt through, and then we can get our nut on the other side. Next, we can get our shock into our lower mount.So we're going to have to push up on the bottom of the shock to get it to line up with our holes. Then we can get our bolt slid through and get our nut on the other side. And now we can take an 18-millimeter socket on our nut side and a 15-millimeter wrench on our bolt side to tighten this down.And now at the top, we'll grab a 15-millimeter socket to tighten this down. Now we can repeat the same process on the other side. The only difference is it's gonna be a 15-millimeter bolt and 18-millimeter nut on the back, so you'll just need an 18-millimeter wrench on the other side.So that'll wrap up this review and install of the BDS 2-inch Coil-Over Suspension Lift Kit with Fox 2.0 Shocks for your 2014 to 2020 4-wheel drive F-150, excluding the Raptor. Thank you for watching, and for all things F-150, keep it right here at americantrucks.com.
Subscribe to our YouTube Channel
Features, Description, Reviews, Q&A, Specs & Installation
Brand | BDS |
Lift Height | 2.00 Inch |
Lift Kit Type | Suspension Lift |
Lift Kit Max Tire Size | 35 Inch |
Lift Kit Includes Shocks | Shocks Included |
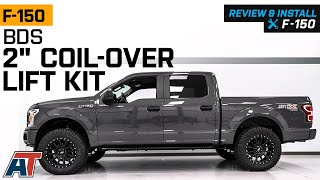
Maximum Suspension Performance. Maximize suspension performance on your F-150 with this BDS 2-Inch Coil-Over Suspension Lift Kit with Fox 2.0 Shocks. This kit provides 2 inches of lift front and rear, increasing ground clearance and letting you run up to 35-inch tires for a sportier stance for your truck.
Premium Shocks. This kit comes with Fox 2.0 Performance Series coil-overs and struts with application-specific valving to ensure the perfect match to your vehicle. The 2.0-inch extruded and machined 6061 T6 aluminum body provides improved heat dispersion while the internal floating piston design eliminates oil aeration and ensures a fade-free performance in all conditions.
High-Performance Upper Control Arms. The control arms that come with this kit are made from 1.50-inch heavy wall tubing and come assembled with factory-style rubber bushings for the frame mounts plus a high-quality ball joint. These offer greater durability and smoother suspension travel.
Installs with Moderate Difficulty. Installation of this kit involves moderate difficulty, with the need for a ball joint separation tool. The whole installation process should take around 3 hours to complete.
With a Lifetime Warranty. This kit is backed by BDS with a lifetime warranty against defects in materials and workmanship.
Application. This BDS 2-Inch Coil-Over Suspension Lift Kit with Fox 2.0 Shocks is designed to fit all models of the 2014-2020 Ford F-150 4WD, excluding the Raptor.
Fitment:
BDS BDS1553FSL
CA Residents: WARNING: Cancer and Reproductive Harm - www.P65Warnings.ca.gov
Installation Info
Installation Time
(approx) 3 Hours
Difficulty Level:
Light to Moderate mechanical skill required.
What's in the Box
10 More Questions