 2021-2026
 2015-2020
 2009-2014
 2004-2008
 1997-2003


Installation Time
(approx) 2 Hours
Difficulty Level:
Light to Moderate mechanical skill required.
 FREE 1 to 3-Day Delivery on Orders $149+ Details

$1,299.99 kit
CONFIRM THIS FITS YOUR VEHICLE!
Saved - View your saved items
We're sorry. We couldn't save this product at this time.
or use


J&L 3.0 Oil Separator; Black Anodized; Passenger Side (11-26 2.7L/3.5L EcoBoost, 5.0L F-150)
 500+
500+
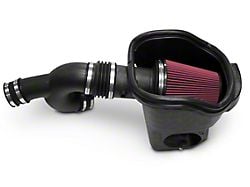
Roush Cold Air Intake (15-17 3.5L EcoBoost F-150, Excluding Raptor)
 500+
500+

Roush Cold Air Intake (18-26 3.5L EcoBoost F-150, Excluding Raptor)
500+
Features, Description, Reviews, Q&A, Specs & Installation
| Brand | Roush |
| Exhaust System Type | Cat-Back System |
| Exhaust Tip Finish | Black, Black Chrome |
| Exhaust Tubing Diameter | 3.00 Inch |
| Exhaust Material | Stainless Steel |
| Exhaust Tip Outlet Style | Dual |
| Exhaust Exit Location | Passenger Side - After Tire |
| Exhaust Loudness | Aggressive |
Deep and Aggressive Exhaust Sound. Roush gives your F-150 a more distinctively aggressive exhaust tone through this Single Exhaust System with Black Tips. This cat-back exhaust reinforces your truck’s overall dynamics and confident stance by releasing a deep and powerful growl as you let it dash on and off-road. The Roush Black Exhaust Tips are designed exclusively for American Trucks
Optimum Performance. Squeeze more power out of your engine for enhanced driving dynamics with this Single Exhaust System. It features a straight-through muffler that allows the exhaust gases to freely flow at a high velocity, as it intensifies your engine’s power. The mandrel bends provide low turbulence, thereby increasing horsepower and improving torque. Expect an optimum performance from your F-150, whether you use it for daily driving or for rough off-roading.
Premium Construction. Roush ensures the long-lasting durability of its exhaust systems by using corrosion-resistant 3-inch mandrel-bent, 304 stainless steel tubing. This cat-back system is built to hold up well over time, sustaining its powerful performance. Additionally, the pair of 4-inch black exhaust tips brings a tough accent that attractively enhances your truck’s confident stance.
Bolt-On Installation. This cat-back exhaust system is designed for a direct, bolt-on installation by seamlessly fitting into your F-150’s factory mounting points. It includes all the necessary hardware for a hassle-free installation process that takes about 2 hours with moderate mechanical skills.
Application. This Roush Single Exhaust System with Black Tips Side Exit is intended for use on 2015-2020 Ford F-150 3.5L EcoBoosts, excluding models with the High Output 3.5L EcoBoost V6 engine.
Shop All Truck Parts And Accessories
Shop All Truck Exhaust
Roush 421985-BLK
CA Residents:  WARNING: Cancer and Reproductive Harm - www.P65Warnings.ca.gov
Installation Info
Installation Time
(approx) 2 Hours
Difficulty Level:
Light to Moderate mechanical skill required.
What's in the Box
Tech Guides:
Sponsored

