Talk to a F-150 Sales Tech
1-888-706-1096
M-F 8:30A-11P, Sat-Sun 8:30A-9P
$20K Sweeps! 10 Chances to Win! Enter Daily >

AEM Induction Brute Force Cold Air Intake; Gunmetal Gray (15-24 2.7L EcoBoost F-150)

Item T532394
Verify parts fit and get product recommendations.
F-150 Sales Techs: Connect Now M-F 8:30A-11P, Sat-Sun 8:30A-9P
$0.00
Our Price

$399.99 (each)

FREE Shipping Market Price $459.99 You Save 13% ($60.00) Up to 10% off for Military & First Responders! See Details

Will this fit your Vehicle?

Select a different vehicle Help?
Update or Change Vehicle
Ship to: Ashburn - 20149
Sorry, please enter a valid US or CA postal code
We're sorry, zip can't be updated at this time.
Recommended Install Shops
How It Works
Install Shops are available near Ashburn - 20149

Add Local Shop Installation

Total cost of service $175.00
    Create a list
    Add to New List

    Saved - View your saved items

    We're sorry. We couldn't save this product at this time.

      Video Review & Installation

      Hey, guys, Adam here with americantrucks.com. Today, we're taking a closer look at and installing the AEM Brute Force Cold Air Intake in gunmetal gray, available for the 2015 and newer 2.7 liter EcoBoost F-150. You should be checking this out if you're looking to ditch your factory air box to pick up some horsepower and torque gains over the factory setup, acceleration increases, as well as fuel efficiency increase. Now, this here is gonna give you a better breathing engine, and an overall better performing engine. As a matter of fact, AEM lets us know that they've dynoed it themselves before and after, and they've walked away with about 17 horsepower and 18 foot-pounds of torque under the curve, which is a pretty impressive gain for a cold air intake. But I will say this does not require a tune, so we're not throwing it on the dyno today. I'm just letting you know what AEM has let us know.Now, this particular kit is made from extremely high quality materials. As a matter of fact, AEM works very closely with K&N to produce this Brute Force filter. K&N, if you're not familiar with them, produces some of the highest quality intake filters in the category. They've been doing it for decades, same thing with AEM. So, when the two get together, they make some pretty premium stuff. That is reflected in our price tag here. It comes in at right around 300 bucks, which isn't the top of the pricing spectrum, but it is pretty up there. So, 300 bucks gets you the conical multi-layer cotton gloss filter. It is a dry filter as a matter of fact. I'll take a closer look at that and dissect that a little bit later on, sitting next to our factory paper element, and I'll show you guys these side-by-side in just a minute.Now, aside from that, it doesn't require as much maintenance as an oil filter. It's definitely going to filter out better than your factory paper element, and it's gonna pull in a lot more cold air. Pretty different air box than your factory one, the factory one had more of a lid, this uses weather stripping to seal up underneath of your hood to block out the hot air. The tubing here, gunmetal gray aluminum twin intake tubing for your turbo, and of course, it works well with the factory tubing on that end. So, this being gunmetal gray, I think just looks amazing under the hood. It's one of those things that's all personal preference. There's a ton of different color shades, materials out there in the category. So, if you're looking for an aluminized tubing here that actually looks very good under the hood, Gunmetal Gray from AEM is a really good choice.Now, with that said, I wanna say that this whole thing is not 50-state legal. If you're located in the emissions-restrictive State of California, this, of course, will not be street legal. So, just keep that in mind when you're navigating the categories, some are 50-state, some are not. This one just happens to be one that is currently not 50-state legal. Three hundred bucks gives you everything you see here, one out of three wrenches on our difficulty meter, no drilling, no modifications, extremely simple job. You can get done in about an hour, maybe a little more, maybe a little less, depending on your experience. I'll take you through every step of the process. What do you say we get started?Tools used in this install include an impact gun, extension, 7 and 8-millimeter deep sockets, and a 10-millimeter wrench.Guys, the first step of the uninstall is pretty simple, we're gonna get our factory intake off of our 2.7. And it's really just a couple of steps. The step number one that we're gonna start with is disconnecting our MAP sensor on the backside of our tubing. From there, we'll be able to loosen up the clamps, disconnect the heat shield lid, and we'll pop that out along with the filter.All right. To disconnect our sensor, you're just gonna head back here, pinch and pull back. Just let that hang down, and we'll get back to that when we're reinstalling. Now, the next couple of steps are pretty straightforward, and they're pretty much the exact same. We're gonna grab a 7-millimeter socket with a ratchet or impact gun, or a flat-head screwdriver, and we're gonna loosen up these three clamps. Now, the one on the bottom is the exact same as this one you see here, so we're gonna be doing the same thing. It just might not be visible for you guys on camera. It's all the way on the back end here. I'm gonna use an extension to reach that. So, for here, I'm just gonna loosen it up, and as you can see, once it gets loose, there's a little knob here, you can actually just rotate the clamp to really loosen that and unlock it. Do the same thing over here, and then, again, on the bottom one. Perfect.Once you have those three clamps loosened, head over to the air box lid and just unsnap it. That will untuck and get loosened up from there. Pull your tubing out to disconnect it from the top and the bottom, and we can set this aside along with our factory filter.So, we got our factory intake off of our 2.7 2019 F-150 here behind me, and it's sitting on the table next to our AEM intake. Now, I wanted to point out some of the similarities, but mainly the big differences between the two kits, which you can really clearly see side by side. And of course, the first and foremost thing I wanna mention here is the difference in the filters. Now, the factory filter is a flat paper element filter, and, you know, it does a pretty decent job from the factory, but it does tend to get really clogged up, really dirty, and it's not washable and reusable. It's filthy, it's disgusting, it's got chunks of leaf in it, and this isn't doing a very good job of staying clean. Now, it's pretty dirty, which means it's pretty clogged up, which means it's not gonna pull in as much cold air as it needs to, or as you would want it to, in order to produce as much power and efficiency.Upgrading to your AEM intake filter here, this is a durable 360-degree conical cotton gauze filter. It's a dry filter, which means you don't have to spend time oiling it, which means less maintenance. But with maintenance, this thing is washable and reusable unlike our factory filter. So, at 13,000 miles, this is a pretty damn new truck, 13,000 miles is not a lot. The 2019 obviously has seen some better days with this filter. Swapping over to this anytime it gets dirty like that, you pop it out, you wash it, you just throw it right back in, and you're good to go. So, routine maintenance becomes a lot easier on your maintenance, and it comes a lot easier on your wallet. So, you don't have to keep picking up new filters like you would from the factory.Now, as far as dry filters versus oil filters, the debate's been going on for a really long time, just know that they're within a 1% difference of performance within each other, and it's all personal preference. Dry filters are typically known to be a little bit better for guys in dry climate areas seeing a lot more air pollution because oiled filters will get clogged up and require a little bit more maintenance a little more often. Now, I don't wanna get too confusing with that, but just know, dry filters are great for airflow, they're great for filtration, and you don't have to re-oil them every time they get dirty.Now, moving on, we have a difference in our tubing. Now, this twin tubing is aluminum, which means that it is gonna dissipate heat a little bit better. It's also a lot more lightweight. Mandrel bends in the tubing are less restrictive than your factory option, which can cause a lot of air turbulence with this flex seal right here. Now, this does a pretty good job of sealing in cold air and blocking out engine heat. This here is also gonna do it, but it's a little bit different. Now, this is gonna have an opened up top with weather stripping around it to seal in up against the inside of your hood. What that means is this weather stripping here is gonna block out the excess engine heat and trap in that cold air.So, a little bit of a different design here with AEM as far as the intake. Their filter is in conjunction with K&N, which means that they're making some of the top quality materials. Their intake heat shield is gonna do a pretty good job, but is very different from the factory option while still utilizing the factory air inlet you see right above our radiator shroud.Now, I wanna stop babbling on. I wanna show you guys how to assemble some of these things with the transfer over our air temperature sensor to our new tubing, and we're gonna move on with the assembly.The first step we need to do in order to assemble things on our new intake is to remove that air temperature sensor. Now, in order to do that, you're really just twisting and pulling straight out. It is really that simple. If you are struggling with this, sometimes they get a little stuck in there with the rubber grommet, you can grab needle-nose pliers, and just be careful not to break any of the clips on the inside, just to pry it out. So, now that we have that, we're gonna set this aside and bring on our gunmetal tubing. Now, in order to get that O-ring out, if you can do it by hand, that's great, you're just gonna roll that off and pull it out. Once you get that out, you can set that aside for a moment.This pre-drilled hole in the side of our tubing is gonna get this grommet. That's gonna hold this in place. What I'm gonna do is take the grommet and just gently set it into place. It'll hug the edges of that cut out. From here, you wanna gonna grab your sensor, and make sure that the actual central portion is facing the inlet. And, again, just push this into place, twisting and turning to get it in. Now, if you see what I just did, my rubber grommet fell through. That's not what we want. So, if that does happen, just pull the sensor back out, try again. You can always put your hand in the tubing to keep that from happening. It might be a bit of a trial-and-error process for you. All right. Once you get that seated in there fully, we're gonna move on.Next up, we're gonna apply our coupler to the outlet side of our tubing. So, on this side, the dual side, that's gonna go straight into your intake. This is coming out, going to the manifold. The bottom one is going to your turbo. This is going to apply just like that, but we're gonna need our clamps. Grab two of the smaller clamps provided in the kit, put one over the end, and slide this coupler on, just about halfway down. Once that's applied, take that clamp. Now, what I like to do is set the tubing down like it would be in the vehicle. That way you can tell where you want your clamps to be oriented. I like having the clamp bolt head out of the way and not super visible. That way, it looks a little bit cleaner in the engine bay, that's just my opinion. Grab an 8-millimeter deep socket and tighten that clamp down.All right. Now, on the other end, of course, that's gonna need a clamp as well. What I like to do is just put that into place, and just get it a little snug so it holds itself in place without being too tight.All right. From here, we're gonna do the bottom one. Now, again, I like to orient it to make sure I know exactly which direction we want the clamps in. You're gonna grab this coupler and have the smaller inlet attached to the tubing. Of course, you wanna grab one of your clamps, put that over where it needs to be. If you need to, just loosen that clamp up. Now, this one has a pretty clear indication of how far down you want it to be. Right at the bottom of this lip, you wanna get your tubing even too. Set your clamp in place. Next up is to grab our heat shield and our weather stripping, and just apply it to the top rim all the way around the box. That just pushes right down into place. All right. Once you get to the end, you may have some excess. You can grab some snips and just cut that excess off.All right. Now, the next step you can either do on the table, like I'm about to do, or you can do it on-car, it's all up to you. Now, what I'm gonna do is take our filter, put it inside of our heat shield, lining up the outlets. Those will go right through those open holes. They'll seat right up against it. You're gonna take these clamps, and you may need to loosen them up. They're gonna go over those outlets. You're gonna insert the twin side of your aluminum tubing into the filter. And before we tighten anything down, you can see the two brackets at the bottom. Our studs are gonna go through there. Before I tighten down those clamps, I wanna make sure that stud's in position. This is a rubber grommet with a threaded stud on each side. You're gonna use a washer and a 10-millimeter nut to tighten them down on each side of this bracket. I'm going to put one in the tubing side first with a washer and the nut, and just tighten it down by hand. From there, you may have to manipulate that tubing, which is why I didn't tighten down those clamps just yet. Now, before we throw it in the vehicle, just grab a 10-millimeter wrench and just tighten down the stud.All right. The first step of dropping this into place is to line up your heat shield. Now, that's gonna snap right into place on your factory lower portion of the air box. You'll see the back portion goes into those clips. This will seat downward. You just wanna make sure everything is lined up properly. Once you have that, these plastic clips will go right back into position, you just snap them in on both sides. Perfect. All right. Once you have that connected, you can work on connecting the bottom coupler to the factory tubing, and then we'll start on the top.Once you have that seated, rotate your clamp up into position. Grab your socket and extension if needed, or your flat-head screwdriver, and tighten it down. All right. Once you have that situated, you reconnect these two. Once you have that coupler in place, rotate your clamp into its position. I like to make it even and equal with the one right next to it, and just tighten it down. Last step of the process, grab that air temperature sensor harness and just plug it right back into the sensor. From there, you're good to go.Well, guys, that's gonna wrap up my review and install for the AEM Brute Force Cold Air Intake in gunmetal gray for the '15 and newer 2.7 EcoBoost F-150. One of the more premium options out there as far as quality materials and filter capabilities, this is gonna be a good way to go. Check it out right here at americantrucks.com.

      Product Information

      Features, Description, Reviews, Q&A, Specs & Installation

      Features & Specs

      • Increased Horsepower and Torque
      • Greater Airflow for Enhanced Performance
      • Innovative Dryflow Filter
      • Twin Tube Design
      • Mandrel-Bent Aluminum Tubing
      • Gunmetal Gray Finish
      • Easy Bolt-On Installation
      • No Computer Re-Tune Required
      • AEM Lifetime Warranty
      • Fits 2015-2024 2.7L EcoBoost Ford F-150s

      Description

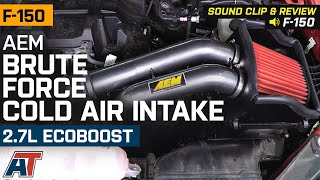
      Better Efficiency and Power Overall. The AEM Performance Cold Air Intake boosts not only the power under the hood, but it cools your engine efficiently, so that you can experience better acceleration and less fuel waste. With better horsepower and torque, you can take your F150 wherever you want and you will enjoy the solid construction that has been created by AEM.

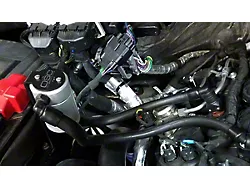
      Maximum Cooling Ability. When you want an intake system that will last you, choose the AEM Performance Cold Air Intake. This intake is made to be durable and will provide your engine with the cold air it needs to operate efficiently. The mandrel-bent aluminum twin tube provides for better air intake and there is a heatshield that cools hot air off in a seamless and efficient manner.

      Easy Installation Process. AEM builds all of their cold air intakes with ease in mind and the AEM Performance Cold Air Intake is no exception. This intake is installed quickly in just an hour and all tools and components come with the kit.

      Warranty. AEM backs the craftsmanship of their Performance Cold Air Intake with a Lifetime Warranty. Some exclusions may apply. Check manufacturer warranty for further details.

      Technical Note. The AEM Performance Cold Air Intake is not CARB certified and not legal for use in California or other states adopting California emission standards.

      Application. The Gunmetal Gray AEM Performance Cold Air Intake is designed to fit all 2015-2024 Ford F-150s equipped with a 2.7L EcoBoost engine.

      Shop All Truck Parts And Accessories

      Shop All Cold Air Intakes For Trucks

      Fitment:

      Details

      AEM Induction AEM-21-8128DC

      CA Residents: WARNING: Cancer and Reproductive Harm - www.P65Warnings.ca.gov

      Installation & What's in the Box

      Installation Info

      What's in the Box

      • (1) Air Filter
      • (1) Intake Tube
      • (1) Heat Shield
      • (1) 42" L Edge Trim
      • (1) Grommet
      • (1) Rubber Mount
      • (2) M6 Hex Nuts
      • (2) Washers
      • (1) Hose Adapter
      • (1) Silicone Hose
      • (6) Band Hose Clamps

      4.6

      Customer Reviews (109)

        Questions & Answers

        10 More Questions

        Will It Fit My F-150

        • 2.7L V6 EcoBoost - 15, 16, 17, 18, 19, 20, 21, 22, 23, 24

            Related F-150 Categories