 FREE 1 to 3-Day Delivery on Orders $149+ Details
How to Install AEM Performance Cold Air Intake - Gunmetal Gray (15-17 2.7L EcoBoost) on your Ford F-150
Installation Time
1 hours
Tools Required
- Screw driver
- 10MM socket
- Socket Driver
- Knife

Shop Parts in this Guide
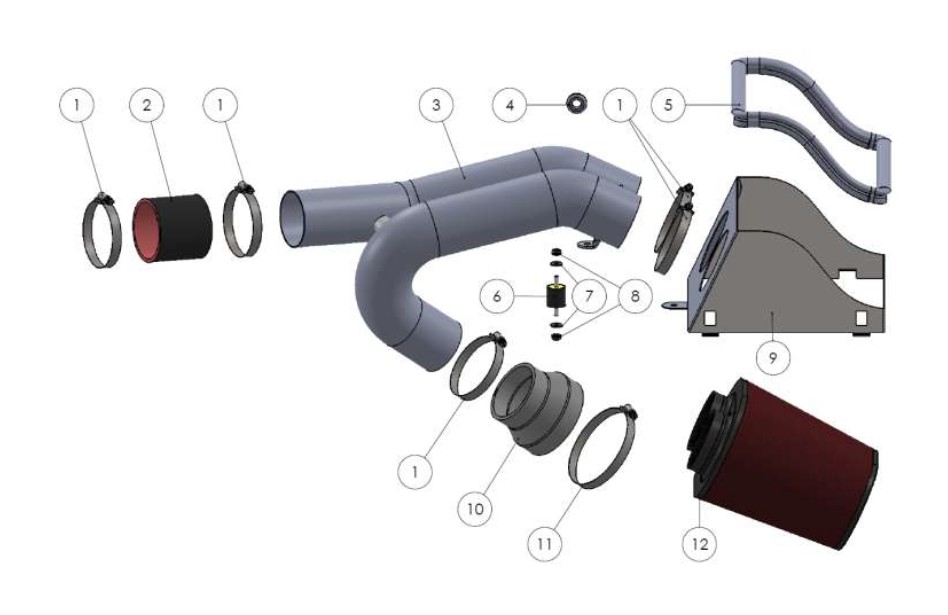
Parts List
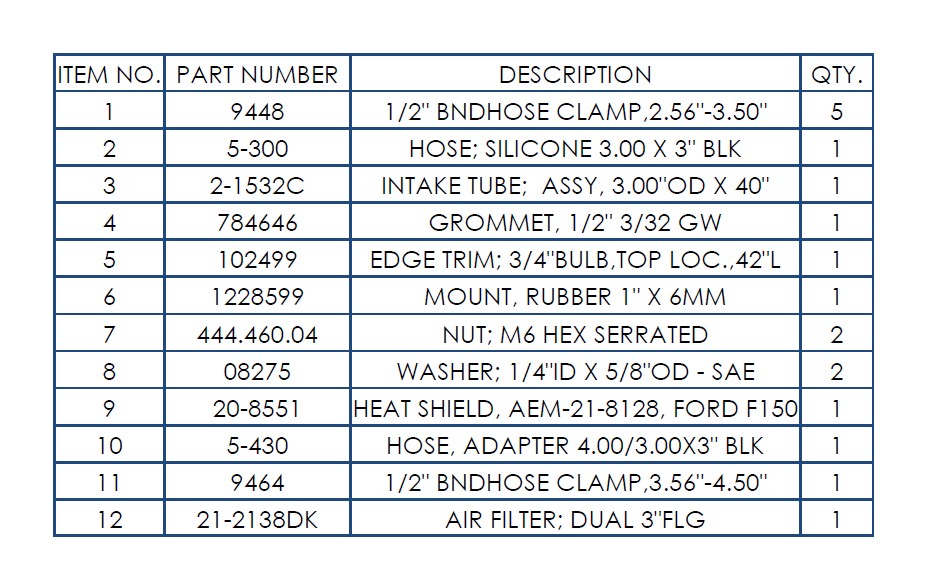
Read and understand these instructions BEFORE attempting to install this product. Failure to follow installation instructions and not using the provided hardware may damage the intake tube, throttle body and engine.
1. Preparing Vehicle
a. Make sure vehicle is parked on level surface.
b. Set the parking brake.
c. If engine has run in the past two hours, let it cool down.
d. Disconnect negative battery terminal.
e. Do not discard stock components after removal of the factory system.
f. Open the air intake kit package and make sure all parts are included.
2. Removal of stock system
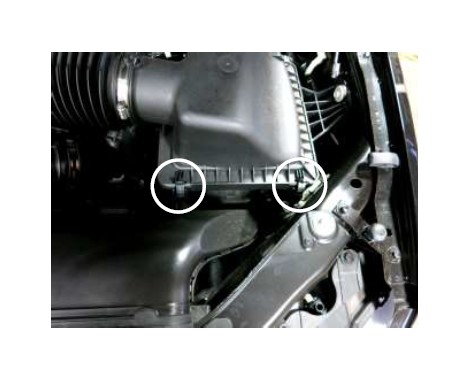
a. Detach the two latches securing the upper air box lid to the lower air box lid.
b. Disconnect the intake air temperature sensor connector.
c. Loosen the hose clamp at the upper air intake tube.
d. Loosen the hose clamp at the lower air intake tube.
e. Remove the stock air intake system from the vehicle. Note: Do not discard any of your stock equipment.
f. Remove your stock air filter from the lower air box.
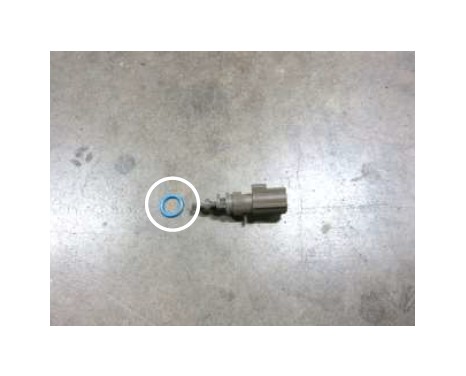
g. Remove the air intake temperature sensor from the stock intake tube. Note: This will be reused in step 3b.

h. Remove the O-ring from air temperature sensor. Note: The O-ring will not be reused.
3. Installation of AEM® intake system.
a. When installing the intake system, do not completely tighten the hose clamps or mounting hardware until instructed to do so.
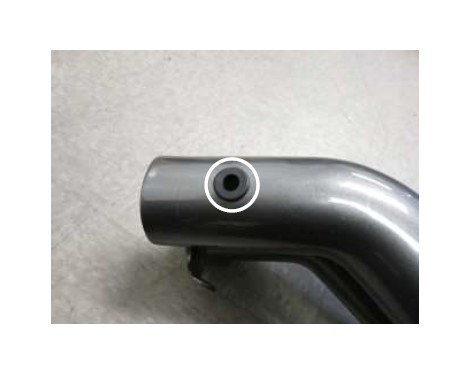
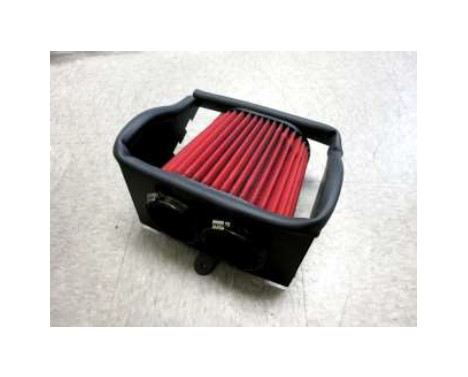
i. Install the provided grommet into the AEM intake tube.
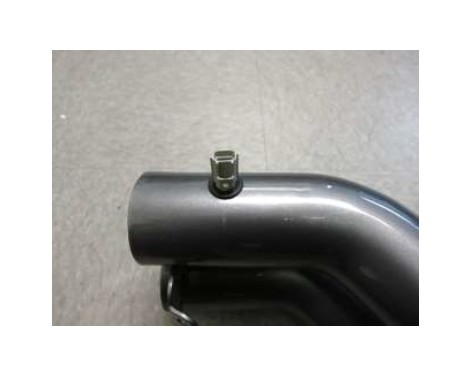
j. Install the air temperature sensor that was removed in step 2g into the AEM intake tube.
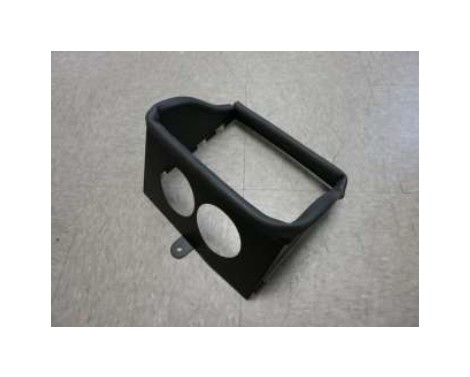
c. Install the provided edge trim onto the heat shield as shown. Note: Trimming the edge trim maybe necessary.
d. Install the AEM filter into the heat shield with the provided hose clamps.
e. With the provided hardware, install the rubber mount/washer/nut onto the heat shield tab.
f. Install the AEM intake tube into the AEM air filter while aligning the rubber mount with the bracket on the intake tube. Tighten the hose clamps on the filter.
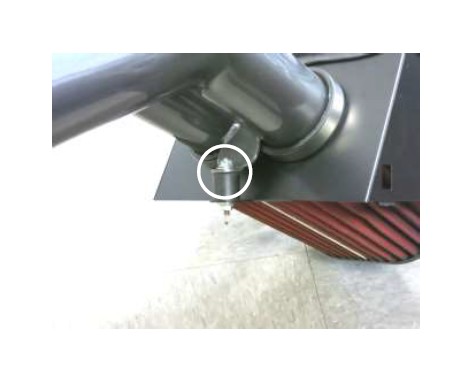
g. Install the provided nut and washer onto the AEM intake tube bracket, then tighten both sides.
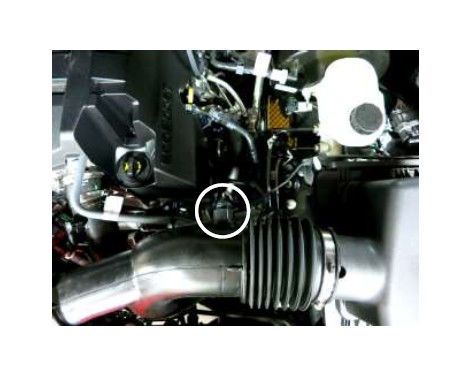
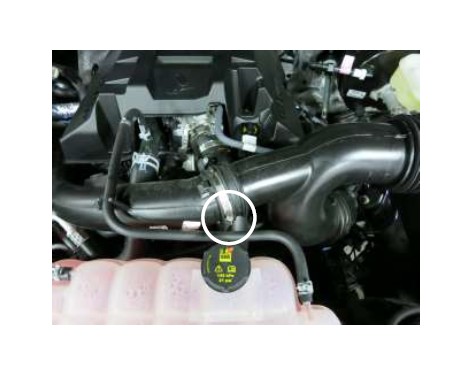
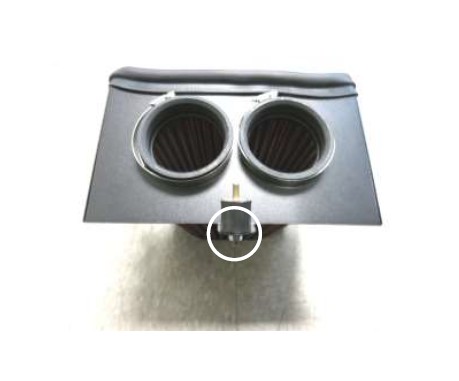
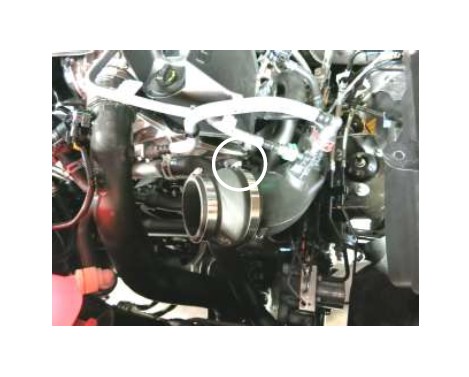
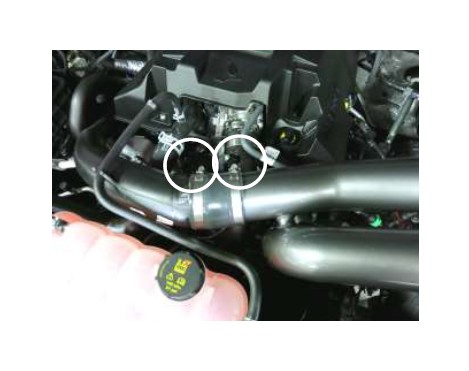
h. Install the step coupler with the provided hose clamps onto the lower intake tube as shown. Tighten hose clamp circled.
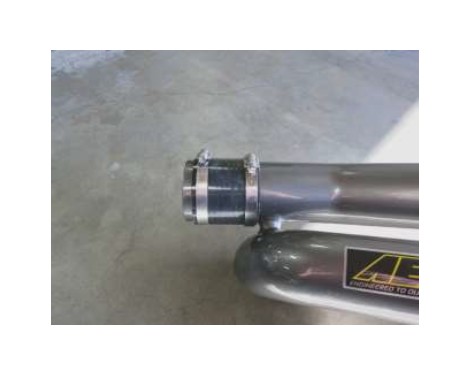
i. Install the straight coupler with hose clamps onto the AEM tube. Note: Use soap and water to allow the coupler to slide on the intake tube.
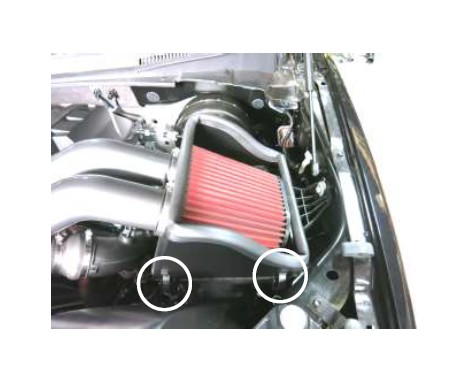
j. Install the assembled AEM intake tube and heat shield into the vehicle. Align the heat shield into the lower air box and latch the clips to secure it in place.
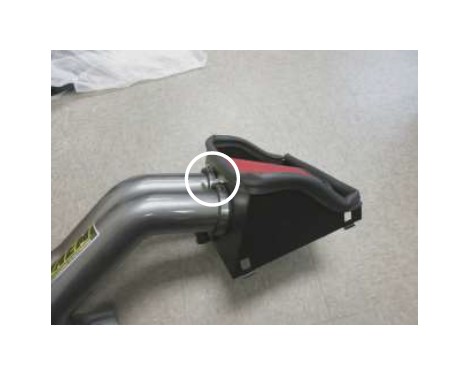
k. Align the AEM intake tube with the step coupler that was previously installed in step 3h. Tighten the hose clamp circled at this time.
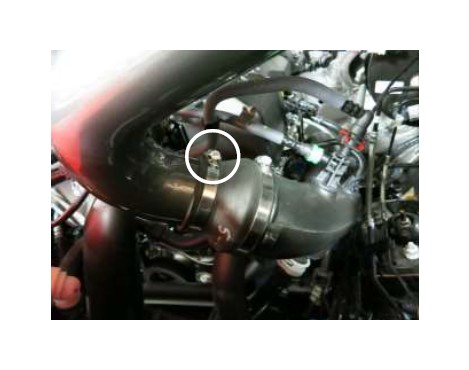
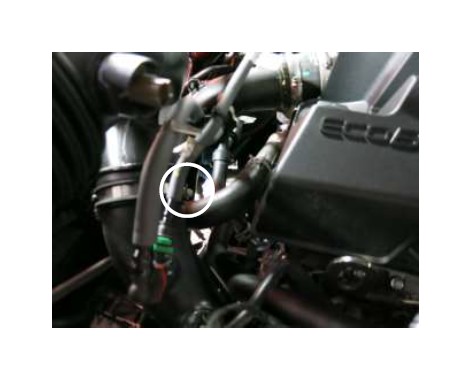
l. Install the straight coupler with hose clamps onto the stock upper intake tube. Tighten both hose clamps at this time.
m. Connect the air temperature sensor connecter onto the air temperature sensor that was removed in step 2b.
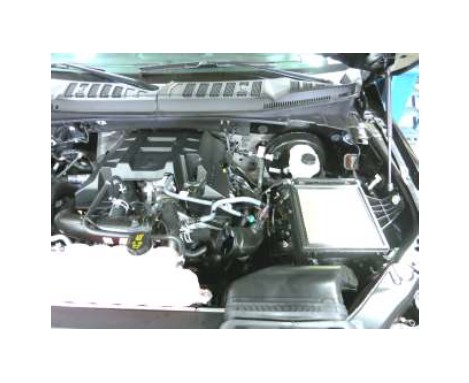
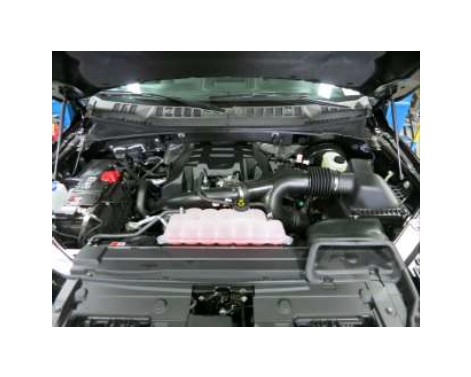
STOCK INTAKE INSTALLED
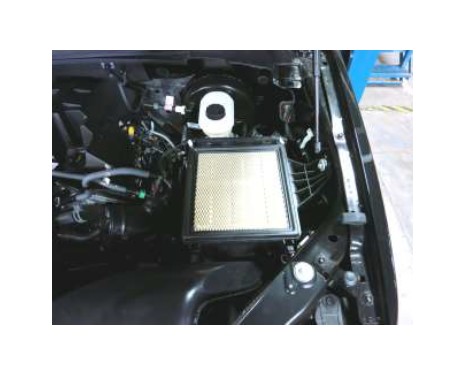
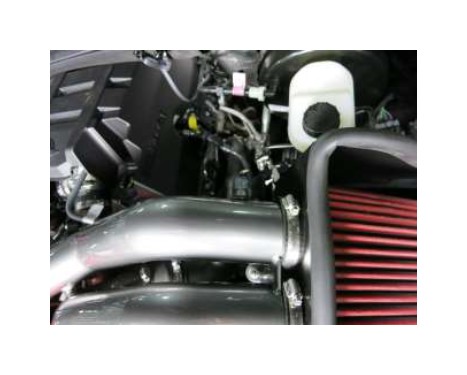
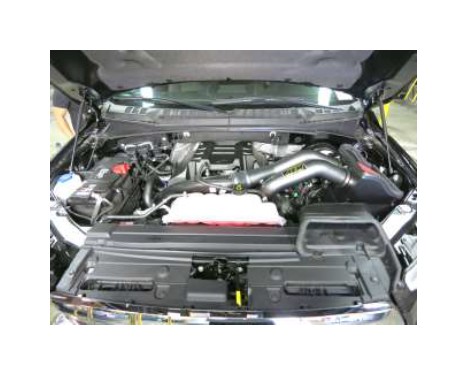
AEM INTAKE INSTALLED
4. Reassemble Vehicle
a. Position the inlet pipes for the best fitment. Be sure that the pipes or any other components do not contact any part of the vehicle.
b. Check for proper hood clearance. Re-adjust pipes if necessary and re-tighten them.
c. Inspect the engine bay for any loose tools and check that all fasteners that were moved or removed are properly tightened.
d. Reconnect negative battery terminal and start engine. Let the vehicle idle for 3 minutes. Perform a final inspection before driving the vehicle.
5. Service and Maintenance
a. AEM Induction Systems requires cleaning the intake system’s air filter element every 100,000 miles. When used in dusty or off-road environments, our filters will require cleaning more often. We recommend that you visually inspect your filter once every 25,000 miles to determine if the screen is still visible. When the screen is no longer visible some place on the filter element, it is time to clean it. To clean, purchase our Synthetic air filter cleaner, part number 1-1000 and follow the easy instructions.
b. Use window cleaner to clean your powder coated AEM® intake tube.
NOTE: DO NOT USE aluminum polish on powder coated AEM® intake tubes.
