


Installation Time
(approx) 2 Hours
Difficulty Level:
Light to Moderate mechanical skill required.
Installation Guides
No guide available for this part yet.
 FREE 1 to 3-Day Delivery on Orders $149+ Details

$379.00 kit
CONFIRM THIS FITS YOUR VEHICLE!
Saved - View your saved items
We're sorry. We couldn't save this product at this time.
or use
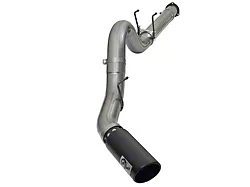
AFE Large Bore-HD 5-Inch DPF-Back Single Exhaust System with Black Tip; Side Exit (17-22 6.7L Powerstroke F-250 Super Duty)
 3
3
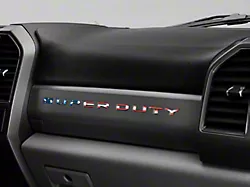
Glove Box Letter Inserts; American Flag Edition (17-22 F-250 Super Duty)
 51
51
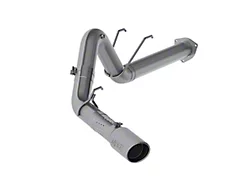
MBRP Armor Lite Filter-Back Single Exhaust System with Polished Tip; Side Exit (17-22 6.7L Powerstroke F-250 Super Duty)
34
Features, Description, Reviews, Q&A, Specs & Installation
| Brand | S&B |
| Cold Air Intake Type | Cold Air Intake |
| Tuning Requirements | No Tune Required |
| Cold Air Intake Tube Material | Plastic |
| Cold Air Intake Filter Type | Oiled |
High-Performance Intake Kit. Add more power to your Super Duty by using the Cold Air Intake with Oiled Cleanable Cotton Filter from S&B. This intake kit improves fuel economy, acceleration, and engine sound with its high-flow intake tube, durable air box, and oiled cotton filter that provide your engine with a powerful air charge. The swapped positions of the battery and intake box moves the system to directly align with the front air inlet. This results in enhanced airflow with 55.97% improvement over the factory intake.
Computer Re-Tuning Not Required. S&B designed this Cold Air Intake to operate using the factory tune without reprogramming your Super Duty’s computer. AmericanTrucks, however, still recommends a custom tune to reprogram your ECU to experience the best possible performance from this upgrade.
Oiled Air Filter. The oiled, cleanable air filter included in this Cold Air Intake Kit allows your engine to breathe freely without sucking the unwanted dust and debris into your engine. This oiled and multi-layered cotton filter design features the tacky oil that helps capture even the tiniest particles. The massive configuration also facilitates a higher volume of air with an intensified velocity to get into the system for a more efficient, power-generating combustion.
High-Quality Build. S&B guarantees the efficiency and durability of this Cold Air Intake System by using an aerodynamically-designed intake tube. This pipe directs the cooler air into the engine’s throttle body for massive power gains. The fully-enclosed air box effectively blocks the hotter air around the engine. It also features a large, clear lid for convenient filter monitoring. Additionally, the injection-molded MAF sensor plate ensures a quality seal around the MAF sensor with a true OE O-ring seal that prevents air leaks. Each of the component, including the hardware is built for high performance and improved service life.
No-Drill Installation. This Cold Air Intake with Oiled Filter comes with all the necessary hardware, clamps, and seals. It fits into your Super Duty’s factory mounting locations with no drilling required. The installation process requires standard hand tools and light-to-moderate mechanical skills.
Million-Mile Warranty. This Cold Air Intake System carries a Million-Mile Limited Warranty covering factory defects in materials and workmanship. This warranty remains valid if the intake kit has been used under typical driving conditions and on vehicles for which they were designed. Some limitations and exclusions are indicated in the manufacturer’s warranty guide; please check the terms and conditions for full details.
CARB-Compliant. S&B ensures that this Cold Air Intake complies with the emission regulations set for the by the CARB. It is 50-state SMOG legal and holds a certification under E.O. Number D-590-17.
Application. The S&B Cold Air Intake with Oiled Cleanable Cotton Filter fits all 2017-2019 6.7L Powerstroke Ford Super Duty F-250 models.
Shop All Truck Parts And Accessories
Shop All Cold Air Intakes For Trucks
S&B 75-5085-1
CA Residents:  WARNING: Cancer and Reproductive Harm - www.P65Warnings.ca.gov
Installation Info
Installation Time
(approx) 2 Hours
Difficulty Level:
Light to Moderate mechanical skill required.
Installation Guides
No guide available for this part yet.
What's in the Box