Guaranteed Free Delivery by 12/24! available on most items - Details

Talk to a Silverado 1500 Enthusiast
1-888-706-1096
M-F 8:30A-11P, Sat-Sun 8:30A-9P
Win $4,000! Enter Daily

S&B Cold Air Intake with Oiled Cleanable Cotton Filter (17-18 5.3L Silverado 1500)

Item S113303
Call a Silverado 1500 Enthusiast at 1-888-706-1096
M-F 8:30A-11P, Sat-Sun 8:30A-9P
$0.00
Our Price

$349.00 (kit)

FREE Shipping Market Price $401.35 You Save 13% ($52.35)

Will this fit your Vehicle?

Select a different vehicle Help?
Update or Change Vehicle
Ship to: Ashburn - 20149
Sorry, please enter a valid US or CA postal code
We're sorry, zip can't be updated at this time.
Recommended Install Shops
How It Works
Install Shops are available near Ashburn - 20149

Add Local Shop Installation

Total cost of service $175.00
    Create a list
    Add to New List

    Saved - View your saved items

    We're sorry. We couldn't save this product at this time.

      Video Review & Installation

      Hey, guys. I'm Eric with AmericanTrucks. In this video, we're gonna be checking out this S&B Cold Air Intake with Oiled Cleanable Cotton filter fitting all 2017 to 2018 Chevy Silverado and Sierra 1500s. You should really be checking this out if you want better throttle response, a little bit of boost in power and horsepower, as well as you are starting to maybe do other modifications to your engine for better performance. Now, cold air intakes are very popular among truck owners, and it's usually one of the first things they do when they wanna modify their engines and get a little bit better power. The old saying goes, "More air in, more air out."And what that's referring to is a cold air intake like this that the manufacturer tells us provides about 40% better airflow, gets more air into your engine, and if you're gonna pair that up with an aftermarket exhaust, you're getting all that air back out of your engine that makes for more performance and better throttle response all the way around. Now, that 40% better airflow, according to the manufacturer, comes almost entirely due to this high-performance air filter that's right here in the airbox. It's made out of cotton fiber and it's oiled and cleanable as well.And what's really nice about the housing here with this S&B kit is you have this large window here that not only shows off your high-performance modification, but it also allows you to add a glance to tell when it's time to clean out your filter. The other nice thing about the design of this kit is it fits up tightly up against your fender well, and that's gonna allow it to create a nice seal in there and you're gonna get air directly into that high-performance air filter. And then you have smooth tubing all the way to your throttle body that's gonna allow less restrictive airflow going straight into your engine.Now, as far as price goes right now, this comes in under $400 and that's pretty much what you should expect to pay for this type of cold air intake. And it's pretty competitive with other makes out there on the market right now. Now, another nice thing about this kit, guys, is that it's a direct bolt-on installation. And as you'll see here in a moment, not too difficult, one or two challenging aspects to the installation. Therefore, I'm gonna give it two out of three wrenches on our difficulty meter. I give it a soft two wrenches, really, but it deserves that because there are one or two additional steps, especially if your truck has the high-intensity discharge lights like this truck does. And as far as time goes, I would budget about one hour to get this job done from start to finish.So let's take a look at the tools you're gonna need and go ahead with the installation. All right, guys, tools you're gonna see in this install are an electric impact wrench, 8 and 10-millimeter sockets, a socket extension, a 10-millimeter crescent wrench, a short and a long Phillips head screwdriver, a flat blade screwdriver, and a trim removal tool.All right, guys, now we're gonna begin by uninstalling our factory intake here. And you're gonna see in this truck, it's been modified quite a bit and there are gonna be some things that are probably different than what you see on your truck if your truck has not been modified at all. And one of those things is right here is I have a Phillips head screw that's holding our MAF sensor in here. You should probably have like two Torx bits holding this in, but I'm going to remove this screw and we'll get the sensor out.All right. Now, with an 8-millimeter socket, we're gonna loosen the clamp here that goes to our factory airbox. We're gonna loosen the clamp that connects up to our throttle body. All right. Now with this clamp loosened, we can disconnect that from the airbox. And if your clamp is loose, just go ahead and get it out of here.All right, guys, now at this step of your uninstall, you're gonna have a couple of hoses here that clamp onto this part of your intake that have like a plastic fitting and a little gray tab that you would pinch. And that would basically...it's like a locking tab. You'd pinch it, and then this would pull off. This truck has been modified and worked on in the past, so it has these non-standard hoses on here.If you have something like this and if you have a little clamp that's like this, you can't just unscrew and loosen these like the other ones. You're gonna have to get in here and cut this top little fold off of there. If you have a pair of snips like I have here, makes it a little bit easier, even though it's still a little bit of work.All right. Now, like I said before, this is a non-standard hose. So, I'm gonna undo this clamp down below. Your factory hose is gonna have a pinch just like up here. Again, non-factory clamp and hose over here. Try loosening it down below. You can just remove this section of your intake away. All right. In order to have some more room to work in here, we're gonna remove this bar temporarily. So we're gonna undo this bolt here. It's a 10-millimeter.All right. Now in order to lift this cover off here so we can access the other end of this support rad, we're gonna undo some locking clips here just enough so we can peel this up a little bit and get access to the other bolt on the other end there. All right. With those clips removed, just lift this up and we're gonna access this bolt right here. Again, 10-millimeter.All right, guys, now we're gonna lift out the factory airbox. You're gonna have to pull it out of a couple of rubber grommets at the bottom, but it should come right out. All right, guys, now we're gonna remove the tray altogether that our factory intake was resting on. To do that, you would probably have 4 bolts here that are 10-millimeter. This truck does not. I have one bolt here.And what I'm looking at here is I have a couple of Phillips head screws, probably not the hardware you're looking at on your truck, but I'm gonna get this removed out of here. All right, guys, now if your truck has the high-intensity discharge headlights like this one does, you're gonna have to do this extra step here, which is we're gonna take out a bolt here and then one on the backside so that we can temporarily remove this radiator overflow reservoir kind of off to the side when we maneuver our airbox into place. So, you're gonna need a 10-millimeter socket for this.And the other bolt is right back here, guys, kind of on this corner of the reservoir. Look straight down on it. You should be able to reach it with about a 6-inch extension. And it's basically a nut on a threaded post down there. So, now we can move this temporarily over here and out of our way. And right here is the nut we were taking out.All right, guys, now we have our factory intake off of this truck. I wanna put it up here on the table side-by-side comparison to our new S&B cold air intake. Now, really what stands out obviously is the airbox here, which is huge. Has this nice, clear window there that's gonna give you a good view of this high-performance air filter that's cleanable. And as long as you remove it, clean it, re-oil it, and put it back in, it's gonna be reusable for years to come as long as you take good care of it.Now, the nice thing about this window, obviously, other than the aesthetics, it kind of looks nice, it's pleasing. Anyone popping the hood and looking in there is gonna tell that you're kind of performance-oriented owner of your vehicle. But the other nice thing about this too is you can start visually seeing when it's gonna be time to clean that air filter.Now, with this totally enclosed unit here, you either have to follow a service interval, which may vary. I mean, depending on the environment you work in, if it's a very dusty, dirty environment, you're gonna have a shorter lifespan on this replaceable air filter. Whereas here, you can work regardless of what environment you're in. You can get a quick glance at your filter and see how dirty it is and whether or not it's time to clean it.Other than that, obviously, it's a huge filter and it's gonna let a lot more air through. And that's where really where you're gonna get that better throttle response and that little bit of boost in power as well. So, let's go ahead and get this mounted up to our truck. All right, guys, so right now, we're looking at the underside of our new S&B airbox here. You can either leave this open and it'll be another pathway for air to come into your airbox, or you can take this large rubber plug here and just insert it in the inside like that and plug that up. So, basically, you only have air coming in this way from the fender.Then go ahead and grab this rubber gasket here. And obviously, it just kind of pinches on. It fits right into place like that. And that's gonna create a seal here between our airbox and the inside of the fender. All right. And we're gonna take the airbox and kind of set it in place here. Now, there are four holes in the bottom of our airbox here that will line up with the holes that are threaded where we removed the hardware to take out the supporting tray earlier.We're not reusing that tray, but we are gonna reuse these threaded holes. So once you got...you can look down and see if you have proper alignment there. And as long as you can maneuver that into place, that's good. But right now, we're gonna go ahead and replace our overflow reservoir. You can kind of move your airbox over a little bit since we don't have it bolted down yet. And we're gonna go ahead and put the bolts in for our airbox first while this is still loose and we can have a little play here if we need it.So, go ahead and grab these bolts and washers out of the kit. And you're gonna need a 10-mill socket to tighten these up. I just have that started a little bit by hand, guys. That's just to make sure that we know we can line up our airbox with proper alignment. Now we're gonna go ahead and tighten up our overflow reservoir. All right. Now go ahead and grab this bolt that we removed earlier.All right. Now we're gonna replace the nut back on here on this threaded post down here. We're not gonna be able to see it on camera. All right, guys, now we're gonna fill in the rest of these holes in the bottom with four more or three more of these bolts from the kit. Go ahead and repeat that for all four. You're not really gonna be able to see it here on video, but you can maneuver your airbox around just a little bit so you get proper...so you can line up the holes down there. And use a 10-millimeter on these, guys, if I didn't mention that before.All right. The one up here on this corner straight down from right here, guys is kind of recessed just by the design of the airbox itself. You can tighten it by finger at first, and then once you get it down, if you wanna cinch it up the rest of the way with a ratcheting wrench if you have one might speed things up a little bit for you.All right, guys, let's go ahead and get our filter in. You drop it in like that all the way down. Now, there's a tab here if you can see that. That's what's gonna kind of lock it into place when we... Just like that. That's nice and firm in there. You can't obviously just get that out by pushing down and in if you have to clean this in the future, but for right now, it's nice and solid.All right, guys, now with our intake tube here, go ahead and grab this stepped rubber connector piece. You're gonna have two different-sized clamps in there. This one's a little bit larger. Obviously, goes on the larger part of the connector piece. Get them started on there. And so they're not so loose, you can kind of finger-tighten it a little bit like that so they're not sliding all over the place on you.All right. Then go ahead and get another large clamp and put it on here. Now, this is the rubber portion part of the actual filter itself that goes on there and we're gonna slide the intake tube in next. All right. Now we're gonna put the tube on. You can connect it up to your throttle body. And now we'll tighten these down. All right. Now we're gonna tighten this clamp down, guys. You're gonna need an 8-mill socket for this.All right. And then we tighten these up here by the throttle body. All right, guys, now grab one of your sections of new tube here and get a couple of clamps started, one on each end, small clamps in your kit. Get them snugged up so they're not moving all around on you. You're gonna plug it back in here on one end and on the other end in here. And then we'll tighten them down.All right. We're just gonna repeat that over here as well. All right, guys, now take your factory air sensor here and you're gonna have this polished or kind of aluminum plate right here and a little rubber gasket. Now, these large holes right here are what's gonna bolt this to the new intake. These little holes right here are what is going to attach the sensor and cinch it up like that. It's gonna attach the sensor to this plate using the tiny screws here to come with it and just tighten those down with the Philips head. Now we can get the sensor on the intake.Then we can plug the sensor back in. All right, guys, now we're gonna install the window on our airbox. You have this little rubber gasket that kind of goes around the edges here. It just kind of pinches on, pretty self-explanatory. And once you get that on there, grab these Phillips head bolts and little plastic washers. You wanna make sure you use those plastic washers because you don't wanna be tightening down these bolts right onto the clear plastic. Then go ahead and get the rest of the bolts in.All right, guys, now we're gonna reinstall this support brace and tighten it down with a 10-mill socket. All right, guys, now reinstall your lock tabs. Okay, guys, that wraps up this review and install of this S&B Cold Air Intake with Oiled Cleanable Cotton Filter for all 2017 and 2018 Chevy Silverado. For all things truck, keep it right here at americantrucks.com.

      Product Information

      Features, Description, Reviews, Q&A, Specs & Installation

      Features & Specs

      • Increases Airflow for Improved Performance
      • Oiled 8-Layer Reusable Cotton Filter
      • High-Quality Construction
      • No Tuning Required
      • S&B’s Million-Mile Warranty
      • Fits 2017-2018 5.3L Chevrolet Silverado 1500 Models

      Description

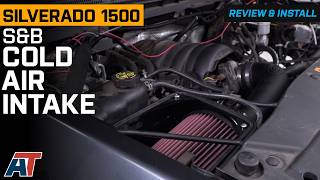
      Improves Horsepower, Torque, and Gas Mileage. Further enhance your 5.3L Chevrolet Silverado 1500s’ powerful build by installing a S&B Cold Air Intake with Oiled Cleanable Cotton Filter. The system is engineered to boost your vehicle’s air intake flow by up to 40.16% more over stock, so expect to gain higher horsepower and torque whenever you hit the streets or trails. What’s more, it comes with a high-quality air filter media, which helps keep the truck’s engine cool and in good condition.

      No Tune Required. S&B engineered its Cold Air Intake to improve the performance of your Silverado without the need of reprogramming your computer. By utilizing flow dynamics, this Intake will increase power using the original factory tune. Even though a re-tune is not required for operation, AmericanTrucks recommends a custom tune to reprogram the vehicles computer (ECU) to get the best possible performance from this Cold Air Intake.

      Impressive Cleanable Cotton Filter. The cotton filter that’s featured in this kit is S&B’s very own Oiled Cleanable Filter. This air filter media boasts an 8-layer design, which means it’s capable of providing your truck’s engine with the cleanest, coolest air possible. Plus, it’s reusable, so you can easily wash it once it’s covered in filth.

      Made to Endure the Toughest Driving Conditions. S&B’s Cold Air Intake features a durable airbox that protects the air filter from the heat of the vehicle’s engine. It also includes a heavy-duty intake tube and an airtight seal that won’t degrade quickly. As a result, the entire system has the strength to endure high-operating driving conditions.

      Designed for Easy Installation. You’ll only need to use common hand tools to secure this cold air intake into your truck. What’s more, all of its necessary hardware is included in the kit, so installing it will be a quick and easy task.

      Backed by a Million-Mile Warranty. This Cold Air Intake system is covered by S&B’s million-mile warranty. Interested to learn more about the warranty’s terms and conditions? Then check out the manufacturer’s website.

      Application. S&B’s Cold Air Intake with Oiled Cleanable Cotton Filter fits all 2017-2018 5.3L Chevrolet Silverado 1500 models.

      Shop All Truck Parts And Accessories

      Shop All Cold Air Intakes For Trucks

      Fitment:

      Details

      S&B 75-5116

      CA Residents: WARNING: Cancer and Reproductive Harm - www.P65Warnings.ca.gov

      Installation & What's in the Box

      Installation Info

      What's in the Box

      • (1) Air Box
      • (1) Intake Tube
      • (1) S&B Filter
      • (1) Fender Seal
      • (1) Box Plug
      • (1) Lid
      • (1) Lid Sear
      • (1) MAF Gasket
      • (1) MAF Plate
      • (2) Hoses
      • Installation Hardware
      • Installation Instructions
      4.9

      Customer Reviews (500+)

        Questions & Answers

        10 More Questions

        Will It Fit My Silverado 1500