Talk to a F-150 Sales Tech
1-888-706-1096
M-F 8:30A-11P, Sat-Sun 8:30A-9P
$20K Sweeps! 10 Chances to Win! Enter Daily >

K&N Series 63 AirCharger Cold Air Intake (17-24 3.5L EcoBoost F-150, Excluding Raptor)

Item T540335
Verify parts fit and get product recommendations.
F-150 Sales Techs: Connect Now M-F 8:30A-11P, Sat-Sun 8:30A-9P
$0.00
On Sale

$299.99 (each)

FREE Shipping Market Price $402.99 You Save 26% ($103.00) Up to 10% off for Military & First Responders! See Details

Will this fit your Vehicle?

Select a different vehicle Help?
Update or Change Vehicle
Ship to: Ashburn - 20149
Sorry, please enter a valid US or CA postal code
We're sorry, zip can't be updated at this time.
Recommended Install Shops
How It Works
Install Shops are available near Ashburn - 20149

Add Local Shop Installation

Total cost of service $175.00
    Create a list
    Add to New List

    Saved - View your saved items

    We're sorry. We couldn't save this product at this time.

      Video Review & Installation

      So 3.5L EcoBoost powered F-150 owners, listen up, because today we're talking about one of the easiest and one of the most affordable ways to make some pretty good performance gains on your truck. I'm talking about cold air intakes like K&N's Series 63 AirCharger that we just threw on our truck today. Now, if you've been hunting for easy power, you've probably seen that whole back and forth, that age-old discussion if you will, about cold air intakes and what kind of performance gains they provide. And what's cool about the EcoBoost in particular is the fact that it runs off of a speed density setup instead of a mass airflow sensor. Without getting into the science, guys, it's pretty straightforward. As far as the EcoBoost is concerned, you can throw pretty much any intake on this truck, you don't have to tune it or dyno it, and the speed density system will automatically make changes to air and fuel on the fly, essentially tuning itself, and that's where you get those pretty good performance gains from.Now, as far as what kind of performance gains you guys can expect, well, I would say that conservatively, you will expect single digit to low double-digit gains. And again, that's without any tuning or dynoing whatsoever. Now, if you're curious about which intake you should go for, I generally lump them into two categories. You got closed-element designs, which are very similar to the factory setup, and then you got these cool open-element designs like the Series 63. So, which intake should you go with? Well, a closed-element design like the one that comes on the truck is not gonna look as good as an open-element design, but theoretically it might provide that colder and denser air to the engine compared to an open-element design, and therefore, you might make some better power with a closed-element design. However, open-element designs obviously look a lot better. And that's the case with the Series 63. We're ditching that really ugly factory intake tube in favor of a kind of OEM in appearance plastic tube with a really nice textured finish on it. If you guys own an XL truck or one of the base models with the black trim on it, this matches very closely. So it looks good, but it's still an obvious upgrade, really cleans up the looks underneath the hood. But what I like about this one in particular is the way K&N designed it. We're actually retaining the factory air inlet, which does an excellent job in my mind, and we're also reusing the bottom of our factory air box. K&N went ahead and fabbed up a new heat shield, which is still fully enclosed with the hood down, so you pretty much get the best of both worlds. When you got the hood up, looks great. You can see that high flow filter going to work, and you can also see if it needs to be cleaned or not. But with the hood down, it's pretty much a closed-element design, so you get that colder, denser air, and you make all that good power that you're hunting for. And obviously next, you have to consider price. And, guys, this one's pretty straightforward. If you want one of the most affordable intakes, then the Series 63 is gonna be the ticket. This guy comes in right under the $300 price point, and anything that's gonna cost less than this is typically only gonna be a replacement tube or a replacement filter. You're not gonna get both, and you're probably not going to be getting a new heat shield either. So again, most affordable complete intake that you can pick up. And as far as the install's concerned, it's very straightforward. I'm actually gonna give this a one out of three wrenches on my patented difficulty meter. And I wager it'll take you guys about 30 minutes to an hour, and that's even if you don't have any experience turning wrenches. Like I said, it's a great first mod. And if you decide to pull the trigger on this intake, you can actually come back to this video in just a bit. I'm gonna show you guys exactly what tools you need to pull out of that toolbox. And I'm gonna walk you through the entire install step-by-step.All right, guys, to install your intake, you're gonna need a 4-millimeter Allen key as well as a standard drive ratchet. And you'll also need 7- and 8-millimeter sockets. Optional but helpful tools for those band clamps include some long extensions. All right, guys, so obviously you gotta make sure your hood is open and then we can remove that factory intake. You're really only gonna need a couple of tools for this. Specifically you'll need a 7-millimeter socket for those band clamps securing our factory intake tubes. It's also very helpful to have yourself a nice long extension, because one of those band clamps is tucked down pretty far. I'll show you where both of those are. All right, so that first band clamp is located just behind the coolant reservoir right here. All you need to do is loosen this up enough so that we can separate this rubber coupler from our intake tubes. All right, that next band clamp is a little bit tucked in here next to all these breather lines and whatnot, so it's very helpful to have that large extension like I said a moment ago. All right, now that our intake tube is separated, we're gonna go ahead and disconnect this little sensor located on the back here. This is just held into a rubber grommet, so all you gotta do is twist it in order to release it. All right, the last step here is removing both of these little clamps right here securing our factory air box to the bottom of our air box. Go ahead and pop those free. You can remove the entire intake as one piece. All right, so we have our factory intake removed. I really wanted to take the time to show you guys a good comparison between the two. And more importantly, I wanted to show you what a nice upgrade the new K&N filter is over this factory paper element. For lack of better phrasing, this thing is kind of crappy. Even out of the factory, it's very restrictive. It doesn't let the EcoBoost breathe as well as it should. And as you can see, our truck doesn't have many miles on it, but this thing doesn't really stay clean for very long.So, we're gonna ditch old busted here. We got our new hotness with this new high-flow filter. This is good for up to 100,000 miles, and it's actually washable and reusable. So, any time you take your truck off-road, or even on the daily commute for a while, you start to get a rough idle, something like that, go ahead and throw this thing under some hot water and some mild soap. Let it dry off, throw it back in, and you should be good to go. Now, before we install our new intake system, we have to do a little bit of a setup here. You do have some weatherstripping provided in the kit. It might be assembled on the heat shield already. If not, simply press it down on there, make sure it's good and snug. And you also gotta get the rubber couplers on your intake tubes with the band clamps like so. The last thing that we really have to do is throw on this plastic coupler, so that we can secure our new air filter to our heat shield. For that, you're gonna need a small 4-millimeter Allen key, and you'll also need these little Allen head bolts provided in the kit. Okay. So to throw the plastic coupler in place, pretty straightforward. You got a couple of pre-drilled holes in the coupler itself. Those are threaded. You're gonna line up those threaded holes with the pre-drilled holes in the new heat shield. Go ahead and hand tighten these little button head bolts on there. And you can drive them home with that little 4-millimeter Allen key. Okay, with that coupler installed, you could go ahead and throw on the air filter itself. Pretty straightforward stuff. You wanna make sure you have that large band clamp on there, so you can secure it. And you're actually stepping up your socket size to an 8-millimeter from a 7-millimeter. Okay, our air filter's all set up. We're all ready to go. Again, make sure you got all those rubber couplers and band clamps on your intake tube right here. I'll go ahead and meet you guys over at the truck. I'll show you how to get this bolted down.Okay, so you got some tongues on our new heat shield here. Those line up with these holes in the factory airbox, so go ahead and line those up. And then once you got the top of the new heat shield flush, you can reinstall it using these provided clips. Okay, with the heat shield secure, we can throw our new intake tube in place. Again, make sure you got those band clamps on all the ends of those rubber couplers, so you can tighten those down once you've lined these up. And you really want to make sure that these rubber couplers are fully seated on the intake tube. Otherwise, you will have an air leak. Okay, now that our intake tube is secure and all our rubber couplers are lined up and nice and flush, we can tighten down all these band clamps. Again, you'll need an 8-millimeter socket to tighten these clamps down. All right, the last step here is reconnecting this little sensor in the back of our intake tube. Now, this rubber grommet can be a little bit of a squeeze, so it's very helpful to spray it down with some WD-40 or some PB Blaster. All right, so once you got those band clamps tightened down and you got your sensor plugged in, that'll wrap up this very easy install, like I said. And that also wraps up my review of K&N's Series 63 AirCharger High Performance Cold Air Intake, fitting your 2017 or newer 3.5L EcoBoost-powered F-150. Be sure to check it more out on the site. And for all things F-150, keep it right here at americantrucks.com

      Product Information

      Features, Description, Reviews, Q&A, Specs & Installation

      Features & Specs

      • Cold Air Intake Replacement
      • Boosts Horsepower
      • Increases Throttle Response
      • Improves Engine Sound
      • High-Caliber Polyethylene Tube
      • Superior Quality Heat Shield
      • Washable and Reusable Air Filter
      • Service Required After 100,000 Miles
      • Million Mile Limited Warranty
      • Medium Difficulty Installation
      • Not CARB Certified, Thus Not Legal for Sale, or Use in California, or States Adopting CA's Emission Standards
      • Fits All 2017-2024 Ford F-150 3.5L EcoBoost Models, Excluding Raptor

      Description

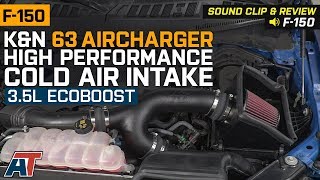
      Increased Throttle Response. You can increase the throttle response and boost the horsepower in your Ford F-150 3.5L EcoBoost by installing the K&N Series 63 AirCharger High Performance Cold Air Intake in your truck. This intake was designed to deliver an improved engine sound that is sure to set your F-150 apart in all your travels.

      High-Caliber Construction. The tubing is designed and manufactured from quality polyethylene to provide augmented air flow and works with the factory air temperature sensor. The heat shield is designed to install directly in the OEM air box space.

      Washable and Reusable Filter. You’ll benefit from an air filter that is washable and reusable. It has a large cone shaped design that is chrome topped. Service of the filter will be required after approximately 100,000 miles.

      Moderate Difficulty Installation. With general hand tools and moderate mechanical knowledge, you can install this cold air intake in approximately 90 minutes or less. Installation requires use of an Allen wrench and a screwdriver.

      Million Mile Warranty. The manufacturer covers craftsmanship defects in this cold air intake by a million mile warranty. Review the warranty information to ascertain what limitations apply.

      Not CARB Approved. This intake kit isn't CARB certified, thus it is illegal for sale or use in California, or any state adopting California's emission standards.

      Application. The K&N Series 63 AirCharger High Performance Cold Air Intake is designed to fit all 2017-2024 Ford F-150 3.5L EcoBoost models, excluding Raptor models. The intake is not street legal in California or in states adopting such emissions regulations.

      Technical Note. The K&N Cold Air Intake is not designed for vehicles equipped with a Body Lift.

      Shop All Truck Parts And Accessories

      Shop All Cold Air Intakes For Trucks

      Fitment:

      Details

      K&N 63-2599

      CA Residents: WARNING: Cancer and Reproductive Harm - www.P65Warnings.ca.gov

      Installation & What's in the Box

      Installation Info

      What's in the Box

      • (1) Air Filter
      • (1) Housing
      • (2) Clamps
      4.8

      Customer Reviews (500+)

        Questions & Answers

        10 More Questions

        Will It Fit My F-150

        • 3.5L V6 EcoBoost - 17, 18, 19, 20, 21, 22, 23, 24
        • 3.5L V6 EcoBoost Limited - 19, 20, 21, 22, 23

            Related F-150 Categories