FREE 1 to 3-Day Delivery on Orders $149+ Details
How to Install Smittybilt M1 Full Width Rear Bumper - Textured Black on your Silverado

Shop Parts in this Guide
NOTE: Carefully read entire instructions thoroughly before attempting to install this part.

INSTALLATION:
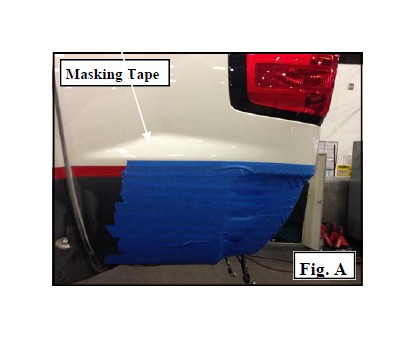
Step 1: Place masking tape on the areas of the rear fenders and tailgate that can be scratched by removal of the rear bumper. (Fig A)
Step 2: Remove the trailer wiring plug, if so equipped. Save the hardware for reinstallation.
Step 3: Unplug the license plate light and back-up sensor wiring at the main harness connector on frame, if so equipped.
Step 4: Unbolt and remove the license plate from the OE bumper.
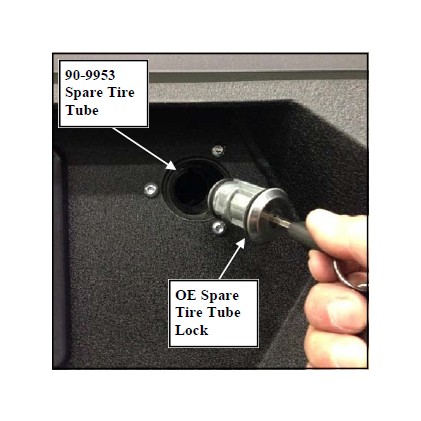
Step 5: Remove the OE spare tire crank tube lock from the OE bumper.
Step 6: With help from a friend or while supporting the bumper with a jack, unbolt the OE bumper bracket retaining bolts from the frame. Carefully remove the OE bumper and brackets from the vehicle. Save the OE hardware for reinstallation. (Fig A)
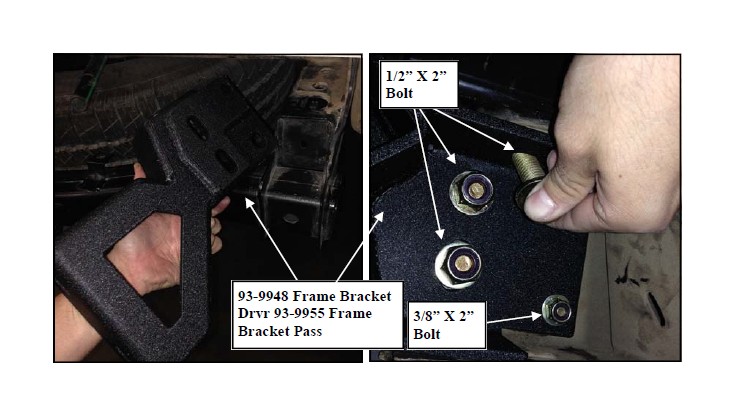
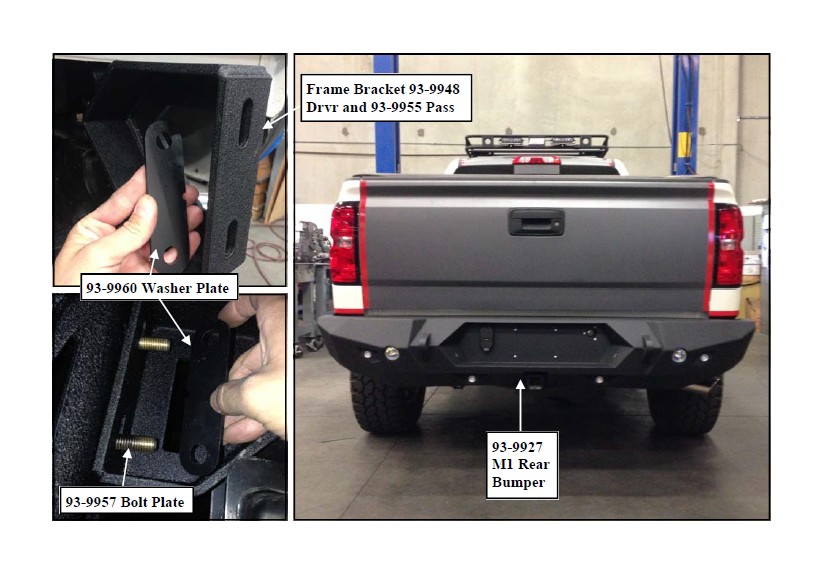
Step 7: Install the bumper mounting brackets (93-9948 Drvr and 93-9955 Pass) to the OE frame rails. Secure using the (3 per side) supplied 1/2” X 2” bolts and (1 per side) 3/8” X 2” bolts and hardware. Lightly tighten the 1/2” and 3/8” hardware at this time. (Fig B)
Step 8: Carefully unclip and remove the OE bumper wiring harness from the OE bumper. NOTE: Be sure to note the orientation of the wiring plugs.
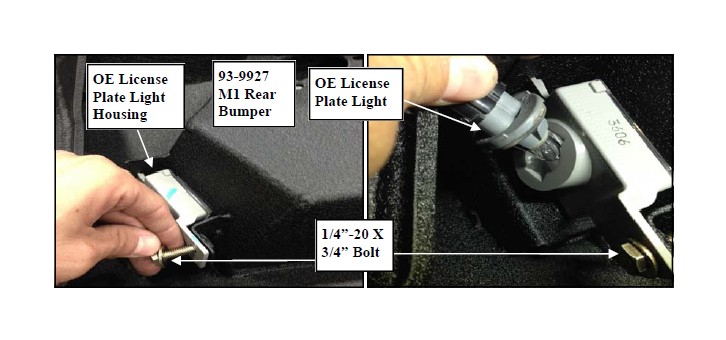
Step 9: Carefully remove the license plate lights and housings from the OE bumper and install the OE housings and lights into the holes on the M1 rear bumper (93-9927) using the supplied 1/4”-20 X 3/4” bolts and hardware. (Fig C)
IMPORTANT!: Perform steps 10 through 13, one sensor at a time, carefully noting the original orientation in the OE bumper prior to removal.
Step 10: Unclip and carefully remove the back-up sensors from the OE rear bumper, if so equipped.
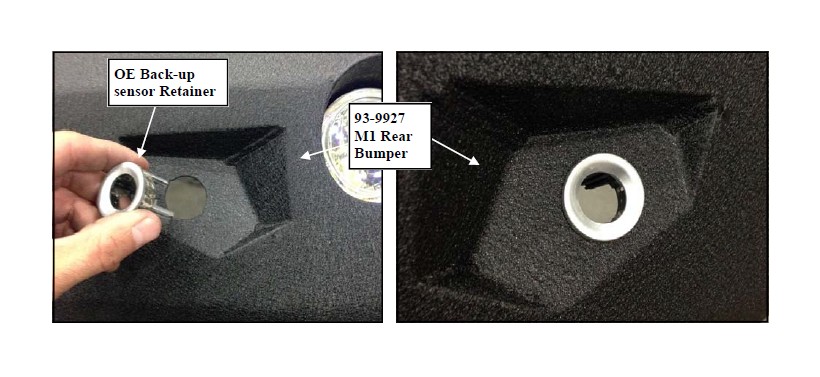
Step 11: Remove the OE back-up sensor retainers from the OE bumper, if so equipped.
NOTE: Be sure to note the orientation of the back-up sensor retainers in the OE bumper prior to removal.
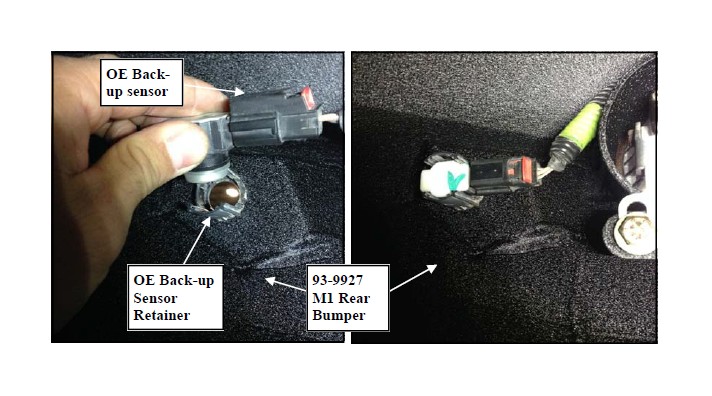
Step 12: Install the previously removed OE back-up sensor retainers into the mounting holes on the M1 rear bumper (93-9927). (Fig D)
Step 13: Install the OE back-up sensors into the OE retainers on the M1 rear bumper (93- 9927) according to their original orientation in the OE bumper. (Fig D)
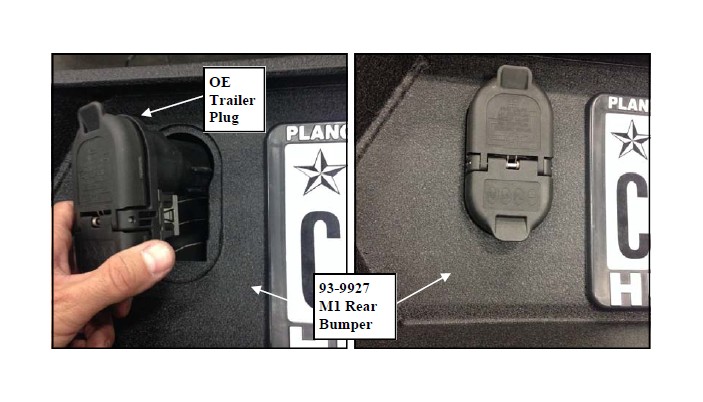
Step 14: Install the OE trailer plug to the mounting hole in the M1 bumper (93-9927). Press the OE trailer plug into place firmly to secure. (Fig E)
Step 15: Install the brackets (90-7318) to the 2 1/2” clear back-up lights as a replacement for the included mounting bracket from clear back-up light kit (S/B612800-03). (Fig F)

Step 15: Install the back-up lights into the new M1 rear bumper (93-9927) using the supplied (2 per side) 1/4”-20 X 3/4” bolt and hardware. (Fig F)
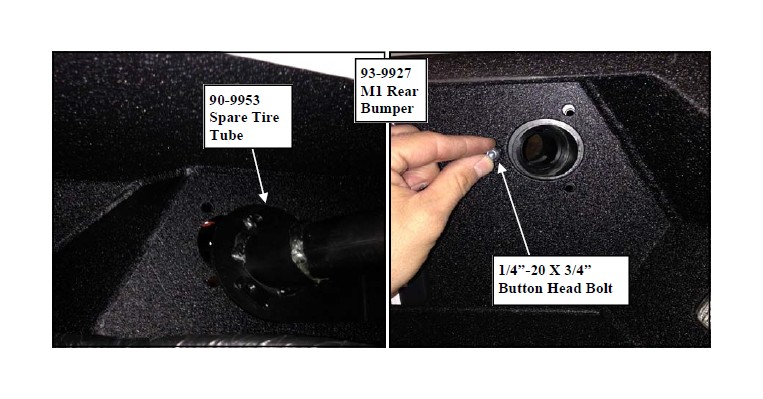
Step 17: Install the license plate using the (4) 1/4”-20 X 3/4” button head bolts.
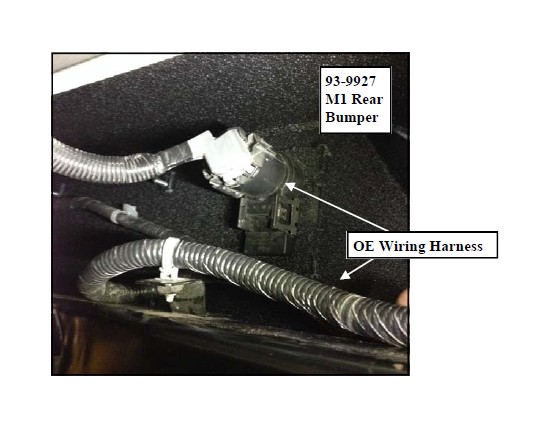
Step 18: Place the OE rear bumper wiring harness into the M1 rear bumper (93-9927) Be sure the harness is tucked up neatly away from any sharp edges or moving parts. Use the zip ties if necessary. (Fig G)
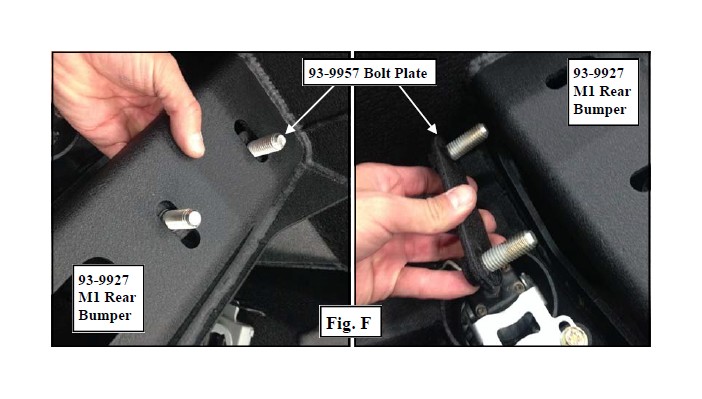
Step 19: Insert the 1/2” bolt plates (90-9957) into the mounting pocket on the M1 rear bumper (93-9927). (Fig H)
Step 20: Carefully raise the new M1 rear bumper (93-9927) into position. Secure the M1 rear bumper to the previously installed bumper mounting brackets (93-9948 Drvr and 93-9955 Pass) using (2 per side) the 1/2” bolt plates (90-9957), washer plate (90-9960), and 1/2” hardware. Leave the hardware slightly loose for adjustment. (Fig I)
NOTE: If the M1 rear bumper (93-9927) is too close to the body or tow hitch, install bumper shims (90-9135) to provide the necessary space.
Step 21: Once proper M1 bumper (93-9927) alignment is achieved, torque the 1/2” bumper mounting hardware to 85 ft./lbs., the 3/8” bumper mounting hardware to 45 ft./lbs., and the OE hardware to manufacturer’s specifications. (Fig I)
IMPORTANT!: Be sure to check clearance between the bumper and tailgate when the tailgate is in the lowered position before torquing the bolts.
Step 22: Install the spare tire tube (90-9953) to the M1 rear bumper (93-9927) using the (3) supplied 1/4” X 3/4” button head bolts and hardware. (Fig J) NOTE: Be sure to check that the OE spare tire crank fits properly into the spare tire tube.
Step 23: Install the previously removed OE spare tire tube lock into the spare tire tube (93- 9953). (Fig D)
Step 24: Reconnect license plate lights to the wiring harness. Use zip ties to secure the wiring harness to the M1 rear bumper (93-9927). (Fig D & F)
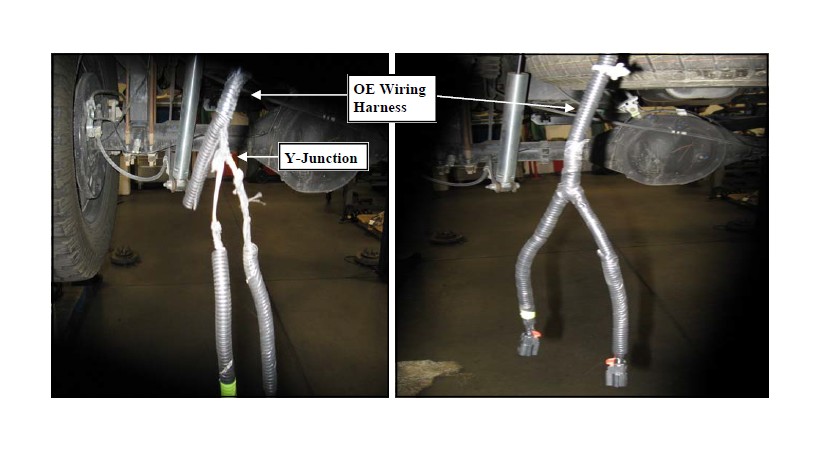
Step 25: At each end of the rear bumper wiring harness are the back-up sensors connectors . Remove the tape and loom cover from the Y-junction and separate the wires in order to move the split 4 to 5 inches further up the harness. Re-tape the Y-junction with electrical tape. Perform this on both sides of the harness. Reconnect the wiring harness connectors to the back-up sensors.
Step 26: Reconnect the rear bumper wiring at the main harness connector on frame.
Step 27: Connect the back-up light wiring per instructions, to a switch or in conjunction with auxiliary back-up lights. Test, aim & adjust the lights at this time.
Step 28: Installation is now complete. (Fig K)