


Installation Time
(approx) 2 Hours
Difficulty Level:
Light to Moderate mechanical skill required.
Installation Guides
 FREE 1 to 3-Day Delivery on Orders $149+ Details

$1,748.99
CONFIRM THIS FITS YOUR VEHICLE!
Saved - View your saved items
We're sorry. We couldn't save this product at this time.
or use
Features, Description, Reviews, Q&A, Specs & Installation
| Brand | Borla |
| Exhaust System Type | Cat-Back System |
| Exhaust Tip Finish | Chrome, Polished |
| Exhaust Tubing Diameter | 2.25 Inch |
| Exhaust Material | Stainless Steel |
| Exhaust Tip Outlet Style | Dual |
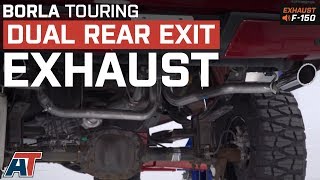
| Exhaust Exit Location | Rear - Dual |
| Exhaust Loudness | Mild |
Raw Sound. The Borla Cat-Back Exhaust System gives your F-150 back some of the raw growl it was made to handle. This is because it downsizes on the factory muffler, which strangles the sound out of your truck. Instead, it filters away high-pitched sounds and allows low-pitched ones to shine. This gives you a powerful yet subtle tone to show off.
High Performance. In addition to sound, the Borla Cat-Back Exhaust System adds to your truck's overall power. Thanks to it's design, you get a free-flow exhaust. This returns some horsepower and torque back behind your rear tires. After all, your Ford F-150's sound doesn't mean much if you don't have the get-up-and-go to back it up.
Meaningful Construction. This system isn't made just to look nice, even if it does. The stainless steel that they used to construct the mandrel-bent piping allows for your piping to be resistant to rust and corrosion. This is especially important for an exhaust system, which handles toxic gases daily. It will also hold up to road hazards such as wayward gravel quite well.
Direct Installation. The Borla Touring Split Rear Exit Cat-Back Exhaust System is made to bolt directly onto the truck's factory hangers. This means you won't have to adjust the piping at all to fit. Furthermore, it comes with all the hardware needed for an installation.
Application. This Borla Cat-Back Exhaust System can be used on a 2015-2020 5.0L F-150s with the following Cab and Bed sizes:
Shop All Truck Parts And Accessories
Shop All Truck Exhaust
Borla 140614
CA Residents:  WARNING: Cancer and Reproductive Harm - www.P65Warnings.ca.gov
Installation Info
Installation Time
(approx) 2 Hours
Difficulty Level:
Light to Moderate mechanical skill required.
Installation Guides
What's in the Box
Tech Guides:
