Installation Time
(approx) 2 Hours
Difficulty Level:
Light to Moderate mechanical skill required.
FREE 2 or 3-Day Delivery on Orders $119+ Details
$674.99 (each)
FREE Shipping + $25.00 Oversized Item Fee Market Price $789.99 You Save 15% ($115.00)Add Local Shop Installation
Saved - View your saved items
We're sorry. We couldn't save this product at this time.
or use
Buy 2 or more Barricade items of $500+, Get $50!
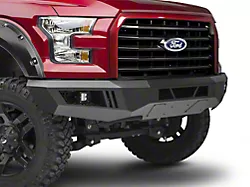
Barricade Extreme HD Front Bumper with LED Fog Lights (15-17 F-150, Excluding Raptor)
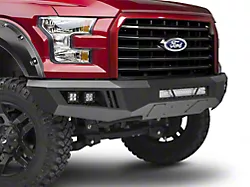
Barricade Extreme HD Front Bumper with LED Light Bar, Fog and Spot Lights (15-17 F-150, Excluding Raptor)
Barricade Extreme HD Front Bumper with LED Light Bar, Fog and Spot Lights (18-20 F-150, Excluding Raptor)
Hey guys, it's Sara with americantrucks.com. And today we have a review and install of the Barricade HD Rear Bumper with LED Fog Lights for Factory Hitches fitting your '15 and newer F-150s excluding the Raptor. This is perfect for the F-150 owner who's looking for a tougher alternative to their factory bumper and wants an option that includes lighting. This full-width rear bumper provides additional protection to your truck with its steel plate construction and a bit of added style as well with its black powder coated finish. This bumper comes with everything you need for installation including two cube lights and the wiring harness needed to hook them up. This bumper is compatible with your factory hitch but also includes brackets if your truck does not have one or you don't wanna reinstall it. It's also compatible with your factory backup sensors. So as far as price goes, this bumper comes in at around $625 which is middle of the road price-wise when compared to other options. And for your money, you're getting a full-width steel bumper that allows you to keep your factory hitch and as a bonus, includes lighting. I'm giving this install a two out of three wrenches on the difficulty meter. It features a direct bolt-up installation and a direct plug-and-play installation of your cube lights. All in all, it can be done within two hours. So with that said, let's jump into our install.For this install, you will need an impact gun or a ratchet, a 13-millimeter wrench, 21, 17, 13 and 11-millimeter sockets, a pop clip removal tool, the included Allen key and you may want a small flathead. All right. So the first step in our install is to remove our factory bumper and to do that, we're gonna go underneath and remove the nuts that hold it to our frame.All right. So the first step is to remove the nuts on these studs for our bumper. These are 21-millimeter so grab a 21-millimeter socket and there's not a ton of space so I'm using a ratchet. If you can't quite get them loose you can try impact or just get some more leverage on it. Now it would be a good time to mention that make sure your bumper is supported. Grab a friend or just put some jack stands underneath it because once you remove all of these bolts, the studs can back out, the bumper can come off. Repeat that on the other side. All right. If you haven't already, disconnect the trailer hitch plug from your bumper. You now need to remove the license plate light connectors by either to pulling the connector out of the light itself or twisting the entire assembly and removing the whole light. So either pressing down here and pulling this out or you can just twist it out and remove the entire thing. Next up, grab the pop clip removal tool and we're gonna remove these clips that are holding on the wiring harness to the bumper. Make sure you get the other license plate bulb on the other side. Okay. You're definitely gonna wanna friend for this step. Have each of you grab one side of the bumper and slide it forward and off.All right, so we do have to take some things off of our factory bumper here. We have to remove this piece with our key. We have to remove the trailer hitch plug and the two license plate lights. We're just gonna take these housings out. So go ahead and grab your keys, slide into this opening and just turn it and it should just come out. To get this trailer hitch plug out, you squeeze from the sides. It doesn't go out by hand you can also use a flathead or a trim panel removal tool to just release these metal clips and it should come straight out. So for these license plate light housings, we're just gonna press down on this tab either with your finger or with a trim tool and they should come straight out the front. Repeat that on the other side.All right. So at this point, if you have a hitch, we're gonna be transferring that over to the new bumper. Go ahead and pry up on this plastic part to expose two bolts. Once you get it started, it should be fairly easy to keep going. All right. At this point, we can remove all the bolts holding on our painted portion of our bumper to the hitch portion. Go ahead and grab a 13-millimeter socket and remove these. Okay. Now we can take the bolts out of the actual hitch portion. This is where it bolts to the frame of your truck. We're gonna take these four bolts out so we can take the hitch portion off. Grab your 13-millimeter socket and let's remove these. Repeat that process on the other side. Go ahead and remove the hitch portion now.All right. So now that we've removed all of the components off your old bumper that we'll need, we can go ahead and start to assemble our new bumper to go back on our truck. All right, we're gonna begin with one of the easier ones with this lock. Go ahead and line up the top cutout with this top part here. You're gonna install it the exact same way you removed it by just twisting. Now it's in place and you can close this top. Next up, we're gonna install our trailer hitch plug. Just go ahead and line it up and these tabs the same way we pulled it out are gonna keep it into this bumper. At this point, we're gonna install these plugs into our bumper because we do not have the backup sensors. These plugs go in their place but if you do have those sensors in your bumper, you're gonna wanna install those at this point. Go ahead and install the remainder of the plugs.All right. Now we're gonna install the bracket on our pod light. You're gonna slide it right in the edge here and we're gonna line it up to this opening. Now I have a bit of tape on the end of a flathead and I have the nut on there. This just makes it a little bit easier because we're just gonna get it right in that slot here between the bracket itself and the light. You can actually even hold it in there while you grab the bolt. Just line all of them up and get it started. That should hold it in place and then you can tighten this down. I would not over tighten this side until you have the other side in place. Go ahead and repeat that process. The tape method is not quite a tool but it works. So now you can tighten these down. Repeat that with your other pod light.All right. So we're gonna slide the bolt through the bracket that we just installed and slide the light into the area where this mesh is. And there is a ton of adjustment here, guys, if you want it to be more forward, a little bit more recessed. I'm gonna shoot for the center area. There is a lock washer on here as well. And if you want you could add an additional washer just to help with not digging into your bumper. All right. Now we're gonna grab a 13-millimeter ratcheting wrench and we're gonna tighten this up. All right. Now we're gonna repeat that process on the other side. Make sure you're taking your wiring harness, the connector and sliding it through this top portion here so that we can hook up our larger harness to it later. Makes it a little bit easier to do that first. Grab your 13-millimeter ratcheting wrench and tighten it down.All right. Now we can install these bolt plates. This is gonna bolt the bumper to your trailer hitch. Go ahead and install these plastic retainers which is gonna hold this plate in place so it's not wobbling around while we're trying to bolt up the hitch portion. Repeat that on the other side. All right. Now that we have those on there, you also may wanna put your plastic retaining washers on these bolt plates as well. These are the factory bolt plates. But now we're gonna lift the hitch and get these two bolt holes to line up right here. Place the washers over top of the bolt plate and go ahead and thread on the included lock nuts. Grab your 17-millimeter socket and tighten these down. Go ahead and repeat that on the other side. Now keep in mind the bumper is slotted so if some reason your hitch does not line up when you get it on the truck, you can loosen these up and move it around. Go ahead and grab your 17-millimeter socket and tighten it down.All right. Now we can install these license plate light covers. Go ahead and line up the two tabs with the larger portion of the bumper and then click it in place. Repeat that on the other side. Now onto the trailer plug, go ahead and line it up with the opening in the bumper and press it into place. All right. And finally, we're gonna install these two plugs for your license plate. This is for the bolts to go into. Just press them into your bumper.All right. Now that we have our factory bumper uninstalled from our truck, we can check it out side by side with our Barricade. Now as you can see, the Barricade is quite a bit beefier than factory. Factory essentially is aluminum pieces with a bit of plastic. The trailer hitch section is really the meat of that and we're reusing it here on the Barricade. It is nice that the trailer hitch section bolts right up. It is a couple extra steps but I think it's worth it to have that on your bumper. In addition, it also features a nice black powder coat finish which is gonna change up the look of the back of your truck and some added lighting as well. So with that said, let's finish up our install.Okay. So you're definitely gonna wanna friend for this step because the bumper with the hitch is pretty heavy now but go ahead and grab each side of it. Carefully line up the studs with the frame of the truck, then go ahead and get a nut on there for now just to hold it in place. Go ahead and get the other two nuts on. Go ahead and grab your 21-millimeter socket and tighten them down. While we're over here, we're gonna plug back in our license plate bulbs. Line it up to the housings that we installed and make sure you twist it into place. Grab your hitch connector as well and go ahead and install that. Repeat that process on the other side. And don't forget about the license plate bulb on the other side.All right. So we have our wiring harness here and we're gonna start near the battery because we're gonna hook up the positive and negative terminal directly to the battery. We will have to mount our relay somewhere. I suggest on this far side of the battery here between the windshield washer spray and the battery but you can go anywhere there's an open bolt. You can also mount it pretty much however you like, zip tie. As long as it's secured and it's not moving around the engine bay, that's all we're looking for. So once that's done, we're gonna start with the positive terminal. We're going for the auxiliary nut right here. Grab an 11-millimeter socket and again, if you'd like to go somewhere else, that's totally fine. I think this way is easiest. You just need power and ground to this to be able to light your pod lights up at your bumper. Go ahead and tighten it down. Make sure you place the rubber boot on top. Let's move over to our negative side. We're gonna go to this auxiliary spot right here. This is a 13-millimeter socket. And again, there are lots and lots of different ways to wire this. Just showing you the one I think is easiest. And tighten it down. All right. Now we're gonna route our wiring harness down. Make sure you are pulling the switch portion of it aside. That will go into the cab and the rest of the wiring, I'm gonna route down and through the wheel well. Make sure as you go that you're securing this with zip ties. Make sure it's not anywhere near any moving parts.All right. So I've disconnected the connector here for the switch. Now you need to run this into your cab somewhere or really wherever you would like this switch to go so you can turn it on and off. There is a large rubber grommet down here that does go inside your cab. I think I'm gonna go through there. It seems like the easiest way but again, anywhere that gets this wire into the cab of your truck will work. So go ahead and peel back the rubber and run your wire through. Okay. Go ahead and plug in the connector once you've run it into your cab. You should see this light up. This will be how you control your light. Let's get this mounted. You're gonna peel off the backing on the switch. Make sure that you're tucking the wiring up so that it doesn't get in anybody's way and although it's upside down, I still like it in this configuration. That way the wire can be tucked down and you can go anywhere you'd like. I'm gonna place it right here on the dash. All right. Once you've routed the wiring harness underneath the truck all the way down, route it to the rear of the bumper. I tucked it underneath the tire so it's out of the way. So we have the connector here. Go ahead and plug it in and repeat that on the other side. Once everything's plugged in, just double check that you need to tuck anything away. Make sure nothing's dangling or near anything that's moving and you should be good to go.All right. So that is gonna do it for the review and install of this Barricade rear bumper. And remember, for all things F150, keep it at americantrucks.com.
Subscribe to our YouTube Channel
Features, Description, Reviews, Q&A, Specs & Installation
Brand | Barricade |
Bumper Type | Full Width |
Bumper Material | Steel |
Bumper Finish | Black |
Bumper Winch Mount | No Winch Mount |
Bumper Fog Light Fitment | No Fog Lights |
Bumper Location | Rear |
Freight Notes. Freight items can only be shipped within the continental 48 states, no expedited methods. What is freight shipping? Your Answers are Right Here.
Shop All Truck Parts And Accessories
Shop All Truck Bumpers
Shop All Rear Truck Bumpers
Fitment:
DetailsBarricade T542752
CA Residents: WARNING: Cancer and Reproductive Harm - www.P65Warnings.ca.gov
Installation Info
Installation Time
(approx) 2 Hours
Difficulty Level:
Light to Moderate mechanical skill required.
What's in the Box
10 More Questions