FREE 1 to 3-Day Delivery on Orders $149+ Details
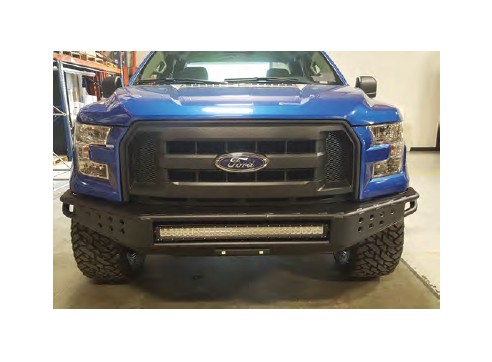
How to Install Barricade Extreme HD Tubular Front Bumper (15-17 All, Excluding Raptor) on your Ford F-150

Shop Parts in this Guide
Contents:
(1) - Bumper
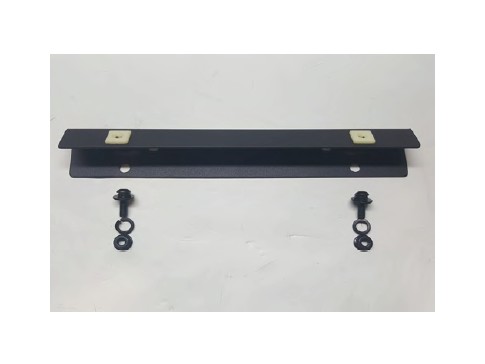
(2) - License Plate Mount & Hardware
(1) - Mesh Grille
(4) - M8 x 1.25 x 20mm Bolts
(2) - M8 x 1.25 x 15mm Bolts
(4) - M8 Nuts
(8) - M8 Flat Washers
(4) - M8 Lock washers
(6) - Plastic Holder Washers
(10) - Zip Ties
** Optional (1) - 20” LED Light Bar
** Optional (1) - Light Wiring Harness
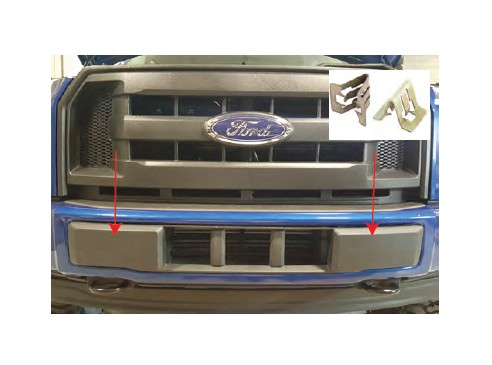
STEP 1 // Using a panel removal tool, remove the plastic bumper insert. It is held in with several metal push clips.
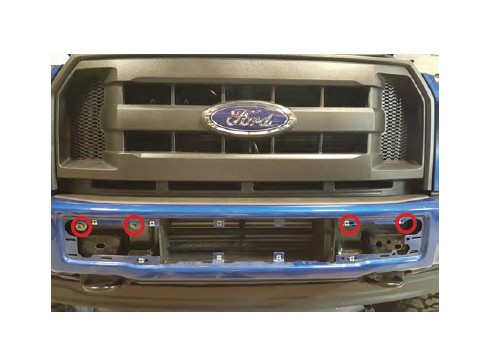
STEP 2 // Next, loosen the upper (4) 21mm nuts holding the front bumper to the support beam of the vehicle. **Note: Factory hardware will be reused.
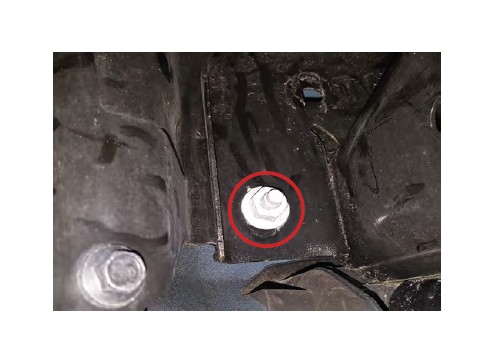
STEP 3 // Unplug the factory fog light connectors and unclip the wiring harness from the bumper. Remove the lower (2) 21mm nuts. Then remove the front bumper from the vehicle. **Note: Factory hardware will be reused.
STEP 4 // Attach the front license plate bracket to the new Barricade bumper if a front license plate is required using the (2) M6 screws, lock washers, and nuts.
STEP 5 // If purchased with the LED lighting option, install the LED light using the hardware provided in the light packaging. If choosing not to use the LED lighting. The bumper will include a bolt on mesh cover. Secure the cover to the bumper using (4) M8 x 20mm bolts, lock washers, and nuts.

STEP 6 // Using the supplied (6) plastic washers attach the factory bolts to the Barricade bumper.
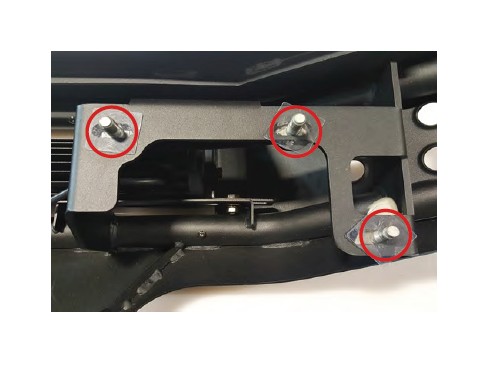
STEP 7 // Slide bumper into place, and secure using the factory hardware.
STEP 8 // Optional LED light wiring, connect the (2) LED lights into the supplied harness. Be sure to zip tie the access wiring away from any damage that could occur.
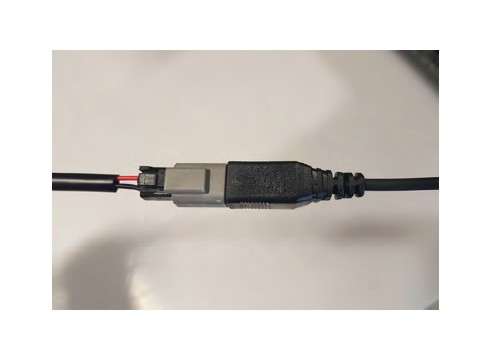
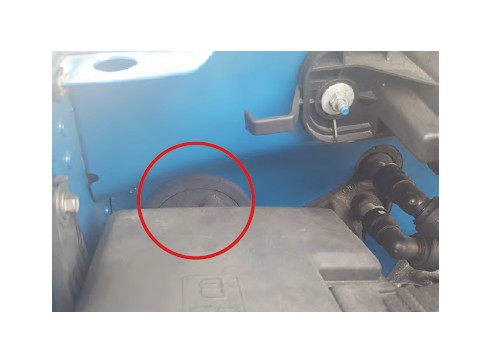
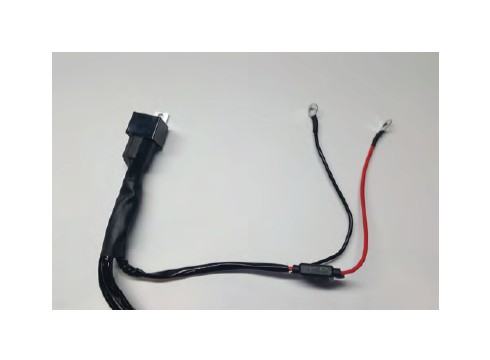
STEP 9 // Optional LED light wiring, Install the Red 12 volt wire to the positive battery terminal. Connect the black ground wire to the negative battery terminal. Mount the fuse in a safe location away from any damage that could occur. Tuck away any extra wiring.
STEP 10 // Optional LED light wiring, Route the on/off switch to the interior of the vehicle using a suitable body grommet. Mount the switch in the desired location. Zip tie any extra loose wiring away from heat and/or moving engine components.