FREE 1 to 3-Day Delivery on Orders $149+ Details
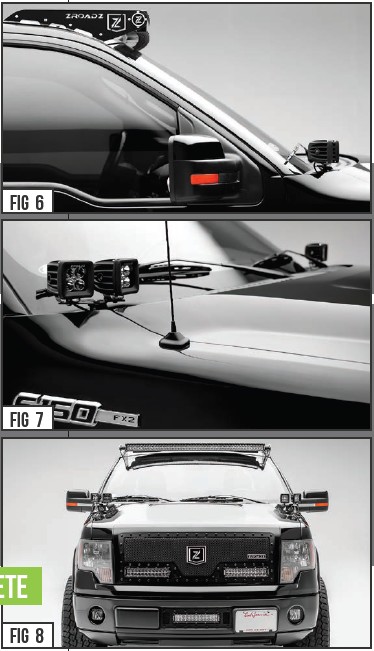
How to Install ZRoadz Hood Hinge Dual Pod Adapter Mounting Plate (07-18 Silverado 1500) on your Chevy Silverado
Installation Time
15 minutes
Tools Required
- Various Socket Set
- Various Wrenches
- Ratchet Tool
- Ratchet Extensions

Shop Parts in this Guide
Parts included
- (1) Driver Side Light Mount Bracket
- (1) Passanger Side Light Mount Bracket
* Simulated Rendering, NOT Actual Parts.
LED LIGHTS INCLUDED
Z360002 - No LED Lights Included
* LED Lights include a seperate hardware kit.
HARDWARE INCLUDED
* APPLIES TO KIT PACKAGES ONLY
Z360002
(4) - M8 x 12mm Hex Cap Screw
(2) - M8 - 1.25 x 20 Stainless Steel Hex Bolt
(6) - M8 Stainless Steel Nuts
(6) - M8 Stainless Steel Lock Washers
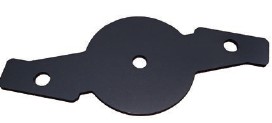
(2) - Dual Light Bracket Adapter
START HERE
PLEASE READ AND UNDERSTAND ALL INSTRUCTIONS BEFORE INSTALLATION. Auto makers offer varied models to each vehicle and occasionally manufacture more than one body style of the same model. To assure your part is correct; our tech department can be contacted at [email protected] to verify fitment and assist with technical questions. All other inquires can be directed to [email protected]. In the event you do not have internet access please call 844-653-8040
BEFORE YOU BEGIN
START HERE: Turn off engine, chalk tires with stop block, open the hood and disconnect the battery.
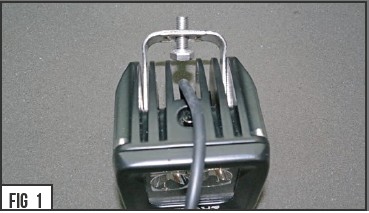
1) Begin by assembling the LED Light Pod hardware to the Pod itself. Slip the cradle mount into position and then tighten.
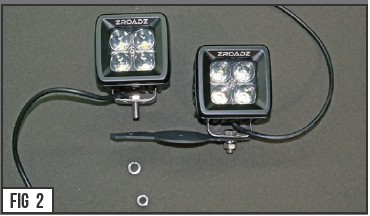
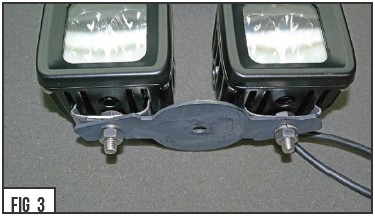
2) With the pods mounted to their individual brackets, bolt them to the Dual Pod Adapter Plate as seen in Fig 2. Make sure to use the provided washer and nuts.
3) Take note of the provided image to visually reference Dual Pod Adapter Plate fully assembled.
4) You should now be ready to mount the fully asembled Dual Pod Adapter Plate and mate it to the ZROADZ Hood Hinge Bracket Mount.
Layout the provided hardware, insert the bolt and then fix it to the Hood Huinge mount as seen in Fig. 5.

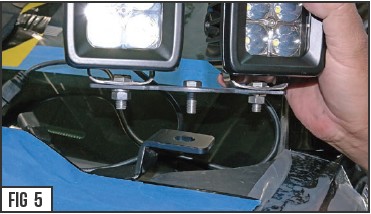
PRO TIP: You may consider fully assembling Hood Hinge / Dual Pod Adapter Plate / & LED Light Pods onto bracket first, and then slipping into place with Hood open and finally securing to Hood Hinge Mount.
6) To adjust the angle of your Light Bar, rotate the LED(s) to adjust the angles till your desired light pattern is reached. You may than tighten the hardware and also mounting bracket to hood and secure everything into place. Note your tape marker under hood to check for proper alignment. Be careful not to over tighten the mounting hardware.
It is best to adjust the angle with the vehicle on level ground with lights facing a wall, garage door or other solid barrier. We recommend checking from a distance of 25’. Your installation is now completed.