Talk to a F-150 Sales Tech
1-888-706-1096
M-F 8:30A-11P, Sat-Sun 8:30A-9P
$20K Sweeps! 10 Chances to Win! Enter Daily >

Whipple Cold Air Intake (17-20 F-150 Raptor)

Item T533534
Verify parts fit and get product recommendations.
F-150 Sales Techs: Connect Now M-F 8:30A-11P, Sat-Sun 8:30A-9P
$0.00
Our Price

$379.99 (each)

FREE Shipping Market Price $444.99 You Save 15% ($65.00) Up to 10% off for Military & First Responders! See Details

Will this fit your Vehicle?

Select a different vehicle Help?
Update or Change Vehicle
Ship to: Ashburn - 20149
Sorry, please enter a valid US or CA postal code
We're sorry, zip can't be updated at this time.
Recommended Install Shops
How It Works
Install Shops are available near Ashburn - 20149

Add Local Shop Installation

Total cost of service $175.00
    Create a list
    Add to New List

    Saved - View your saved items

    We're sorry. We couldn't save this product at this time.

      Video Review & Installation

      Hey, guys. Adam here with americantrucks.com. Today, we're taking a closer look at the Whipple Cold Air Intake available for the 2017 and 2018 Raptor. Now, if you're the owner of that 2017 to '18 Raptor, first off, I'm extremely jealous. And, second off, you might be looking to pull in a little bit more air than your factory inlet will actually let you. Now the factory cold air intake is a little bit more restrictive than some of the aftermarket options, especially this Whipple one. Whipple lets us know, with this added to your truck, not only can you expect a better breathing engine, which in turn equates for more power, but you can actually expect up to 10 wheel horsepower and 15 foot-pounds of torque, with a 132% airflow increase. Those are seriously impressive numbers from a cold air intake. That is all because of the wider, durable, heat-resistant roto-molded tubing along with the upgraded heat shield and, of course, the extra-wide pleaded cold air intake filter. Now, this filter, as you can see, is a lot wider than your factory option and a lot wider than some of the other ones in the category. It's also a washable and reusable filter so when it comes time for routine maintenance, pop this thing off, give it a good cleaning, throw it right back on, and you're good to go, good as new.This one here is a cotton gauze made from extremely high-quality stuff, including a diamond wire mesh covering the outside here to make sure it's filtering out all the particles you don't want coming into the engine, but pulling in strictly that cold air that's gonna make all that power. Now, this thing here is gonna cost you right around 380 bucks, which is a really common price tag among all the cold air intakes in the category. Whipple is a very, very well-known brand. You guys might have heard of them. They make really cool superchargers and this cold air intake is gonna be a very welcome addition to your Raptor. When all is said and done, you can expect to have this done in about an hour, maybe a little less if you have some experience with intakes. This is one of the more easy installations you can do under the hood so I'm giving it one out of three wrenches on our difficulty meter. Without further ado, I wanna show you guys how this process is done so let's get to it. Tools used for this install are a flathead, ratchet, extension, 7-millimeter and 8-millimeter deep socket. All right, step number one here, to disconnect our factory cold air intake, our factory air box, we're gonna go back here and disconnect this sensor harness. Now I'm just gonna pinch and pull straight back. All right, so the next thing we're gonna do is disconnect or loosen up all three of our clamps here holding on our factory tubing. We're gonna start on the one on the bottom. Now the head of this clamp is kind of tucked into the engine bay so you wanna grab your longest flathead that you have, put it right down here past all of our tubing, and loosen this one up. Once you have that loosened up, you can rotate that and unlock it. All right, we're gonna do the same thing for the top two clamps. I'm gonna switch from the flathead to a 7-millimeter socket and ratchet. All right, now we're able to disconnect and remove our tubing. All right, and just pop off your coolant hose from that attachment and you can set this aside. All right, next up, we can pop off the clips holding on our factory air box. That lifts up, slides right out, and we can pop out that factory paper element filter. We finally got our factory air box out of our Raptor and on the table next to our Whipple cold air intake. As you can see, a lot of similarities but a lot of big differences between the two kits. One of the similarities being the general shape of the tubing here stays the same. This one is gonna be a little bit wider from Whipple to allow for a bigger airflow. This is also a heat-resistant injection roto-molded plastic so it does resist against that heat a little bit better than your factory option. The biggest difference between the two kits is gonna be your paper element filter versus your new Whipple conical design on the filter. Now, this is gonna pull in a lot more cold air than this could. This isn't really designed to be as aerodynamic as your new filter here from Whipple, as you can see by the different designs, as you can see by the different shapes. Your Whipple filter is gonna filter a lot easier and a lot better than your factory one so you'll see huge improvements there just by the breathing of the engine and how much more this will pull in air-wise. Now as you can see from the air box, this doesn't look like much, but as you have it installed, your air filter will sit in, it seals against the inside of your hood and seals out all that excess engine heat, strictly pulling in your cold air from the front by utilizing the bottom portion of your factory air box. Now, the way this sat in your Raptor, sat in the bottom portion with the air inlet coming out toward the upper radiator shroud. That pulls in a lot of cold air from the front end and we are still going to utilize that, as you see by us leaving it in the vehicle. There's a couple of things we have to transfer over, one of which being our sensor. You're just gonna twist this and transfer it over to our new tubing. Before we can actually put this in our tubing, however, we wanna install our rubber grommet. So we're gonna do that and then we're gonna start to assemble our couplers and our clamps onto our new tubing. All right, installing our new grommet is gonna be pretty simple. We're just gonna turn over our intake tubing, pinch the grommet, and press it into place. That's gonna be the new spot that your sensor is gonna sit in. So moving on over to the factory tubing again, to remove your sensor, you're gonna rotate this, find the sweet spot, you can just pull it straight back and we're gonna transfer that into our new hole that we just put in our rubber grommet. Next up, we're gonna start assembling our couplers onto our new tubing from Whipple. Now, these are very much side-specific. You wanna make sure you're putting them on the correct side but, then again, they only go on one way. So we're gonna pop our coupler through our clamp and slide this onto our tubing. Once you have it seated all the way down, you can grab either a flathead screwdriver or an 8-millimeter socket and ratchet and tighten down that clamp. First, we're gonna loosen that and seat that all the way down. Now on the other end of that, you wanna make sure you're grabbing the smallest clamp in the kit and putting that around the edge. Now, you don't wanna tighten it down too much. I just like to get it just a little bit snug, that leaves enough room for the edge of the coupler to flex but still not quite fall off. We're gonna install our secondary coupler. Now, this is the same size on both sides so it's not gonna make a difference which one you put on first. So we're gonna put our clamp through and seat this all the way down. Grab your socket and tighten it down. Now that we have our couplers in place, I'm gonna install this in the vehicle so we're gonna start at the air box and work our way down the tubing. First step for our installation, we're gonna drop in our new Whipple heat shield. Now that's just gonna hook on to the side of the factory lower air box. And that's gonna seat just like this and we're not gonna bolt anything down just yet, what we're gonna do is put in our new filter. All right, now we're not actually gonna bolt this filter into anything. We're just gonna seat this right inside the air box. You wanna have this in beforehand because once we put the tubing in, it won't fit. It won't be able to slide in. So we wanna seat this in here and eventually, once we have that tubing lined up, we'll be able to bolt it down like this. So, for now, seat it just inside. All right, next up, we can drop in our Whipple tubing. We're gonna connect it to our factory components with our new couplers and then we're gonna tighten down the clamps. Now we can rotate our clamps so that the head of the clamp that we're gonna tighten down is facing upward and easy to access. Grab your socket and tighten them down. All right, now before we secure our air filter, you wanna put on this stripping. Now the strip is gonna go right around the edge of our metal air box just to seal it from any engine compartment heat that could seep through the crack here, that way you'll have a nice snug fit between the tubing and the air shield. So we're gonna start by flipping this sideways and feeding it up into the slot on the strip. You might use a flathead screwdriver just to pry it up into the spot and you wanna work your way all the way around. All right, now we can pop our air filter on now that we have that trim in place. You wanna make sure the air filter is on all sides seated all the way against the heat shield. Grab your socket and tighten down the clamp. Now we can put on our weatherstripping all the way around the box. This will seal it against the inside of the hood. All right, now you can trim off the excess. All right, to finish things off, let's plug in our sensor. That's gonna wrap up our cold air intake from Whipple on our '17 to '18 Raptor. So if you wanna get your Whipple cold air intake, you can do so for just under the $400 mark right here at americantrucks.com.

      Product Information

      Features, Description, Reviews, Q&A, Specs & Installation

      Features & Specs

      • Whipple Cold Air Intake
      • Designed to Increase Horsepower and Torque
      • Provides Superior Air Flow
      • Durable and Cleanable Air Filter
      • Features Extra Wide Pleats
      • Heat Rejection with Roto-Molded Tube
      • Heavy-Duty Heat Shield with Powder Coating
      • Simple Installation
      • Made in America
      • Street Legal in 50 States
      • Fits All 2017-2020 Ford F-150 Raptor Models

      Description

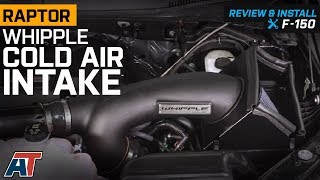
      Improves Horsepower. The Whipple Cold Air Intake system was designed to increase horsepower and torque in your Ford F-150 Raptor. You’ll benefit from up to 10RWHP and 15RWTRQ gains over the stock system with the use of 93 octane.

      Superior Air Flow. This system provides approximately 132% more air flow than the stock system in your truck. The filter is cleanable and provides long-lasting performance value. This system has such increased air flow capacity due to the extra wide pleats on the air filter.

      Innovative Design. The roto-molded air tube was designed to ensure superior heat rejection. This high velocity intake tube is effective in lowering the inlet losses that the OEM tube has so that your truck will experience hidden power. The heat shield is made more durable with the addition of a heavy-duty powder coating.

      Straight Forward Installation. This cold air intake system was designed to have a simple installation process that can be completed in approximately 30 minutes. You’ll love the basic bolt-on process as no tools are required to complete installation. No grinding or welding is required.

      Application. The Whipple Cold Air Intake is designed to fit all 2017-2020 Ford F-150 Raptor models. Custom tuning may be required. This intake is street legal in fifty states with the Whipple Stage 1 System. It is important to note that power levels may vary due to operating conditions and octane.

      Shop All Cold Air Intakes For Trucks

      Fitment:

      Details

      Whipple EB-8150

      CA Residents: WARNING: Cancer and Reproductive Harm - www.P65Warnings.ca.gov

      Installation & What's in the Box

      Installation Info

      What's in the Box

      • (1) Intake Tube
      • (1) Housing
      • (1) Air Filter
      • (5) Clamps
      • Installation Guide
      4.8

      Customer Reviews (17)

        Questions & Answers

        10 More Questions

        Will It Fit My F-150

        • 3.5L V6 EcoBoost Raptor - 17, 18, 19, 20

            Related F-150 Categories