FREE 1 to 3-Day Delivery on Orders $149+ Details
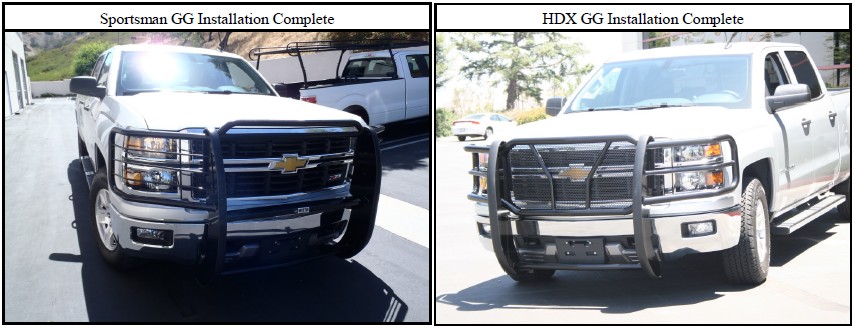
How to Install Westin HDX Grille Guard - Black (14-15 Silverado 1500) on your Chevy Silverado

Shop Parts in this Guide
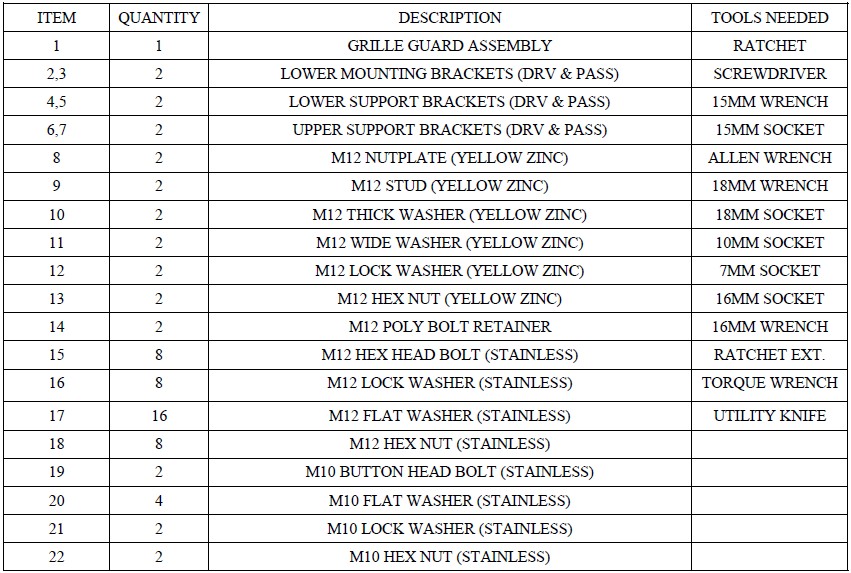
ANTI-SEIZE LUBRICANT MUST BE USED ON ALL STAINLESS STEEL FASTENERS TO PREVENT THREAD DAMAGE AND GALLING
1. Remove contents from box, verify if all parts listed are present and free from damage. Carefully read and understand all instruc-tions before attempting installation.
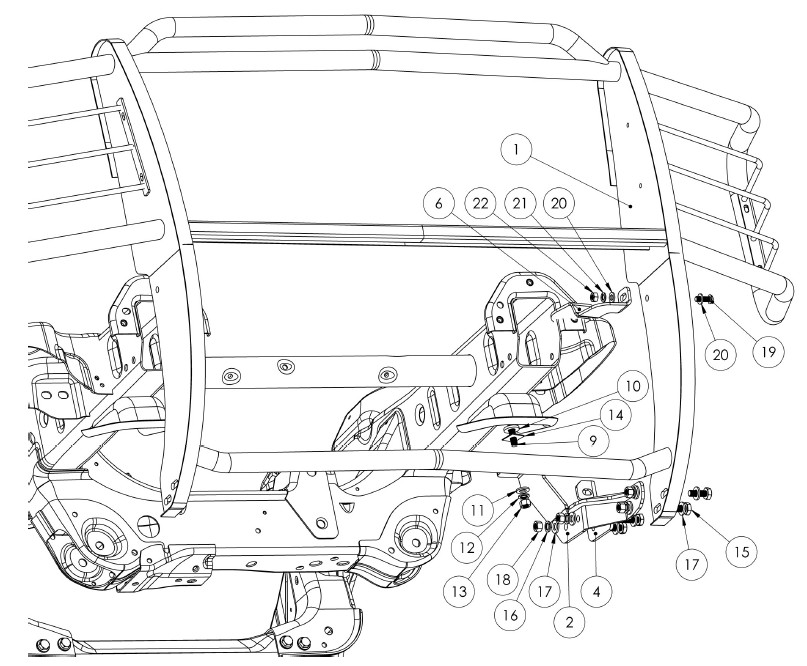
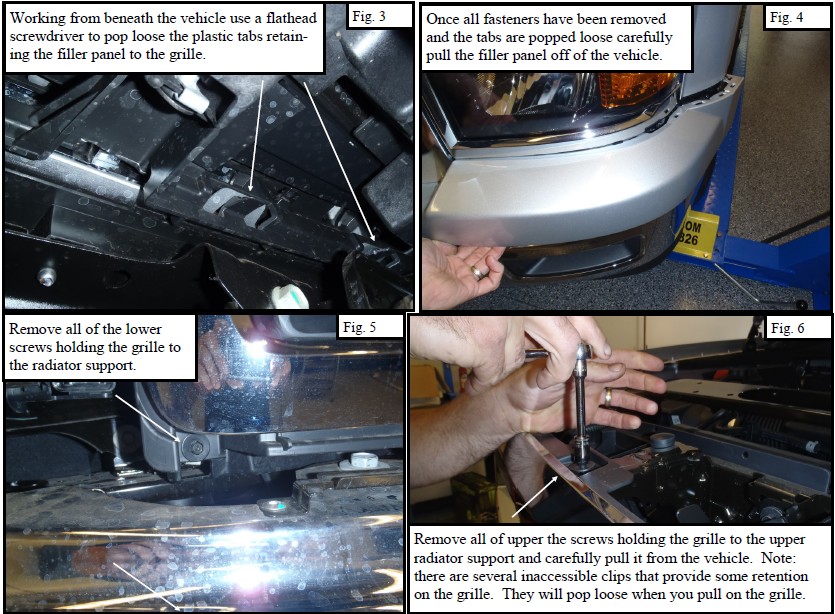
2. Remove the front grille and filler panel from the front of the vehicle (Figures 1 - 6).

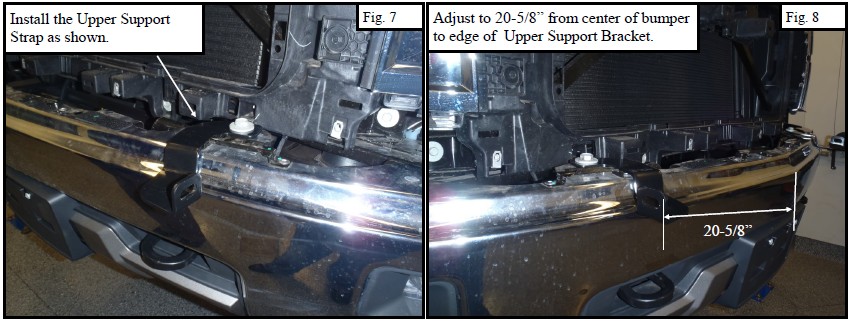
3. Starting on the Driver Side remove the M12 bumper bolt and loosely install the Driver Side upper support strap (Figure 7).
4. Repeat step 3 for the Passenger Side.
5. Measure from the middle ridge of the bumper face channel to the outer edge of the each support bracket. Adjust the brackets to approximately 20-5/8” (Figure 8). Tighten the brackets to 50-55 ft-lbs.
6. Verify that the distance between the tightened upper support straps is less than or equal to the distance between the upper mount points on the grille guard. These brackets cannot be adjusted once the filler panel has been re-installed.
7 . Re-install the grille and filler panel in the reverse order that they were removed.
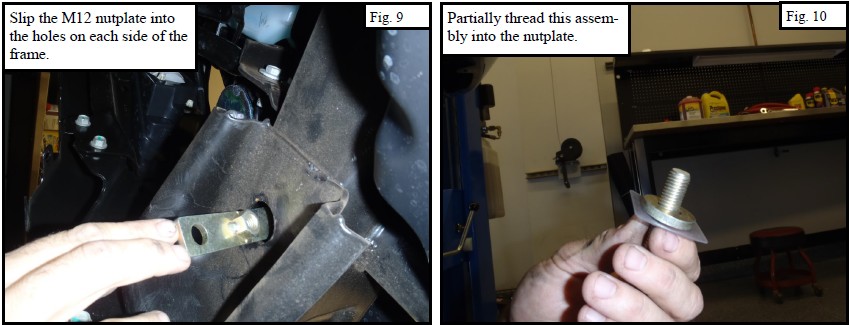
8. From beneath the vehicle slip the supplied M12 nutplates into the large holes in the bottom of the frame as shown (Figure 9). Make sure the flat portion of the nutplate is on the bottom of the frame and center the threaded portion in the middle of the hole.
9. Assemble the thick M12 washer and poly washer on the M12 stud (Figure 10). Partially thread the assembly into the nutp late previously placed inside the frame. The thick washer centers the stud in the middle of the large hole. The poly washer prevents the washer from falling off.
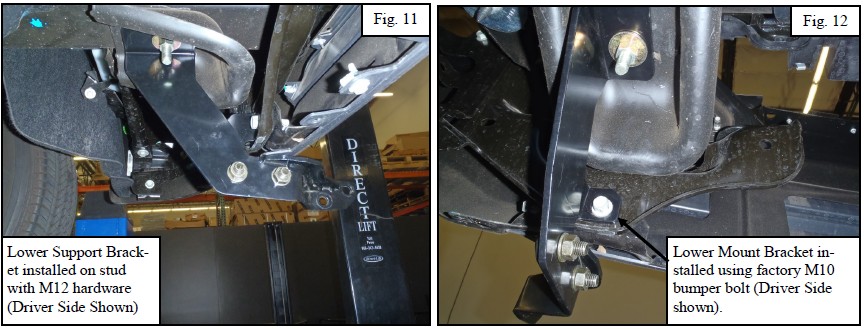
10. Loosely install the Lower Mounting Brackets on the studs using the supplied M12 hardware (Figure 11). Note: The lower plastic valance will either need to be trimmed or permanently removed in order to accomplish this.
11. Remove the lower M10 factory bumper bolts. Re-use them to loosely install the Lower Support Brackets (Figure 12).
12. Loosely attach the lower support brackets to the lower mount brackets using the supplied M12 hardware.
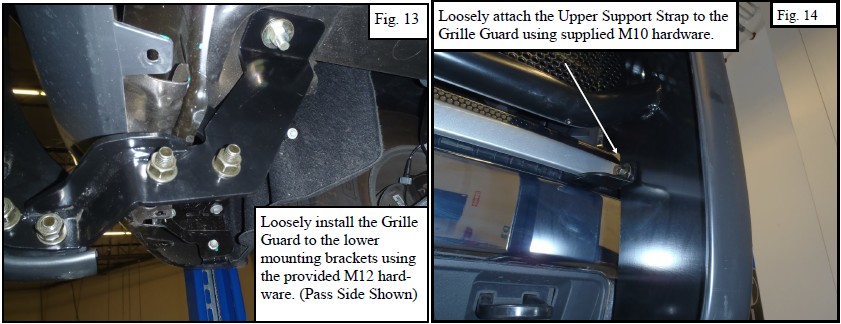
13. With assistance loosely install the Grille Guard on the lower mounting brackets using the supplied M12 hardware (Figure 13)
14. Loosely bolt the Upper Support Strap to the Grille Guard using the supplied M10 hardware (Figure 14).
13. Align and adjust the Grille Guard as necessary. Tighten all remaining hardware; M10 to 30-35 ft-lbs., M12 to 50-55 ft-lbs.
14. For the 57-3680 HDX Grille Guard, headlight glare may exist from light reflecting off the wings. If this condition exists use the supplied black anti-reflective tape on the back of the wings to reduce it.
CARE INSTRUCTIONS
● REGULAR WAXING IS RECOMMENDED. DO NOT USE ANY TYPE OF POLISH OR WAX THAT MAY CONTAIN ABRASIVES
● STAINLESS STEEL PRODUCTS CAN BE CLEANED WITH MILD SOAP AND WATER. STAINLESS STEEL POLISH SHOULD BE USED TO POLISH SMALL SCRATCHES
● GLOSS BLACK FINISHES SHOULD BE CLEANED WITH MILD SOAP AND WATER