FREE 1 to 3-Day Delivery on Orders $149+ Details
How to Install T-REX Upper Class Series Upper Overlay Mesh Grilles - Black (14-15 Silverado 1500) on your Chevy Silverado
Tools Required
- Socket Set
- 10mm wrench
- Flat/Phillips Screw Drivers
- Drill and 3/16” Bit

Shop Parts in this Guide
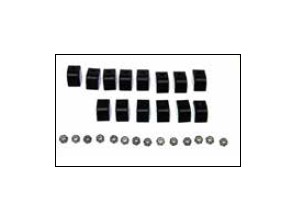
PARTS LIST:
(14) 1/2” L-Brackets
(14) 6/32” Nylon Lock Nuts
PLEASE READ AND UNDERSTAND ALL INSTRUCTIONS BEFORE INSTALLATION. Auto makers offer varied models to each vehicle and occasionally manufacture more than one body style of the same model. To assure your part is correct; our tech department can be contacted at [email protected] to verify fitment or assist with tech questions. All other inquires can be directed to [email protected]. In the event you do not have internet access please call 1-800-287-5900.
Step 1
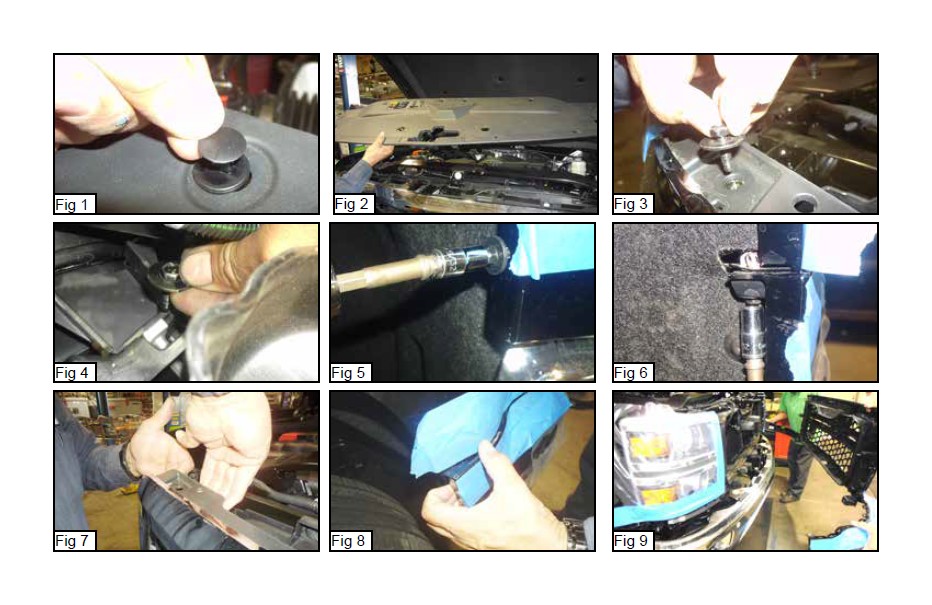
Factory Grille Removal
Remove 12 plastic pop clips from the top of the plastic radiator cover with a flat screwdriver. Remove the plastic radiator cover (Fig 2). Remove four 10mm bolts from along the top of the factory grille (Fig 3). Remove four 10mm bolts from the bottom of the factory grille, two are on the corners and two are in the center of the bottom of the factory grille (Fig 4). These can be accessed from underneath the vehicle or by reaching down through the top of the engine compartment. Remove two 6mm bolts from the forward section of each front fenderwell where the bumper meets the fender (Fig 5 & 6). Now pull up on each top corner of the factory grille while pulling slightly forward, this will release the top of the factory grille (Fig 7). Now grab the top plastic bumper cover at the fenderwell where it meets the bumper (this is where you removed the bolts from earlier) and pull the bumper cover outward until it un snaps (Fig 8). Now remove the factory grille (the top plastic bumper cover is connected to the factory grille and will be removed with it (Fig 9). Place the grille/top bumper cover on a workbench.
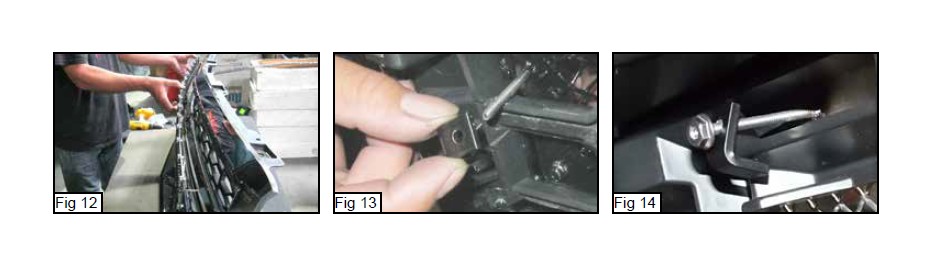
Step 2
Grille installation
Take the two mesh grilles and insert them the openings in the front of the factory grille (Fig 12). On the backside of each mesh grille are several threaded studs, place the 1/2” L-Brackets on the threaded studs (Fig 13). The L-Bracket will latch onto the backside of the factory grille. Now place a nylon lock nut onto each threaded stud after the L-Bracket and tighten (Fig 14). Replace the completed grille on the vehicle along with all the hardware removed in step 1.
Installation complete