FREE 1 to 3-Day Delivery on Orders $149+ Details
How to Install Stainless Works 3 in. Dump Style Cat-Back Exhaust (2017 Raptor) on your Ford F-150

Shop Parts in this Guide
Thanks for purchasing a Stainless Works Catback system for your 2017 Ford Raptor. Our team has done our very best to ensure that this product is the premium in performance, quality, and fitment. We are proud to say that this system will unleash the true character of your vehicle. We encourage you to read through the following steps, and check the included Bill of Materials before beginning. Please follow these steps to ensure that your installation goes as planned.

a. Disconnect the battery before starting work on the exhaust system for your vehicle. Reconnect the battery when the job is completed.
b. Your exhaust system can be installed by a weekend warrior but the use of a lift is recommended for ease of installation. If using a jack, the vehicle must be placed on a level hard surface. Jack stands are required for safety reasons.
c. You will assemble the components together as specified below, but only snug the clamps as you move along from front to back. After aligning all the components in the vehicle, you will tighten all the clamps working from front to back of the vehicle.
d. When installing your catback bumper exit system, make certain that the hangers at the end of the exhaust have at least ¾” of clearance to the bumper. The exhaust will grow over ½” in length and can possibly damage the bumper. If the end of the hangers are too close to the bumper, then you must make sure that you have everything pushed forward onto the slip fit joints more fully, starting with the X-pipe.
DISASSEMBLY
1. 1. Disconnect battery.
2. Raise and support vehicle.
3. Loosen clamps at rear tails.
4. Remove the right and left tail pipe hangers. Remove (2) nuts (10mm socket) from rear-most hangers. Remove (2) bolts (10mm socket) from each of the other tail hangers near the spare tire.
5. Remove the right and left tail pipes, saving the hangers and hardware for reinstallation.
6. Loosen the clamps in front of the rear muffler. Remove the (2) bolts (10mm socket) that hold the muffler hanger to the frame then remove the hanger. Remove rear muffler assembly.
7. Loosen the clamp on the right pipe in front of the resonator and remove (2) bolts (13mm socket) from the left pipe. Remove the front resonator assembly.
SW DOWNPIPE INSTALLATION
8. Reinstall the muffler hanger using the original (2) bolts.
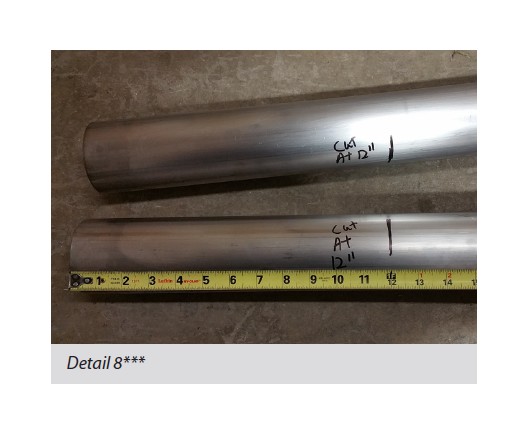
***SuperCab Models: Before installing the catback inlet tubes, SuperCab models will require some minor trimming. Measure 12” from the outlet end of each tube, mark and cut at this location. Deburr the end of the tube after cutting.
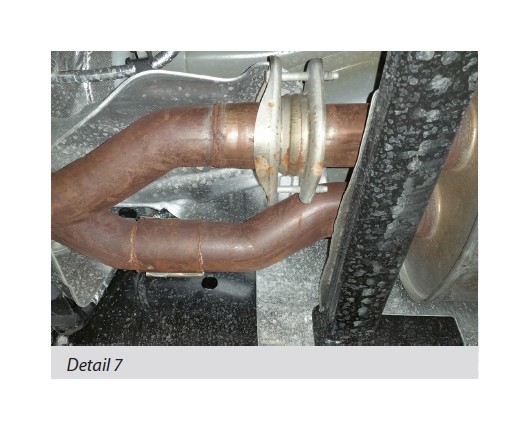
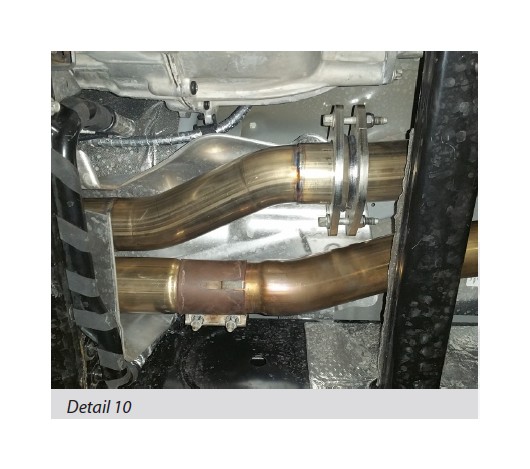
9. Install the right-side inlet tube to the factory or SW downpipe, using the factory clamp.
10. Install the left side inlet tube using the supplied donut gasket #31556 and the supplied 10mm hardware.
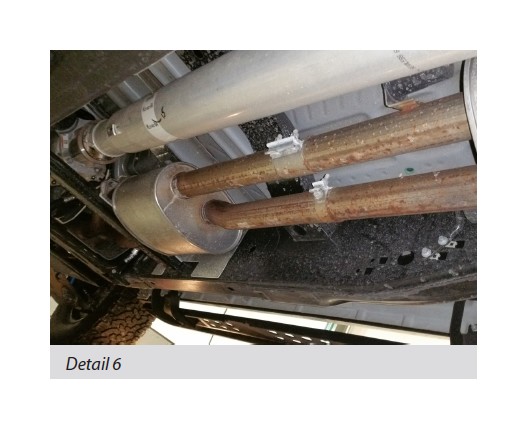
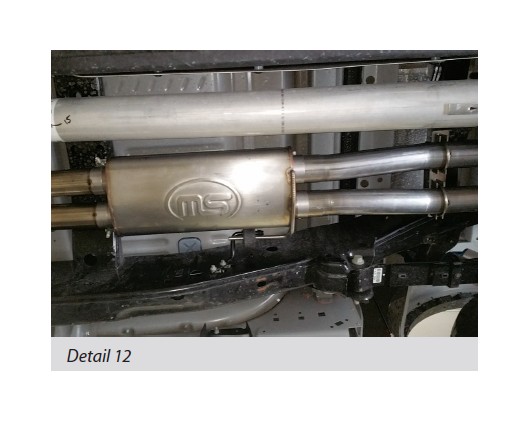
11. Install the muffler hanger into the rubber insulator. Assemble the muffler to the inlet tubes using (2) 3” clamps.
The following steps are for the full catback with under bumper exit (FTR17CBUB). If you are installing the SW high clearance dump exit (FTR17CBDP) you can jump ahead to step 16.
12. Install the right and left front tailpipes to the muffler using (2) 3” clamps. You will also assemble and install the tailpipe hanger using the (2) 3” U-bolt clamps.
13. Install the bumper hangers and mid hangers that were removed earlier onto the rear tailpipes.
14. Install the rear tailpipes to the front tailpipes using (2) 3” clamps, then reinstall the hangers to the vehicle using the original (2) nuts or (2) bolts at each location (10mm socket).
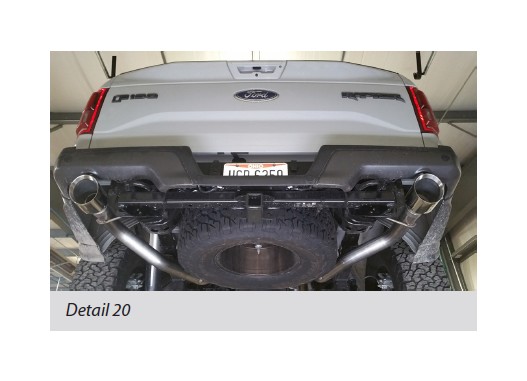
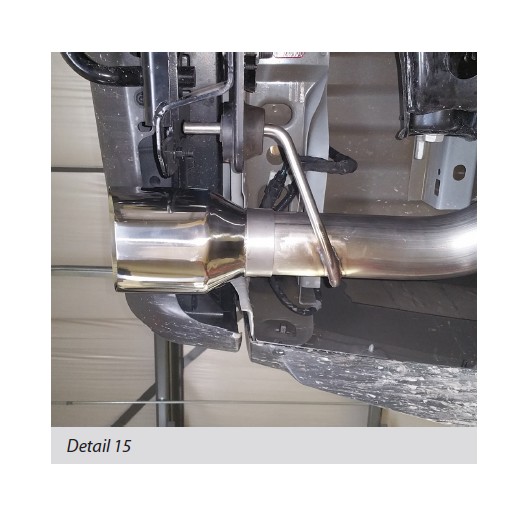
15. Install the tips using (2) 3” clamps.
The following step is for the SW high clearance dump exit (FTR17CBDP). If you are installing the full catback with under bumper exit, jump ahead to step 17.
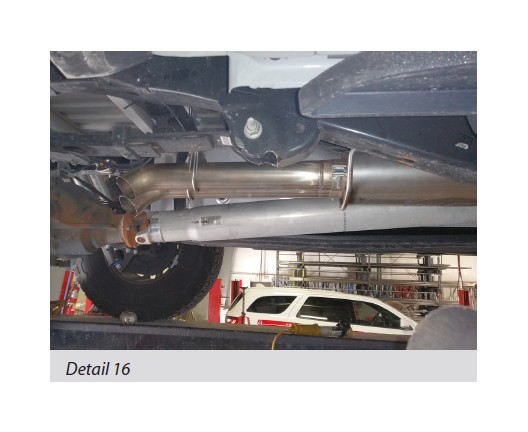
16. Install the resonated turn-down tips using (2) 3” clamps at the muffler. Install the supplied tailpipe hanger using the (2) 3” U-bolt clamps. Orient the tips as shown, turned down and towards the passenger side of the vehicle. Notice the left side tip has a small amount of extra straight at the outlet.
17. Adjust and tighten starting at the front and leveling from side to side.
18. Lower the vehicle.
19. Reconnect the battery.
20. After double checking for clearance and making sure all lines, wires, and hoses are secured, drive the car for 10-20 miles and re-check all clamps and clearances. Your system can be tack welded at the joints/clamps to reduce shifting of the system during heating and cooling cycles. Be sure to disconnect the battery before performing any welding.