FREE 1 to 3-Day Delivery on Orders $149+ Details
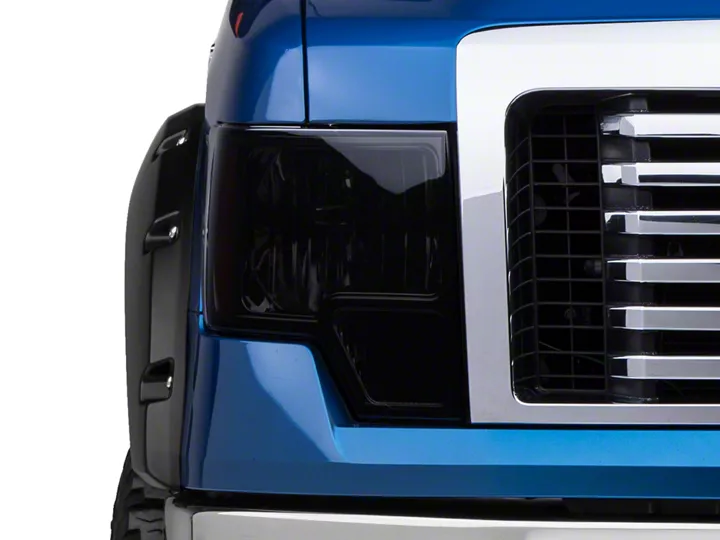
How to Install Smoked Euro Style Headlights on your F-150
Installation Time
1 hours
Tools Required
- flat wrenches
- socket wrenches
- rivet gun (on certain vehicle applications)
- screwdriver(s)
- Torx head bits (if applicable)
- electric drill (if applicable)
Shop Parts in this Guide
HOW TO INSTALL A SET OF CUSTOM HEADLAMP ASSEMBLIES
Our custom headlamps are sold in pairs, designed to fit in the exact location of your factory units, and cost less than you might think. In the scope of this article, we'll review the step-by-step basics of installing complete custom headlight units designed for your specific vehicle.
REMOVING & INSTALLING BUMPER COVERS (IF REQUIRED)
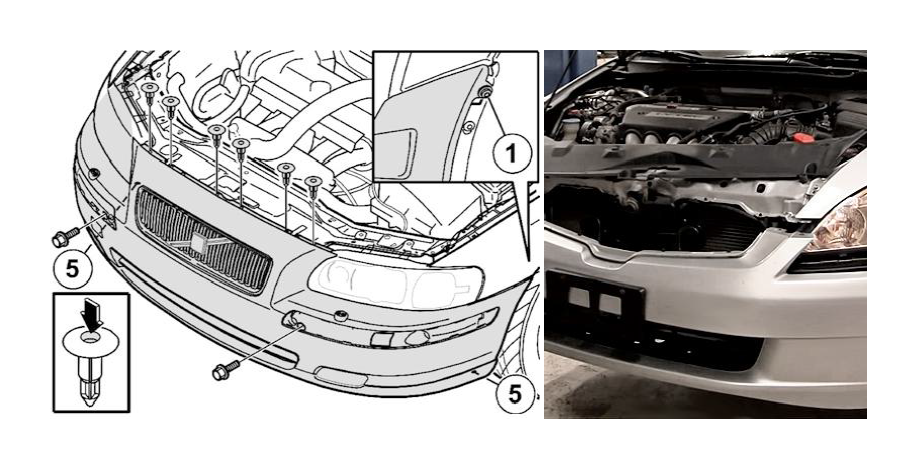
This is often the first step because many modern vehicles require the plastic front bumper cover to be slid loose an inch, or completely removed in order to access the anchor points where headlight assemblies bolt on. If you're not sure whether this step is needed, we recommend checking with your vehicle manufacturer or accessing a repair manual online. Removing and re-installing the front bumper cover is relatively easy because most are designed to unbolt and slide off with basic hand tools.
Taking a close look at the bumper cover, you'll notice that the bolts which secure it in place are typically exposed once you open the hood. They can also be found underneath the vehicle where the bumper cover meets splash shields, and near the edge of wheel well openings where wheel well liners meet fenders. There may also be small plastic caps or clips covering such bolts, so remove them with a small flathead screwdriver.
Remove the bolts themselves with an applicable socket wrench or flat wrench. In the event your vehicle manufacturer has used rivets to secure things (wheel well areas), they'll need to be drilled out with a traditional drill. Then you'll need a rivet gun to reinstall new ones - not an expensive purchase, but the proper tool to use. When drilling out rivets, bits designed for drilling into metal are most suitable due to a higher heat rating.
Once all fasteners are removed, the bumper cover can be detached. Many are designed to slide horizontally along special bracket pieces mounted underneath before coming completely loose, so move the bumper cover in this fashion first if you aren't able to obtain specific instructions on your make and model.
UNBOLTING YOUR OLD HEADLAMP ASSEMBLY
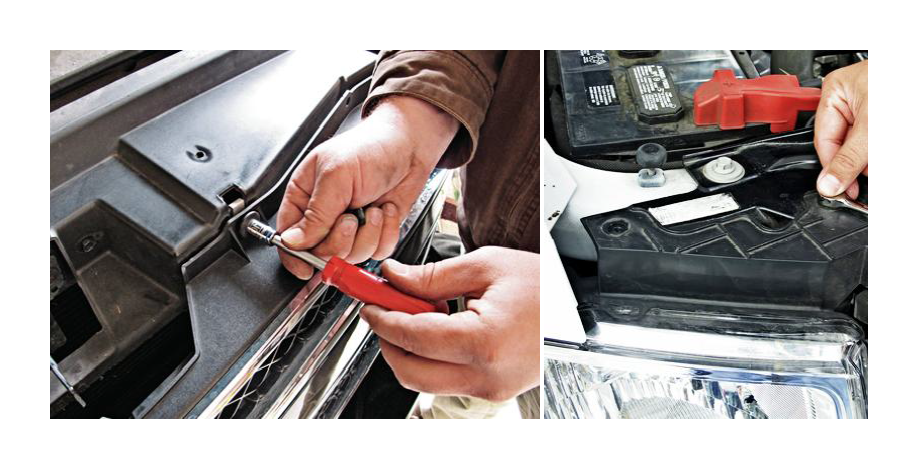
Depending upon the year and model of your car, you may need to remove your vehicle's front grille section in order to access bolts or clips that secure the headlight assembly in place. This can be done by removing the screws from the top or sides of the grille and/or by releasing hold-down clips found on some vehicles with a flathead screwdriver.

Once any grille, trim, and bumper cover sections have been removed in order to provide access to headlamp assembly attachment points, you can proceed with unbolting them - usually a small socket wrench serves best for such applications. Look for hold-down bolts in the metal body panels above and to the side of your headlamp assemblies. Some vehicles also feature hold-down clips on the headlamp assembly which can be released with a flathead screwdriver.
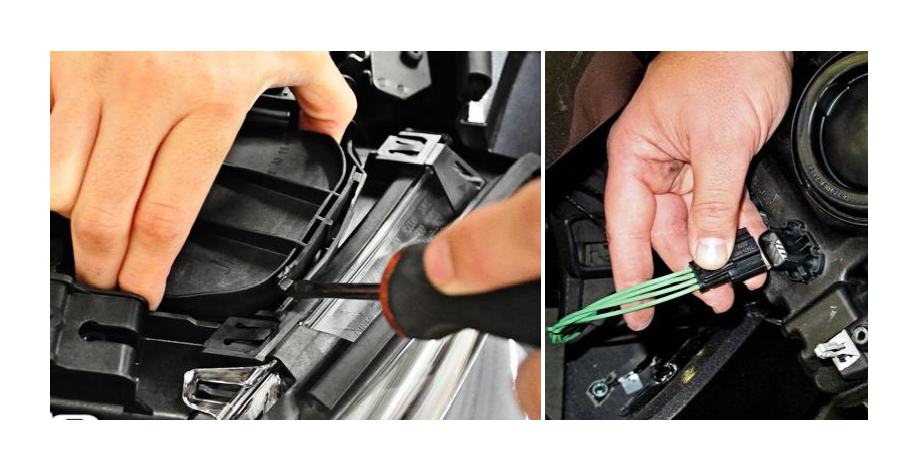
After all applicable hold-down bolts and clips have been removed, it's time to slide your old headlamp assembly away from the vehicle - wiggling it gently as you go. Remember, unless you disconnected them earlier from behind, electrical wiring harnesses are still attached. Don't remove any bulbs from your factory housings just yet. Set your OEM headlamp assemblies aside, in the event that you wish to reinstall them one day, for example, if you decide to sell the vehicle.
DISCONNECTING AND RECONNECTING ELECTRICAL WIRES
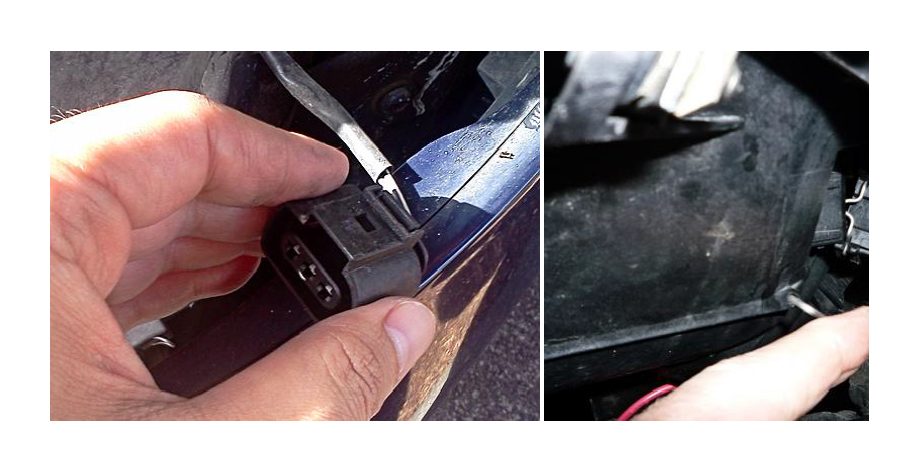
Once you've pulled the old headlamp assembly away from the vehicle a short distance, it's time to get a full look at wiring harnesses that are attached. Even if you've removed one or more connectors from the rear of the assembly before unbolting it, there may be others (such as separate wires to side marker bulbs) still attached which were previously obscured. Once you can see everything, unhook any and all electrical connectors from the back of the headlight assembly. Usually, either a simple squeeze on the edges of the connector or pulling up on a tab is enough to cause the connector to release its grip, but if a thin wire bar is present, it usually needs to be slid into an unlocked position first. If you're not sure how a locking clip is designed to release, it's best to further research instructions for your make and model.
You are now ready to begin installation of the new lights. We will make all of the electrical connections first, while we have access to the backs of the assemblies. Then we will perform the mechanical install into the front of the car's body.

TRANSFERRING BULBS FROM OLD TO NEW ASSEMBLY
Depending on your year and model car, plus the design of the new custom lights, you may need to transfer some bulbs. In general, the new light will include low/high beam headlight bulbs. In many cases, the turn signal (incandescent) bulb is not included in the new assembly. This is very easy to rectify. You will need to remove the signal bulb from the old lamp (do NOT disconnect any wires) and install it, in its existing housing, into the new lamp. There may be a paper sticker which needs to be removed first.
THE PLUG'N'PLAY PORTION OF THE INSTALLATION
Both your old and new headlamps have low and high beam headlamps. When you removed the old units, you disconnected an electrical plug from the car or truck's wire harness. On the new assembly, you should find an electrical plug shaped exactly like the plug on the old assembly. This portion of the electrical install is called 'plug'n'play' because you literally only need to connect the new plug into the existing harness. If you have purchased lamps without any additional lighting elements like halos or LED lights, you are done with the electrical install.
CONNECTING THE EXTRA WIRES FOUND ON HALO AND LED CUSTOM HEADLAMP ASSEMBLIES
When you install custom headlamp assemblies equipped with additional halo and/or LED lights ("bonus lights"), you're going to find extra sets of wires. In the typical installation, there will be one pair of wires for each additional light. Within each pair, one wire will be 'positive' (usually red or white) and one will be 'negative' (usually black). Assuming you want the LEDs and halos to switch on with the headlights, you'll be splicing both white wires together and both black wires together.
However, should you prefer these lights be triggered by your vehicle's daytime running lights (DRLs), parking lights, or even turn signals, the wires can be connected to separate power wires for those items instead. For example, if they're wired into the DRL harness, the world will see them anytime your DRLs are on during the day. Or, connect them to parking light wires to show them off when you're parked on the street at cruise night (they'll also flash every time you use keyless entry). Because wiring harnesses for different lighting functions vary from vehicle to vehicle, we recommend researching locations and wire colors for your specific make and model. Use a test light or multimeter (DMM, or digital multimeter) to probe the factory harness. Be sure to turn on the lights for the circuit you are pursuing so that it shows up as "live".
Once you've decided which wires you want connected, use a wire stripping tool (we offer a selection in our Wire & Cable Tools section) to remove an inch of the colored insulation at the end of each wire. The "power" wire needs to be connected to the light circuit. The "negative' or "ground" wire can be connected to any convenient vehicle ground point. However you choose to permanently splice the wires together, you'll find all the odds and ends you need (butt connectors, quick splice connectors, crimp caps, etc.) in the Connectors & Terminals section of our website.
Before bolting your new headlight assemblies back on the vehicle, check the back of them to see what type of knobs, screws, or fittings are there for the purpose of adjusting headlight aim. Look for applicable hand tools that provide grip, and put them to the side. Test all lights and turn signals to ensure they're functioning properly. Once that's been confirmed, tighten the new headlight assemblies firmly into place and reinstall all other components in the reverse order of removal.