Guaranteed Free Delivery by 12/24! available on most items - Details

Talk to a F-150 Enthusiast
1-888-706-1096
M-F 8:30A-11P, Sat-Sun 8:30A-9P
Win $4,000! Enter Daily

S&B Cold Air Intake with Oiled Cleanable Cotton Filter (18-23 3.5L EcoBoost F-150, Excluding Raptor)

Item T543339
Call a F-150 Enthusiast at 1-888-706-1096
M-F 8:30A-11P, Sat-Sun 8:30A-9P
$0.00
Our Price

$349.00 (kit)

FREE Shipping Market Price $401.35 You Save 13% ($52.35)

Will this fit your Vehicle?

Select a different vehicle Help?
Update or Change Vehicle
Ship to: Ashburn - 20149
Sorry, please enter a valid US or CA postal code
We're sorry, zip can't be updated at this time.
Recommended Install Shops
How It Works
Install Shops are available near Ashburn - 20149

Add Local Shop Installation

Total cost of service $175.00
    Create a list
    Add to New List

    Saved - View your saved items

    We're sorry. We couldn't save this product at this time.

      Video Review & Installation

      Justin: The S&B cold air that we have here today would be an awesome choice for the 2018 through 2020 3.5L EcoBoost owners who are looking for one of the nicest sealed options available at a very attractive price point.The S&B will feature a durable ABS plastic build, reusable oiled filter, and will not require the use of any custom or canned tuning. Price point for the 5-star rated option here is going to live in that mid $300 range, and is backed by S&B's signature million mile warranty. I always like to say, intakes are one of those gateway mods that often times gives truck owners the ability to get comfortable with modifying their own rigs at home.Not only is there an instant improvement in both appearance and performance, but the satisfaction of tackling something like this on your own in the driveway or garage is certainly going to build confidence for the next modification.The S&B that we are talking about here today is going to be one of the most popular in the category for the EcoBoost truck with well over 100 5-star reviews, and as always guys, I'm going to encourage you to read up on some of those first as it will definitely help to hear from fellow EcoBoost owners when making your final decision on the topic of an intake.As far as your major components are concerned, well, two biggies are going to jump out at me. First and foremost, you are getting a very nice sealed enclosure that's been designed and built extremely well. Sealed enclosures are always going to get a thumbs up for me personally as they're going to be one of the best bets at reducing high intake air temperatures, especially when the truck is stationary.When you're moving, obviously, it's not a big deal. But if you're the type of truck owner who sits in traffic a lot, especially in a hot climate, this can definitely be a factor and help contribute to a sluggish-feeling truck. Inside that sealed enclosure will be one of S&B's signature oiled filters. The general rule of thumb here when we're talking oiled filters is that they're going to flow a little bit better compared to a dry filter. However, the dry filter will capture more particles overall, but really not a huge concern here because, again, the filter is enclosed, and therefore, that will limit the amount of dust and elements that the filter will inevitably see.The only drawback to an oiled filter such as this is that they might require a little bit more maintenance when being cleaned and re-oiled. However, those dry filters, you don't have as much flexibility when it comes time to clean them. Basically, you're just going to blow them off with some compressed air, that's about it. These guys, you can actually rinse off, re-oil, and will basically last you the lifetime of your truck.As far as benefits, well, obviously, a more modified under hood appearance is one, but also, the biggie here is expecting a little bump in both horsepower and torque. We're not talking 20, 30 wheel horsepower from this alone, but typically, high single digits, low double digits for both horsepower and torque depending on the condition of the system and filter you are replacing.If you're replacing something that's been on the truck forever, dirty, clogged up, then obviously, you're going to see some bigger gains overall.Owners will also sometimes benefit from things like improved throttle response, and even in some extreme rare cases, fuel economy, but obviously, those experiences are going to differ depending on how heavy your foot is. But outside of the sealed enclosure, again, extremely nice here with the S&B especially at this price point.The rest of the components here are pretty straightforward, pretty simple. We already covered the filter of course in that airbox, but you're also receiving a rotor-molded plastic intake tube along with a fresh snorkel that's going to mount on the radiator cover right in front of the intake itself. I like that. One of the only companies by the way to include that, and that is a very nice piece.You're also of course getting all the nuts and bolts, the hardware, the clamps, everything needed to get the system in place. Again, this kit does not require any tuning whatsoever guys, so you can throw this thing on and go right out of the box without the need for essentially anything else.But now, we want to segue into that installation process, and the site's going to call this a two out of three wrenches on a difficulty meter. I think that's a bit on the strong side. But regardless, leave yourself about an hour or so, and you should be good to go.But to give you a better idea of just how this job will go down on your Eco at home, here's an American Trucks customer to walk you through it.Man: Real quick, just to go over the tools that I used in this installation. It didn't recommend using an impact. I like to use that whenever I'm tightening hose clamps and things like that. But you did need an 8 millimeter and a 10 millimeter for all your hose clamps. They're all 8 millimeter. This was Phillips 8 millimeter, 8 millimeter on the inside there as well on the filter clamp.And then, you had a 13 millimeter. It went on the inside of the airbox that mounted to the fender. I do recommend having a pair of snips, because at one point, they do actually have you using zip ties. You know, you always have to cut the extra off the end of your zip ties.First step is to disconnect the negative battery terminals. That's a 10 millimeter. I'm just going to go ahead and use my impact. Pull that off to the side, make sure that you don't lose your nut. Second step is to loosen this clamp up here. You can use a flathead if you want.Third step rather is to loosen the clamp leading to the passenger-side turbo. Fourth step, loosen the clamp to the driver's side turbo, if I can find it. All of the other hose clamps that we're going to be installing, we're probably going to leave them loose until the very very end to make sure that we have everything positioned right. But for now, this one actually says to tighten it up front.We're going to be installing the front inlet onto the airbox. It says you use two plastic rivets on each hole and inch them together to lock them in. All right. There we go. Supplied rubber grommet for the engine air intake temperature sensor. Simple enough. Now, we're getting into the couplers and hose clamps.You get two different size couplers and two different size clamps. There is one for the larger side and one for the smaller side. I'm going to go ahead and install the hose clamps on here. That's going to be positioned this way. This is on here. And then, you position the hose [inaudible 00:08:14].If you look down in here, there's actually two grommets inside where the factory airbox was. And on the very bottom of the new airbox, these will tip down into those grommets, and then, this is going to mount in the same place as our factory airbox did.We're just going to pop this down into the truck, leave it in the right spot. That was easy enough, fell right into place. Make sure you get your wires back here out of the way. The next step it says is to install that 13 millimeter again.It says to remove the O-ring off of the intake air temperature sensor before installing it. And when you're trying to install it into the tube, you want to use a spinning motion. And there is a line on the tube that you're supposed to line up the tab on the sensor with. I'm going to keep all of these factory parts just in case something happens and I have to go back to the factory airbox.To install, it says you use a twisting motion. There's the tab it tells you to line up with. Feels pretty snug, so I'm going to leave it like that. I'm going to try and squeeze this air filter down to the intake. That's no big deal. I'm just going to pick up my intake tube and try to avoid everything else in the engine bay while I make this fit through that hole.It's not sliding super easy, but it isn't impossible. All right. It is in. Everything's a little bit lined up here. It says try to align the inlet tubes on the turbos, the big one down here and the small one up here, with the intake tube. That way, whenever you get to tighten it down, it's not going to be that big of a pain.This bottom one, pretty well [inaudible 00:11:41]. I'm going to back it out a little bit because I think I might have tightened a little bit too much. Just take that little bracket right here. Take this nut, bolt, and washer, and I'm going to put this through. And then, on the inside of the airbox, put the washer on.Hopefully, with that vacuum thing hanging here, I'll still be able to access the hole. It would have been real, real helpful to have done before at this point. That nut head, the bolt head is a 7/16, the nut, 11 millimeter seems to fit it.Now that I actually have that bracket, that vacuum hose actually fits right on. They want you to go ahead and mount the air filter, which I don't like how they have this on here. I'm actually going to take the clamp off the filter if I can get it off if it's still in the airbox because I would prefer to tighten it with it facing me, not facing the opposite direction.Anybody else watching this, go ahead and take it off before you drop it in the airbox just to make it a little bit easier on yourself. Slide the filter over the intake tube. Like I said, getting to it is important to me. Swap that around. It says to go ahead and tighten the clamp on the air filter whenever you get it clamped on the outside of the intake tube.You don't want to get crazy tight on any of this. It is rubber and plastic, so it grips pretty well. I don't think it's going to rattle loose or have any air leaks or anything. Definitely tighten. Don't go crazy with it. Don't overtighten your stuff.You know why I was having so much trouble with that? Because earlier in the instructions, it did tell you to slide the coupler as far back as you could. That way, you can align the intake tube with the turbo inlet on this side. I probably tightened that up just a little bit too much. But it is very frustrating for them to fall off while you're trying to mount them.Just going to loosen them up just a little bit more and see if I can slide the coupler down now that we have it lined up, and it's going down pretty easy. There is a tab on the side of this inlet tube. When you've got the coupler slid down far enough, you'll meet that. What I am noticing is that these clamps do kind of get into position where it's difficult to get to them, so as you're maneuvering, you want to try and get the head of the bolt facing you because you've got all these PCV tubes and everything in here that's going to, they're going to get in your way.I'm going to get those facing where I can get to them. And then, it says to do the exact same thing over here on the passenger side turbo inlet. We've got [inaudible 00:15:44]. Immediately, it's looking like they're not going to line up overly well, and that's what sliding the coupler forward is for, and why you leave everything loose until the very, very end.I think I've got that as far on as it's going to go. It does say to go ahead and tighten up your hose clamps once you've gotten that far. Let me go ahead and just do this by hand a little bit before I use my. Again, not the easiest to get to, but it's not terrible. And once they tighten down, they stay in place a little bit better.Let me make sure I can feel all the way around. They're on pretty good. If I can help it, power tools are always better. Be careful not to overtighten if you're using an impact. It's kind of snug. It does seem like they're wanting to drift apart. You can see there's a little bit of play, a little bit of wiggle room, because the only way this mounts is onto the turbo over here, there's nothing holding that in place.And it's a rubber boot down at the turbo, a coupler like this as well. Just make sure that you've got the same thing on this side as you do over here. You've got these tabs that help the coupler, let you know that the coupler is as far on as it's going to go, and then just hold your clamp in place. Get it snug.Again, do not overtighten with your power tools. I actually tightened up the clamps on the driver side first, maybe that contributed to this seeming like it didn't want to line up. It does say step 30 is to tighten your hose clamps on the passenger side turbo first, and then step 31 says to tighten the one. Live and learn. Just got a little ahead of myself.Your engine temperature sensor moved whenever we did this. It's all the way up here instead of being back here. They do supply an extension. It comes in this bag right here. I can say this is the...what am I doing? This is the wire, and it used to mount right about here.They give you an extension, and there's this other bracket we had to disregard because it didn't matter to this year model vehicle. This is the extension that it says to use. And from right off the bat, it looks like the smaller one goes into this end, the bigger one goes on this end.Over here on the back of the airbox where we removed this wire, there's holes drilled into the aftermarket airbox to allow you to push these tabs back in and hold them into place. [inaudible 00:19:41] currently. There it is, down here below the S&B logo is what it says.That's in place. But it's kind of behind this, I don't know what this is, something to do with the brake booster. It's a little bit behind that, but you can still wiggle the tab in there and push it into the hole.All right. It's telling me to go ahead and install the two plastic rivets into the front inlet here which is going to hold it down to our firewall. You get two of these. You're just going to line them up with the hole, push them down first, and then push them down again.We're going to peel the covering off the plexiglass now. Now, we're going to take this rubber seal that they gave us, and what does it say whether to start on the side or in the corner. I'm just going to start right here in the middle I guess.Again, guys, I'm not a mechanic. I'm not the most graceful person working with my hands. If you're sitting at home watching me struggle on this, you'll have to forgive me. I just like to tinker a little bit. And then, you're going to place the lid on top of the airbox. You can go ahead and get them started finger-tight.I'm going to go up here at this top corner [inaudible 00:22:02]. I'm actually going to snug these up with my impact. It specifies do not overtighten, so I'm going to be very careful with this. Once that washer flattens out, I'm just going to quit tightening. And once you tighten the bolts, or the screws down, it actually definitely makes the plexiglass fit a little bit nicer, lines the holes up better.We'll come over here and get our negative terminal back on, get a little sparky spark going on there.Justin: But wrapping this one up guys, if you're looking for one of the highest-rated intakes on the site for your EcoBoost at a very attractive price point, well then you have to consider the S&B for your rig right here at americantrucks.com.

      Product Information

      Features, Description, Reviews, Q&A, Specs & Installation

      Features & Specs

      • Horsepower and Torque Gains
      • Quicker Throttle Response
      • Reusable High-Flow Oiled Air Filter
      • Tough Polyethylene Intake Tube
      • No Required Tuning
      • Enclosed in an Airbox
      • Direct Installation
      • Backed by a Million-Mile Warranty
      • Not CARB-Certified
      • Fits 2018-2023 3.5L F-150 EcoBoost Models, Excluding Raptors

      Description

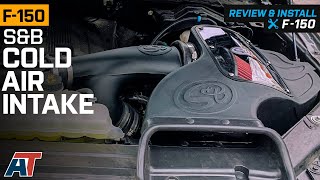
      Horsepower and Torque Gains. Make your truck a more powerful off-roading vehicle by equipping it with this S&B Cold Air Intake that includes an Oiled Cleanable Cotton Filter. With this cold air intake’s superior performance, your truck will be able to gain more horsepower and torque, allowing you to conquer the most challenging trails.

      No Required Tuning. Installing this cold air intake is hassle-free and does not require any tuning. You only need to perform a test drive to ensure that there are no air leaks and abnormal noises.

      High-Flow Air Filter. For the best filtration performance, this comes with a high-flow air filter. It is then equipped with an oiled cotton media that prevents dirt and particles from mixing with your engine’s fuel. Also, this filter is washable and reusable, allowing you to use it even after multiple cleaning cycles.

      Tough Construction. Built to handle your truck’s heavy-duty performance, this cold air intake is made using high-quality materials. With its premium and tough construction, it won’t easily fail or break provided it gets regular care. What’s more, the included airbox helps extend the intake's life by protecting the unit from too much heat and debris.

      Direct Installation. Anyone with a light to moderate mechanical expertise can install this product. Built as a direct replacement for your factory intake, you can mount it to your truck’s factory location points using a few basic hand tools.

      Backed by a Million-Mile Warranty. To cover any factory flaws, this product is backed by a million-mile warranty. To learn about the warranty claim process, you may contact customer service.

      Not CARB-Certified. This cold air intake is currently not CARB-certified. This means that this product is not legal for use in California or other states adopting its emission standards.

      Application. The S&B Cold Air Intake with Oiled Cleanable Cotton Filter is designed to fit 2018-2023 3.5L Ford F-150 EcoBoost models excluding Raptors.

      Shop All Truck Parts And Accessories

      Shop All Cold Air Intakes For Trucks

      Fitment:

      Details

      S&B 75-5122

      CA Residents: WARNING: Cancer and Reproductive Harm - www.P65Warnings.ca.gov

      Installation & What's in the Box

      Installation Info

      What's in the Box

      • (1) Air Filter
      • (1) Intake Tube
      • (1) Air Box
      • (1) Rubber Cuff
      • (1) Clear Lid
      • (1) Lid Seal
      • (1) Front Inlet
      • (8) Plastic Rivets, Interlocking Shank
      • (2) Plastic Rivets, Long Stem
      • (6) Hose Clamps
      • (6) Washers, Sealing
      • (6) Screws, Truss
      • (1) Hump Coupler
      • (1) Straight Coupler
      • (1) Grommet
      • (1) Vacuum Line Bracket
      • (1) Screw, Hex
      • (1) Washer, Flat
      • (1) Locknut, Nylon
      • (1) IAT Sensor Harness Extension
      4.9

      Customer Reviews (500+)

        Questions & Answers

        10 More Questions

        Will It Fit My F-150

        • 3.5L V6 EcoBoost - 18, 19, 20, 21, 22, 23
        • 3.5L V6 EcoBoost Limited - 19, 20, 21, 22, 23