Talk to a Silverado 1500 Sales Tech
1-888-706-1096
M-F 8:30A-11P, Sat-Sun 8:30A-9P
$20K Sweeps! 10 Chances to Win! Enter Daily >

S&B Cold Air Intake with Dry Extendable Filter (14-16 5.3L Silverado 1500)

Item S104459
Verify parts fit and get product recommendations.
Silverado 1500 Sales Techs: Connect Now M-F 8:30A-11P, Sat-Sun 8:30A-9P
$0.00
Our Price

$349.00 (each)

FREE Shipping Market Price $401.35 You Save 13% ($52.35) Up to 10% off for Military & First Responders! See Details

Will this fit your Vehicle?

Select a different vehicle Help?
Update or Change Vehicle
Ship to: Ashburn - 20149
Sorry, please enter a valid US or CA postal code
We're sorry, zip can't be updated at this time.
Recommended Install Shops
How It Works
Install Shops are available near Ashburn - 20149

Add Local Shop Installation

Total cost of service $175.00
    Create a list
    Add to New List

    Saved - View your saved items

    We're sorry. We couldn't save this product at this time.

      Product Videos

      Hey, guys. Adam here with americantrucks.com. Today we're taking a quick look at and installing the S&B Cold Air Intake with the Extendable Dry Filter. And this is available for all 2014 to 2016 Silverados and 2014 to 2018 Sierras with the 5.3 motor. You should be checking this out for your own 5.3 if you're in the market for an upgraded cold air intake to replace your factory airbox that'll filter out a lot more particles, bring in a lot more cold air, overall, make your engine perform and breathe a lot better and also give you a small bump in horsepower and torque along with throttle response. This particular intake is a huge upgrade as far as airflow is concerned. We have an extendable dry filter as opposed to an oiled filter that you see a lot in the aftermarket world. Although this is a paper element filter, the dry filter, of course, it has that conical shape, which is a huge upgrade over the factory flat paper element filter. This will do a lot better job pulling in air. As a matter of fact, S&B tells us that this upgrades up to 37.43% of airflow. 37.43% over the factory airbox is a huge upgrade. It's about a third more air you're pulling in. That is a big difference. That is because the extendible dry filter not only is a lot larger, it's also gonna filter out a lot more particles. Dry filters are typically known to be a little bit better of a choice for the guys out there in dry climate areas. Dry climate areas see a lot more air pollution as far as particles and dust is concerned. Dry filters do a little bit of a better job of making sure that those particles don't make their way into your engine bay, which, of course, prolongs the life and does a lot more for performance than some of the alternatives.Now, you might be asking what's the difference between a dry filter and an oiled filter? Well, dry filters are a little bit better for the guys out there in dry climate areas who see a little bit more dust and air particles polluting the air, which might make their way into the engine bay because this here will definitely do a little bit better job, making sure that you're getting a little bit less of that making its way into the engine bay. Whereas an oil filter, although does have the oil protecting it, making sure that there are no dust and particles, it's also gonna obstruct a little bit more airflow because those particles get stuck inside of the oil and it clogs up some of the gaps. This has a more free-flowing air gap, so a little bit more air is gonna make its way through the dry filter, but I will say as far as dry versus oil, they're within a small percentage of difference between performance versus the two, so really not that big of a difference, although dry filters will typically cater to the guys in dry climate areas.With that out of the way here, the rest of the kit, huge upgrade as well. Very different airbox when comparing this to the factory option. We'll take a closer look at these sitting next to the stock option once we get that uninstalled from our 5.3 Silverado we have right behind me. Everything you need to get the job done is included in the kit. But there is one thing about this kit I wanted to point out that it's pretty unique to the S&B collection. At the bottom of the intake, there is a square cutout with a rubber plug that actually just literally plugs this up. This is something you can just pop off and remove and as a matter of fact, it's going to open up the airways so that air coming through the grille is actually gonna shoot up from the bottom and go into the intake, actually giving you a lot better airflow. You can unplug this if you're on your way to the track, if you're looking for a little bit more performance. So that is an option there S&B includes, which I think is a really nice touch as far as quality and performance gains, which will actually contribute to the 37.43% more air that you're seeing.Now, I wanna show you guys how all this is installed, but before we get there, if you wanna pick this up, it's just around 300 bucks, it does not require a tune for your 5.3, huge upgrade for everybody who doesn't wanna spend the extra bucks on a custom tune. And if you wanna get this installed, one out of three wrenches on our difficulty meter, anybody can tackle it in the driveway at home in under an hour with very, very simple hand tools. I'm gonna show you guys every step of the way so let's get to it.Tools used in this install include an impact gun or a ratchet, extension, flathead and Phillips head screwdriver, 10-millimeter deep socket, and a T15 Torx bit or Torx socket. Well, guys, the first step of the uninstall of your factory airbox is to unplug your factory PCV hoses on each side of the factory intake tubing. As you can see, we've got it here on our driver side. We're gonna pinch down on the gray clip and pull straight back. That'll disconnect it, and just repeat that same thing for the other side.The second step is gonna come over to your passenger side and disconnect your MAF sensor. Now, in order to do that, pull up on the red locking tab. You'll feel that disconnect and then you can pinch and pull it off. I like to tuck it out of the way so it's not in the way while you're pulling your airbox out, but once you tuck it, you're good to go.Next up, it's time to start disconnecting your intake from the throttle body. Grab your flathead screwdriver and loosen up the clamp, holding that intake tubing to the throttle body itself. Now, once you start unscrewing that, you'll feel the clamp get looser and looser, and from there, you can actually twist it to unlock it. Once you have that clamp loosened up, you can actually just pull back on the factory intake tubing to disconnect it from the throttle body. Now, at this point, it is optional. You can pull the entire intake assembly out in one piece. I find it a little easier to disconnect the other clamp by the factory heat shield since it is underneath of your coolant hoses. You can, of course, disconnect the coolant hoses, but you wanna make sure your engine has had time to cool down, otherwise it is under pressure and can start spraying coolant. Instead of doing all that and worrying about that mess, what I like to do is take the flathead and loosen up the clamp, holding your intake tubing to the heat shield and disconnect it in two pieces.So like I said, grab that flathead, loosen up that clamp, and do the same thing. You can rotate the clamp to unlock it or at least loosen it up and from there you can disconnect the two pieces. With that out of the way, you can pull the factory intake out of your engine bay. And your factory heat shield with your filter just sits in place. There's nothing bolting that down. You can just pull that straight back. Make sure you're keeping in mind where your MAF sensor harness is. If you had that in the way, pull that out of position so that you can lift up the intake. It might take a little bit of finesse just to get this out of position, but you can pull it off.Guys, now that we have our factory intake off of our 5.3 Silverado, I wanted to put it on the table so you can get a side by side comparison. Now, I know I talked about all the materials already from the S&B kit, but I did just wanna point out a couple of differences that you can see now that they're side by side. The factory airbox is a little bit different than the S&B option. I know I already talked about the opening at the bottom, which not the case for the factory option. It just bolts straight down to the tray. There's one other thing I wanted to mention. There is an intake funnel on your passenger side fender that this connects to, so some of the air coming through your grille and underneath the vehicle feeds through this hole into your factory filter and into your engine bay. Now, this is a lot wider on the new S&B option and it's got that rubber grommet to make sure there is no plastic on metal connection. It's got a safe, safe grip on that fender opening, so you're getting a little bit of cold air from there as well, also contributing to that 37% increase.There's also a couple of other things I wanted to mention. Your factory air tubing, very different. This has that big cover, couple of reservoirs underneath, this accordion-style connector that goes straight into your airbox, your heat shield. That's a little bit restricting for your air coming through. Smooth finish here on the polyethylene tubing, something that's extremely durable, heat-resistant. It's not an aluminum intake tubing unlike some of the other ones in the category that are a little bit more susceptible to the engine heat and heat soaking, which, of course, is not super good for air. We want colder air, not hotter air, so not the case here. This is good for heat dissipation. It's also including a bunch of silicone couplers which are rated for up to 400 degrees Fahrenheit, which is well beyond what your engine bay gets to. So those are rated to withstand a lot of engine heat and a longtime use. It also has a billet aluminum cutout for your MAF center. This would go right onto the side of your tubing to adapt to your factory MAF sensor, so there's no need to pick up a new one to work with this particular option here, so huge benefits there.It's also got a plexiglass screen for the top to help block out excess engine heat, making sure just cold air is making its way in. Now, most, if not all of the other options in the category do not offer this. Instead, they'll just offer what we call a weatherstripping seal that will go around the edges to seal underneath of the hood. Once you shut your hood, those weatherstrip seals will block out some of the engine heat, but it's not entirely as effective as literally just boxing in that new intake filter. So I'm gonna show you guys how to install that. That's one of the last steps in the entire process.What we wanna do first is get all this stuff off the table, but we do have to remove our factory MAF sensor. We're gonna install that with the billet aluminum adapter, then we're gonna assemble some of those couplers. As you can see, one of them is already on the other end, so I'm gonna do the other one, which is the exact same process. We also have new replacements for the PCV hoses. I'll show you guys how to use that with the new clamps. But first off, let's get that MAF sensor out of place.Now that we have our factory heat shield on the table, we're gonna grab a T15 Torx bit socket and remove the factory screws holding on our MAF sensor to the end of the tubing. Now, these are hand-tightened so I can just pop them off just with a socket alone, but if you need, grab a ratchet, of course, and get these off properly. Once we have this off, we'll just transfer this right on over to our new tubing from S&B. Carefully slide that out of the slot. We'll set this aside and get our new tubing on the table.Next up, you wanna grab your S&B tubing and you also wanna grab the billet aluminum spacer or adapter along with the gasket. Now, the gasket's gonna go right underneath of it. On the flat portion of the adapter, you're gonna put that into place, lining up those open-threaded holes on the tubing. Grab your factory screws and use them to bolt down this adapter. You don't wanna overtighten them. Just one hand-tighten will be perfect. That'll be nice and secure. Grab the Phillips head screws provided for you in the kit as well as your MAF sensor and line up the MAF sensor holes and slide that right into the slot. Use the Phillips heads along with the small washers and tighten those down by hand and then grab a Phillips head screwdriver and finish the job. Perfect. Now I wanna grab the other coupler and install it to this end just like you see here. Gonna use a clamp, the coupler, and tighten those down together and just repeat that for this side.Next step, we have our S&B heat shield on the table. We just wanna put that rubber grommet over the end, that's gonna go into our fender. That just hugs around this lip, just put pressure all around and it'll seat itself properly. If you wanted to put that rubber plug on the bottom, you can do so now, same exact thing we just did except it's a square shape. We're gonna skip that step because we wanna maximize our airflow, but if you wanted to plug that up, now's the time.Now, in order to drop our big heat shield into place, we're gonna have to move this bar out of the way. So what we're gonna do is grab our 10 socket, pop this bolt off, and we're just gonna put a little bit of effort into just rotating this out of the way. That'll give us enough clearance to get this heat shield in then we can rotate it back and tighten that bolt back down.The next step is to remove the four bolts holding on that bottom plate that was underneath of your factory heat shield. Grab an extension and a 10-millimeter socket and remove all four. Next up, we can just drop this into place. Using those factory bolts, we'll tighten it down to that bottom tray. Next up, we're gonna drop in our filter. Now, as you can see, it's got a couple of rubber grommets on the end. This rubber grommet here is gonna hold it to our new heat shield, so we're gonna drop this in, push it through that hole, and twist it until it snaps into place. And as you can see, it's in there, it's really secure. At this point, we can grab our new tubing and set it over the end here with this clamp, tightening it down. We'll connect that here, tighten it down with our flathead, and do the same thing on the throttle body. All right. Now we can drop that air intake tubing in, pop the end of it over the filter and the other end on the throttle body, just push those into place. There you go. You'll feel that snap in. You'll feel it connect. From here, grab your flathead screwdriver and tighten down the clamp on the filter. Perfect. Now, do the exact same thing to the clamp on the throttle body.Next up, guys, we're gonna remove this factory tubing. What we're gonna do is push down on that gray tab, just pull straight back. We can set this aside. I would recommend holding onto it just in case you ever wanna revert back to stock. It's good to have. We're gonna replace that with the new hose provided for you in the kit. Make sure you have one of those tiny clamps around the end there. Push that on, then we're gonna bend this backward, making sure there's one more clamp on the other end and apply that to the fitting on your intake tube. From here, grab your flathead and tighten down those clamps. All right. Now tighten down the other side. Perfect. Repeat this for the other side. All right. On the other side here, we're just gonna push up on that tab and remove the factory hose, putting our small clamps over our new hose and then popping that onto the factory location. The other end, we're gonna wrap around and connect to our fitting. Grab your flathead and tighten these down.All right. Just a couple of steps left. The next step is to reconnect our MAF sensor. Grab that MAF sensor harness, bring that around, reconnect that to the new sensor location. You might have to rotate it. Once you push that down and it snaps in, push down that red locking tab and you're good to go. Last step of the process, we're gonna throw on that plexi shield cover that I mentioned earlier. Those have open-threaded holes on the ends here. We're gonna tighten those down. Then we're gonna swing back the support brace and tighten it back down to our fender and we'll be good to go. Just make sure that if you don't have it already on, you wanna put that weatherstripping around there, that just makes sure it's blocking out all of the excess engine heat. Line that up, take those screws provided for you in the kit, thread them on by hand just to make sure you got the locations good. Then we're gonna grab our Phillips head and tighten these down. Perfect. Last step, let's swing that bar back around and tighten this down with that factory screw.Well, guys, that's gonna wrap up my review and install for the S&B Cold Air Intake with the Dry Extendable Filter, available for all 2014 to 2016 Silverados and 2014 to 2018 Sierras. If you're looking to pick this up, it's around 300 bucks. You can get yours right here at americantrucks.com.

      Product Information

      Features, Description, Reviews, Q&A, Specs & Installation

      Features & Specs

      • S and B Cold Air Intake with Dry Extendable Filter
      • High-Performance Intake System
      • Delivers Air Flow Increase of 37.43%
      • High-Caliber Dry Extendable Filter
      • Silicone Coupler, Tube Sleeve, and Inlet
      • Filter Features Air-Tight Seal
      • Silicone Handles up to 400-Degree F Temperatures
      • Mounting Adapter Made with Billet-Machined Aluminum
      • Maximum Space in Air Box Housing
      • Perfect Fitment in Engine Bay
      • Additional Space for Larger Filter
      • Simple Snap-In Installation
      • Not street Legal in Every State
      • Fits 2014-2016 5.3L Chevy Silverado 1500 Models

      Description

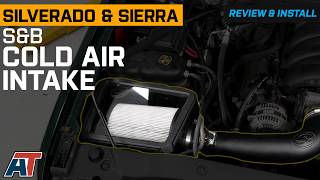
      High Performance Intake. The S and B Cold Air Intake with Dry Extendable Filter is a high-performance intake system that is perfect for your 5.3L Chevy Silverado 1500. It outperforms the OEM intake system and delivers increased airflow of 37.43%.

      High-Caliber Material. The high-caliber dry extendable filter features an air-tight seal and snap-in installation to the housing. The coupler, tube sleeve, and inlet are made from silicone for durability. The silicone can handle up to 400-degree F temperatures. The mounting adapter is made with billet-machined aluminum. This ensures proper mounting of the MAF sensor.

      Maximum Space. This air box housing offers maximum spacing for a larger air filter to ensure breathable room for optimized performance. The housing fits perfectly in the engine bay.

      Simple Installation. This filter has a simple snap-in installation in to the housing. An installation guide is available for download.

      Application. The S and B Cold Air Intake with Dry Extendable Filter is designed to fit all 2014-2016 5.3L Chevy Silverado 1500 models. It is street legal in most states. However, some states have emissions restrictions so the system cannot ship to those states. See the manufacturer website for more details. The CARB EO number is still pending.

      Shop All Truck Parts And Accessories

      Shop All Cold Air Intakes For Trucks

      Fitment:

      Details

      S&B 75-5069D

      CA Residents: WARNING: Cancer and Reproductive Harm - www.P65Warnings.ca.gov

      Installation & What's in the Box

      Installation Info

      What's in the Box

      • (1) Dry Extendable Filter
      • (1) Heat Shield
      • (1) Intake Tube
      • (2) Clamps
      • Downloadable Installation Guide

      4.8

      Customer Reviews (500+)

        Questions & Answers

        10 More Questions

        Will It Fit My Silverado 1500

            Related Silverado 1500 Categories