 FREE 1 to 3-Day Delivery on Orders $149+ Details
How to Install RedRock 4x4 2 in. Fender Flares - Matte Black on your F-150
Tools Required
- - Utility knife
- - Electric Drill
- /4" Drill Bit
- - #2 Phillips driver
- Socket wrench
- - 7 /32" Socket
- - 3/8" Socket
- - l O mm Socket
- - 13 mm Socket
- - Grease Pencil
- 6 mm Allen Wrench
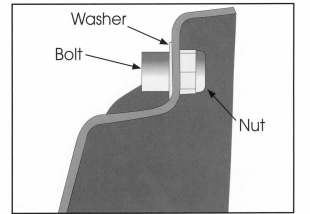
1 . Install supplied bolts, washers, and locking nuts into each flare.

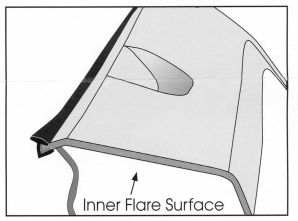
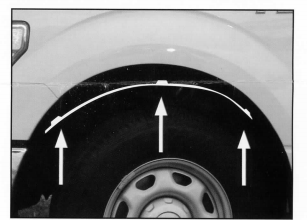
2. Clean inside of top lip edge with rubbing alcohol. Install edge trim by removing red vinyl tape covering only a few inches at a time. Applying adhesive side of edge trim to inner side of flare. Install edge trim to the top edge of flare (the edge that contacts vehicle). Do not stretch trim while being applied. Trim excess from ends.
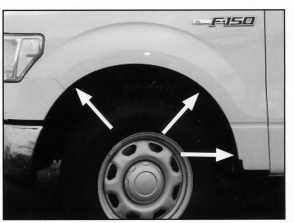
3. Remove three factory installed screws with
7 /32" socket wrench. Save factory screws for reinstallation.
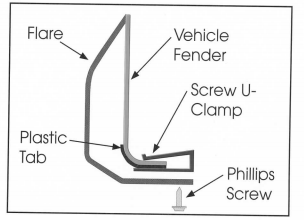
4. Install Small Screw U-Clip over uppermost factory hole in fender.
5. Install Front Flare Inner Piece using a supplied Phillips screw through installed Small Screw U-Clamp, Use factory screws and 7 /32" socket to attach inner piece to factory holes.
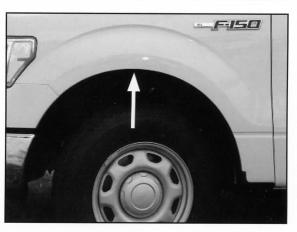
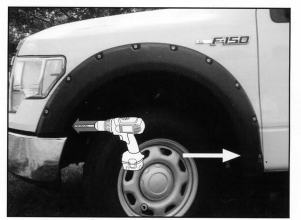
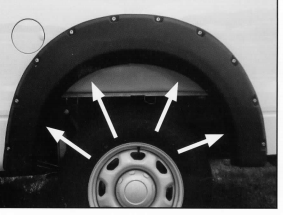
6, Hold flare to fender and install factory screw into factory hole toward rear of wheel well using 7 /32" socket. Continue to hold flare and drill through bumper cover with a l /4" drill bit using forward most hole in flare as a guide.
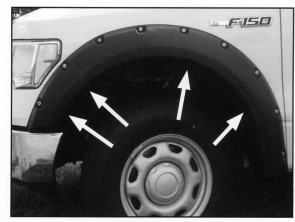
7. Install Retainer Rivet Screws in four marked holes. Complete front flare installation.
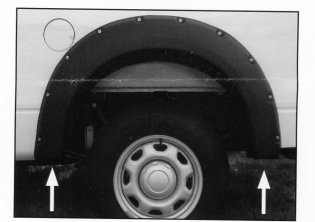
8. Remove two factory bolts from bottom of rear wheel well using a l O mm socket. Save bolts for reinstallation.
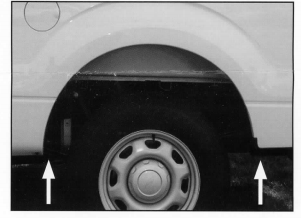
9. Hold flare to vehicle and using a marker or grease pencil mark locations of four holes in flare on sheet metal. Wrap a Plastic Square Tab around sheet metal over four marks. Install Long Screw UClamps over four Plastic Square Tabs.
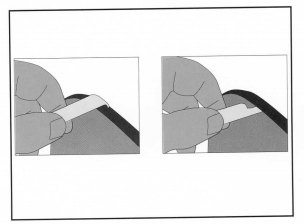
l 0. Follow guide shown for proper way to install Plastic Square Tabs and Long Screw U-Clamps. Hold flare to vehicle and attach using supplied Phillips screws into Screw U-Clamps, starting with the topmost screws first.
11 . Use a l O mm socket wrench to reinstall factory bolts. Complete rear flare installation.
12. Use supplied edge trim tool to seat edge trim against vehicle with curved end; slide it under trim along vehicle fender. Use fiat end of tool to seat trim againt ftare; slide tool between trim and ftare.
Painting
l . Lightly sand flares with 320 grid sandpaper.
2. Remove all surface contaminants from flares using an approved grease and wax remover.
3. Wipe flares with a tack rag to remove any dust or dirt.
4. Apply two even coats of adhesion promoter to flares. Allow recommended flash time between coats. Let second coat dry for 15 minutes before primer application.
5. Apply an even coat of primer to flare surface (a high build primer is recommended).
6. Paint flares with an automotive grade paint (a flex additive must be added to paint).

