 FREE 1 to 3-Day Delivery on Orders $149+ Details
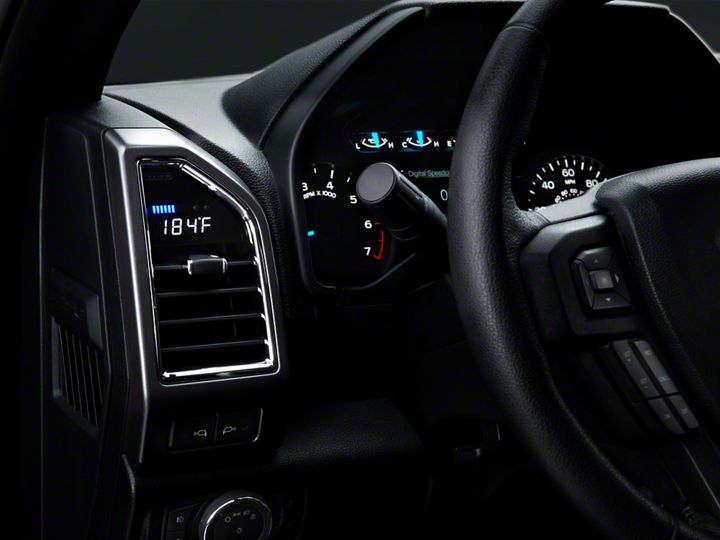
How To Install a Raxiom Vent Integrated Boost Gauge w/o Vent Housing on your 2015-2016 Ford F-150
Shop Parts in this Guide
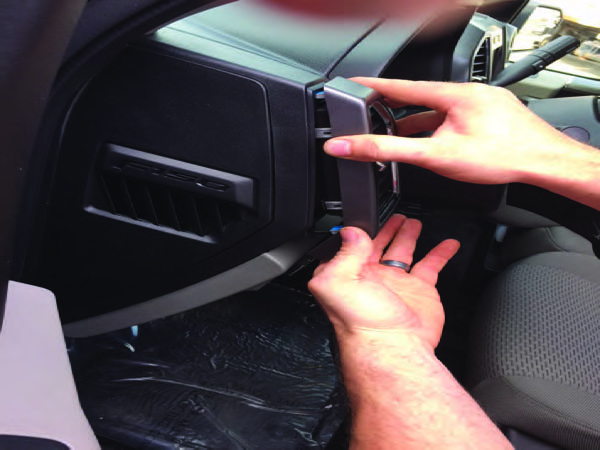
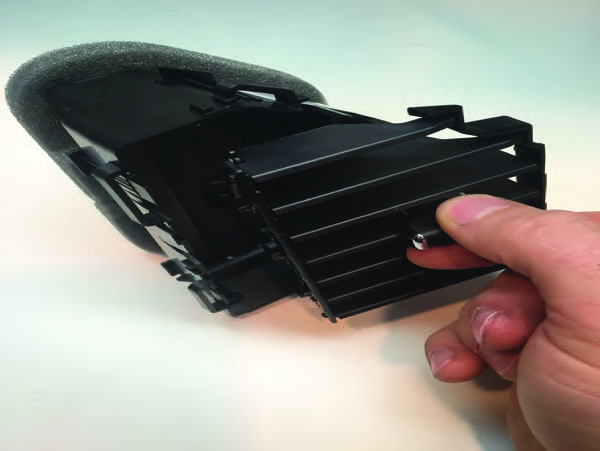
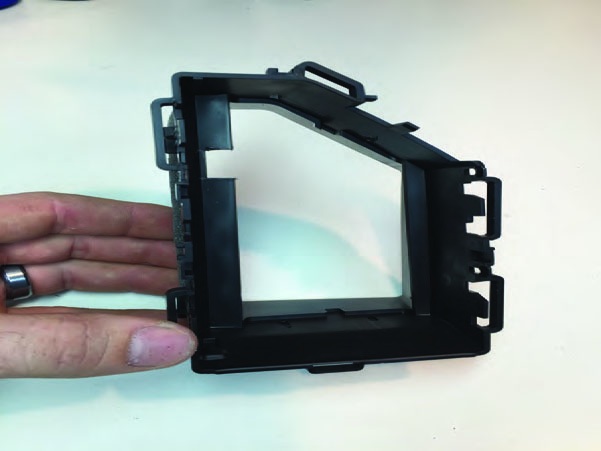
Step 1
Remove vent housing by pulling straight out with a slight upward motion.
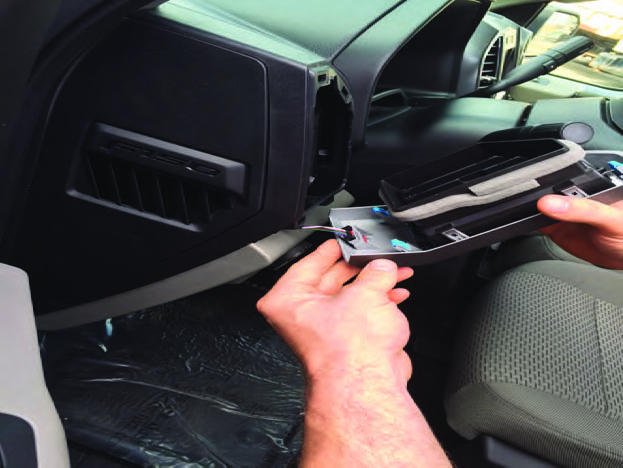
Step 2
Disconnect the connector at the bottom of the vent housing.
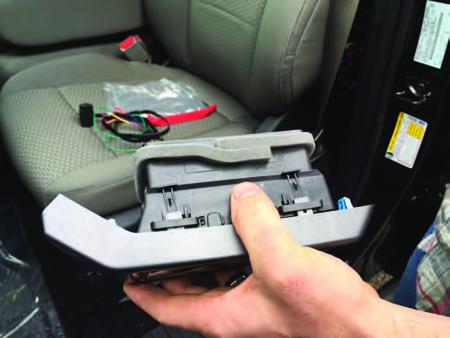
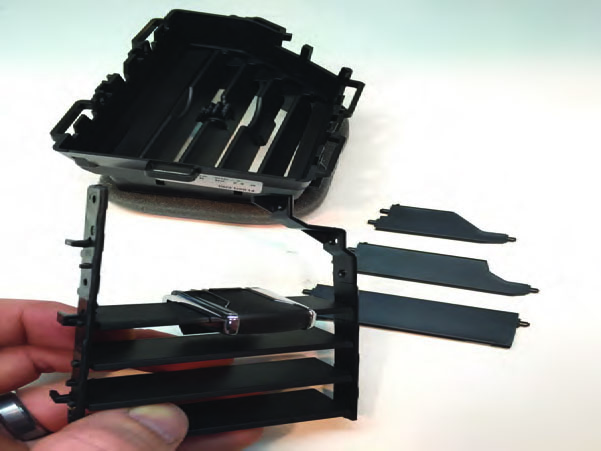
Step 3
Next remove the vent fascia trim by releasing the clips on the side of the vent housing.
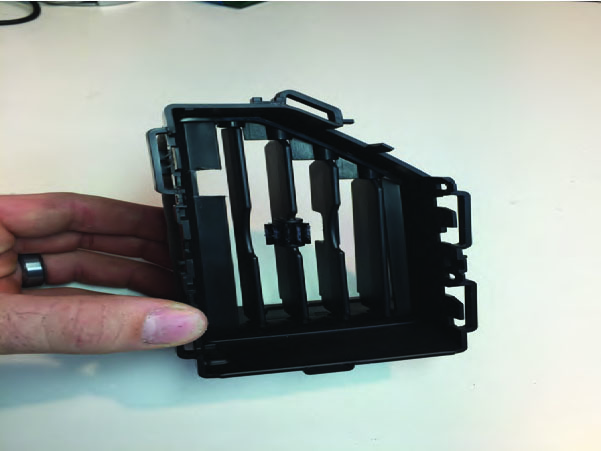
Step 4
Remove horizontal slat assembly from the vent housing.
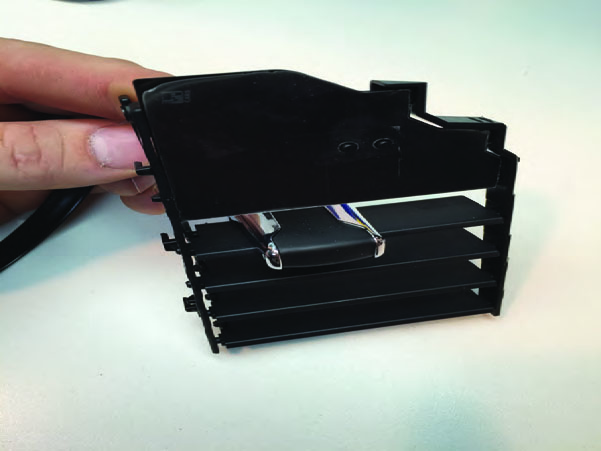
Step 5
Remove the top 3 horizontal slats from the vent slat assembly.
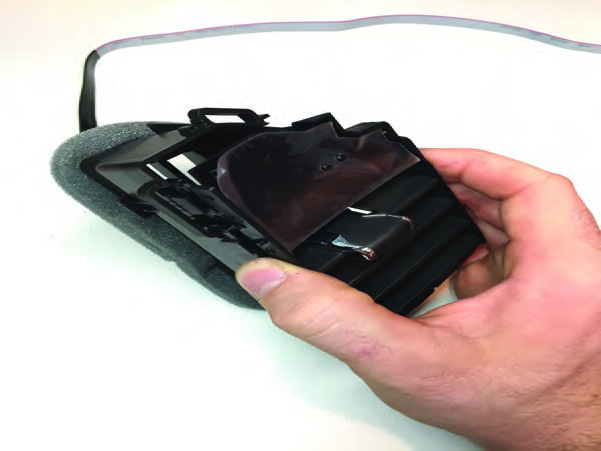
Step 6
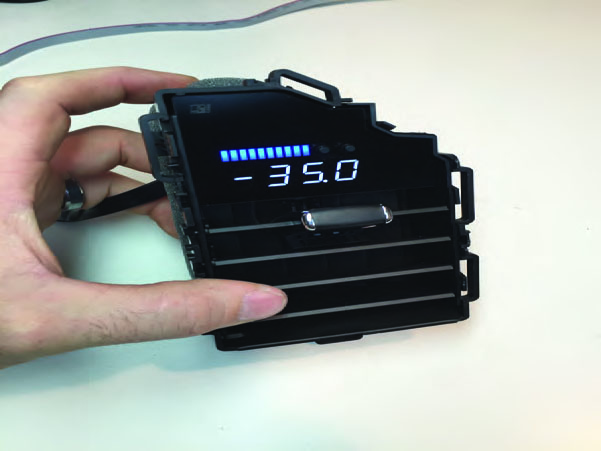
Insert display into the vent slat assembly.
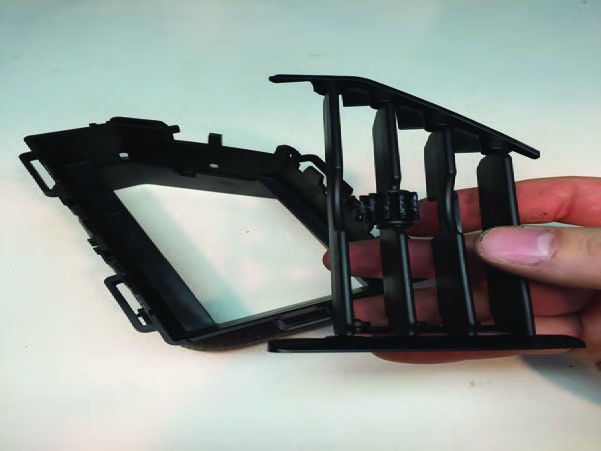
Step 7
Remove the vertical assembly from the vent housing.
Step 8
Measure down 1" from the top of the vent housing and cut a 7/16" slot as shown in the picture.
Step 9
Reinstall vertical slat assembly into vent housing.
Step 10
With the horizontal slider all the way to the left and vertical slats all the way open, reinstall the slat assembly with display. Feed the display wire through the slot cut in step 5.
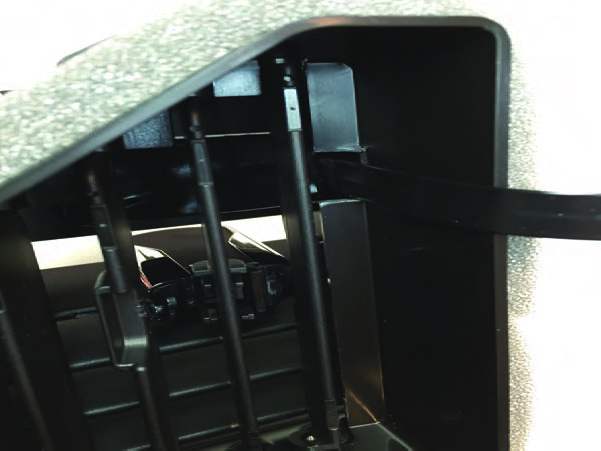
Step 11
Be sure the display cable is flat against the vent housing so it will not interfere with the vertical slats.
Step 12
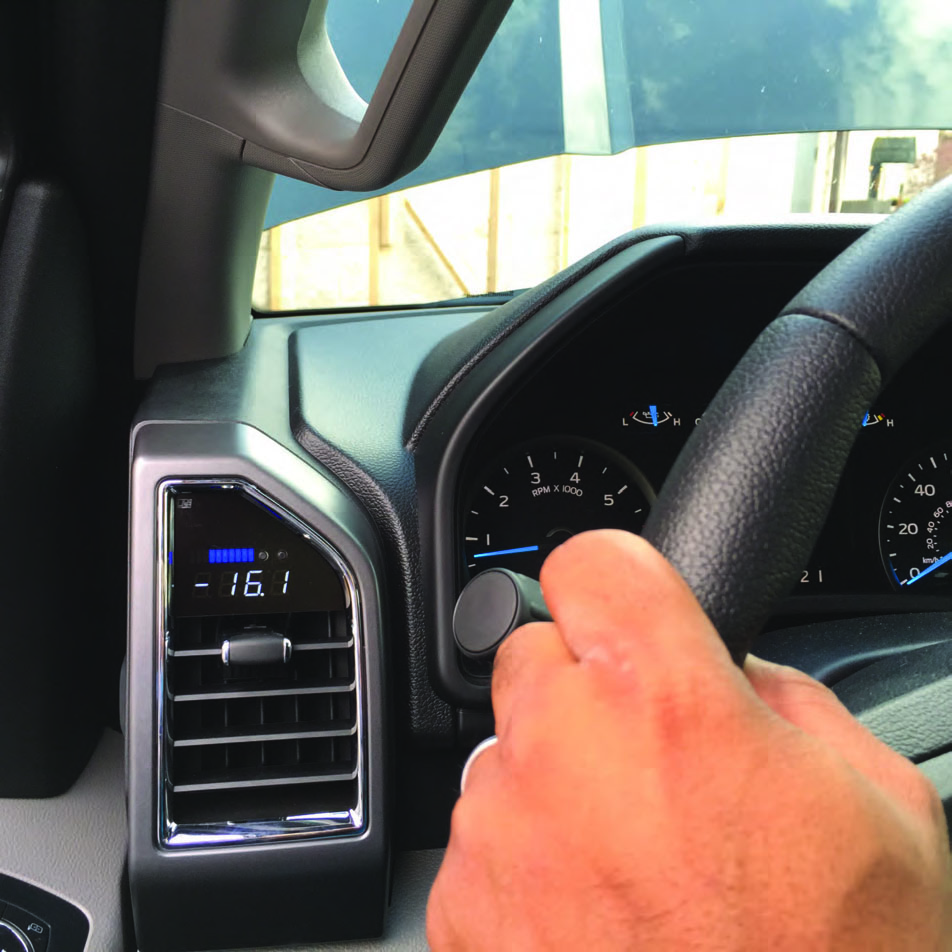
You are now ready to install your vent into your vehicle.
Step 13
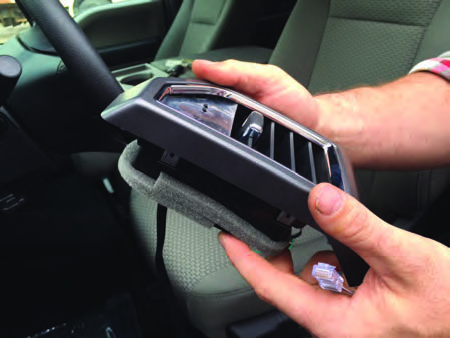
Place your vehicles trim on the vent with the Raxiom Multi-Gauge or Raxiom Boost Gauge installed.
Step 14
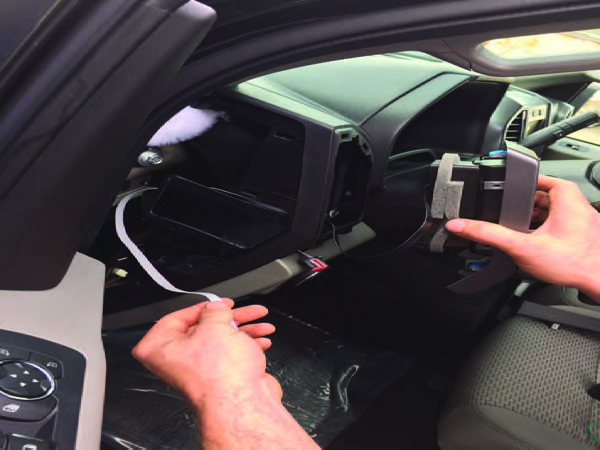
Remove side dash cover panel.

Step 15
Feed the display cable through the dash vent and down the side dash area.
Step 16
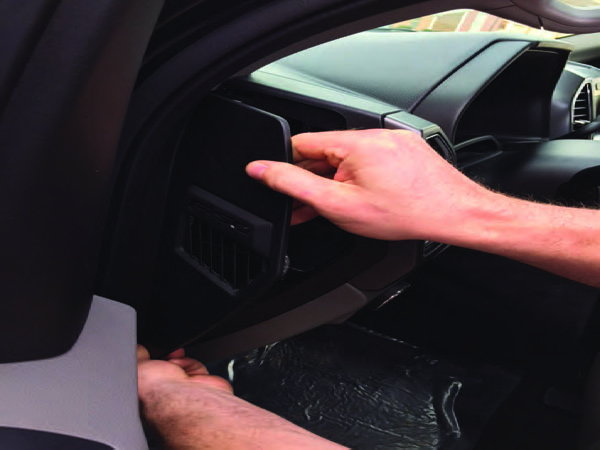
Reinstall side dash cover panel
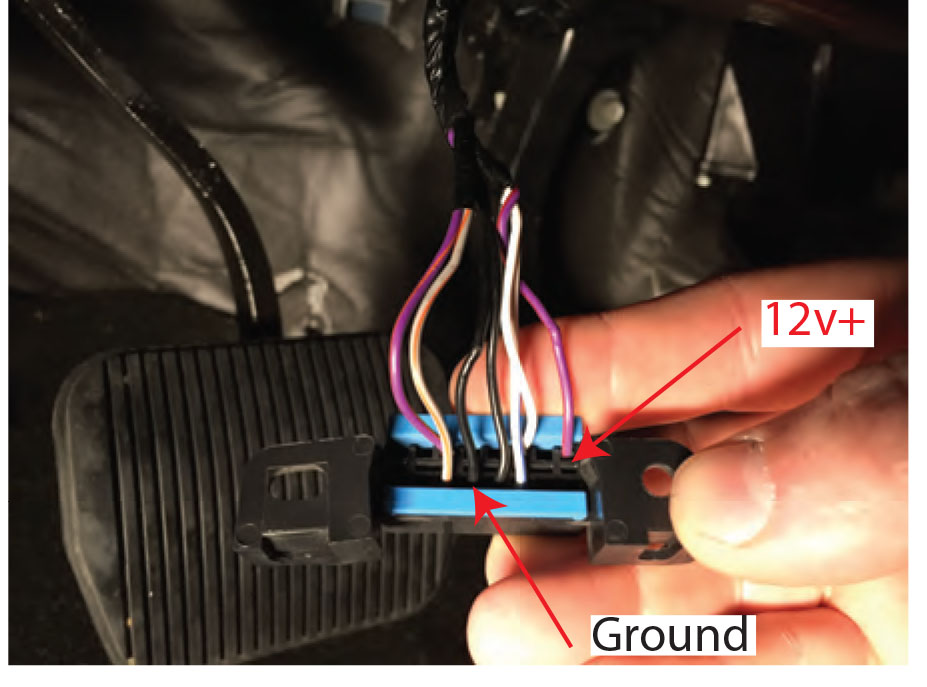
Step 17
Locate your OBDII/DLC port under the drive side dash and tap the black wire into pin 4 for chassis ground and the red wire into pin 16 for 12v . The Raxiom Boost Gauge has a smart sense to prevent voltage draw when the car is off.
**Optional Dimmer (yellow wire) Tap the vehicle's dimmer switch wiring, this is the purple wire on a 09. Check your vehicle's wiring diagram, wire color may vary from vehicle to vehicle
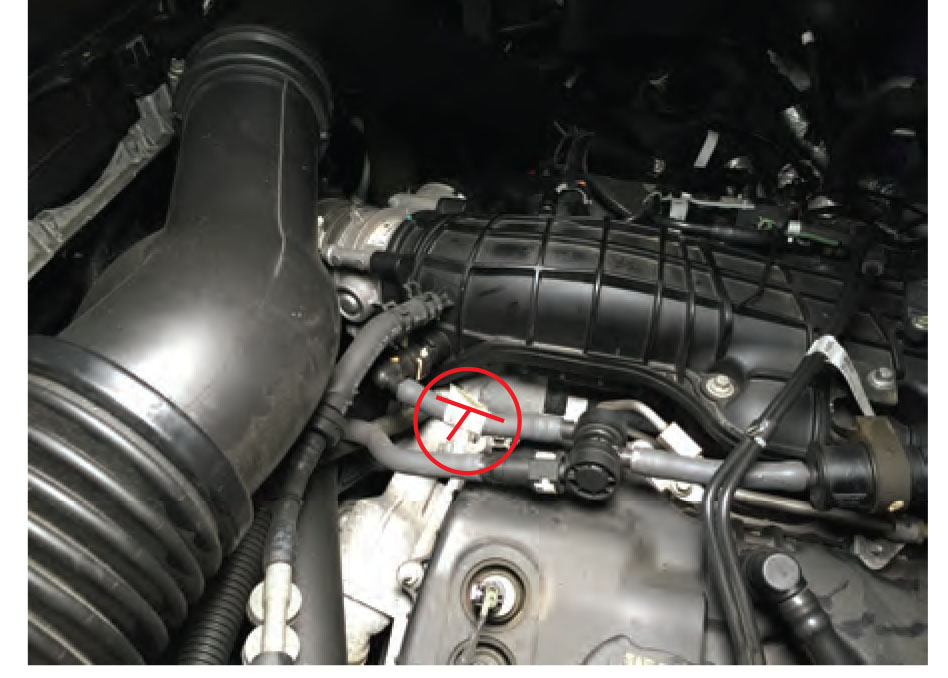
Step 18
Run the supplied vacuum tubing to the engine bay and t tap into a suitable vacuum source. Secure with a zip tie.
WIRING DETAILS
Red - 12V
Black - Ground
Yellow - Dimmer, hook to an interior lighting connection, when the headlights are on the gauge will dim.
OPERATION DETAILS
BUTTON FUNCTIONS (Running Mode)
Left Button TAP = Peak recall (and start 15 second record)
Left Button HOLD = 15 sec playback
Right Button TAP = View Current Mode Name
Right Button HOLD = Night/Day Dimmer toggled (if auto dimming is NOT enabled)
THE PEAK RECALL AND RECORD/PLAYBACK FEATURES EXPLAINED
PEAK RECALL: The gauge offers peak recall of the PEAK VALUE on the selected mode, since the last recall, or since the vehicle was started. In addition to this, for 2008 model year cars the gauge also stores peaks for EGT, Air, Coolant in the background, so that you can switch to that mode later, after a lap for example, and recall your peak temperatures. A quick tap of the Left most button will show your peak value.
RECORD/PLAYBACK: The 15 seconds record/playback feature is available on canbus vehicles only, and provides a way for you to see 15 seconds of historical data from the current mode. Recording is started when the peak recall button is pressed. Simply tap peak recall, do some acceleration, and then after you are able to look at the gauge again, hold the peak recall button and gauge will show you the first 15 seconds of data from that mode, as well as RPM scaled onto the bargraph readout.
CONFIGURING THE GAUGE
ENTER CONFIG:
Simply hold both buttons to enter the config menu, you can do this at any time! RELEASE the buttons 2 seconds after you see the word "Conf" flash on the screen.
SAVING YOUR SETTINGS:
Your settings will not be saved until you exit the config menu by HOLDING the rightmost button until the gauge turns off or resets if your car is running.
Config Button Functions:
Left Button TAP = Change Value
Right Button TAP = Peak Recall
Left Button HOLD = Change Value fast repeat
Right Button HOLD = EXIT and SAVE settings.
CONFIGURABLE PARAMETERS:
Display Options / Valet Mode
d.On = display on, normal operation, Off = Lockout / Valet, display off. Enter config with car OFF to to re-enable from valet. On.A = Auto dimmer (must attach green wire to red/gray dimmer line on trunk pop switch or other locations) On.P = persistent dimmer, (stays on last setting after restarts.)
English/Metric
En.Y Y or N or b English units. N = Metric, Y = English, b = Boost only (boost in PSI, all other data in metric)
Boost Pressure Resolution
Pr0.1 0.1 or 0.5 or 1.0 decimal point. 0.1 = tenths, 0.5 is rounded to 5 tenths, 1.0 = whole numbers
Vacuum Bargraph
U.bg.Y Y or N Vacuum bargraph in boost mode - set to N for no bargraph while in vacuum
Boost Reading Selection:
FORD bSt.d for MAP sensor, analog. (Analog is for gauges with boost sender and tubing to manifold using the analog boost sensor connection)
TROUBLESHOOTING CHECKLIST
-Make sure the gauge is set to d.On ... if you set the gauge to display off (d.Off) you will need to have the car OFF to re-enter config by holding both buttons.
-Make sure the obd2 connection is secure, try unplugging and re-plugging it a few times with the car running. Some ports can be stiff.
-Check your obd2 port fuse, on a fuse chart this will usually say OBD or DLC.
