Installation Time
(approx) 2 Hours
Difficulty Level:
Light to Moderate mechanical skill required.
Guaranteed Free Delivery by 12/24! available on most items - Details
$227.00 (pair)
FREE Shipping Market Price $258.99 You Save 12% ($31.99)Add Local Shop Installation
Saved - View your saved items
We're sorry. We couldn't save this product at this time.
or use
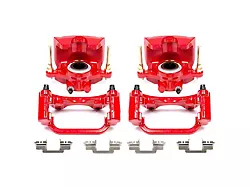
PowerStop Performance Rear Brake Calipers; Red (07-13 Silverado 1500 w/ Rear Disc Brakes; 14-18 Silverado 1500)
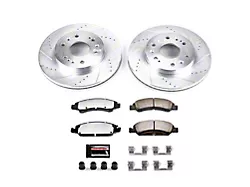
PowerStop Z36 Extreme Truck and Tow 6-Lug Brake Rotor and Pad Kit; Front (07-18 Silverado 1500)
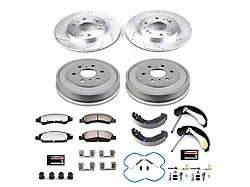
PowerStop Z36 Extreme Truck and Tow 6-Lug Brake Rotor and Pad Kit; Rear (14-18 Silverado 1500)
Hey, guys. It's Sara with americantrucks.com and today, we have a review and install of the Power Stop Performance Brake Calipers in red, fitting your '07 through '18 Chevy Silverado 1500. These are perfect for the Silverado owner who's looking to upgrade their failing or aging front calipers with this stylish replacement. These are perfect for all applications from street to towing or hauling and they will hold up for years to come with their bright red powder coat finish.These calipers feature high-temperature EPD and rubber boots and are pressure tested to ensure leak-free operation. This kit includes the caliper and bracket as well as bleeder screws, pins and clips. The only thing it does not include are brake pads so you can reuse your stock ones or this might be a good time to upgrade, in which case Power Stop has plenty of kits to choose from.So, as far as price goes, these come in at around $225 for the pair, making them a great way to replace your calipers and add some style while saving some money over other OE replacement options. I am giving these a two out of three wrenches on the difficulty meter. They feature direct bolts of install and can be done within two hours. So with that said, let's jump into our install.For this install, we used an impact gun and ratchet, 19-millimeter, 18-millimeter, and 11-millimeter sockets, a T30 Torx socket, a 3/4-inch skinny wrench, a 10-millimeter wrench, a tool to hang our caliper, a clamp tool, and a pair of pliers.All right, so the first step for our uninstall is to grab a 19-millimeter socket. We're gonna take off the two bolts that hold the caliper to the bracket. All right, so we're gonna take these two 19-millimeter bolts out at the back of our caliper and you want to have a caliper hanger tool or a bungee cord on deck as soon as the caliper comes off.Now, if these bolts do spin on the back here, you can grab a skinny wrench and just hold the slider parts still. But ours seem to come out easily. All right. Now that the bolts are out, you may have to wiggle the caliper free. If not, you can pry back on the inside right here. Well, once it's free, grab your hanger and hang your caliper out of the way. Be careful not to put any tension on the brake line.Now at this point, you can grab an 18-millimeter and we're gonna remove the two bolts that hold the caliper bracket to your knuckle. Just keep a hand on it when you're pulling this second bolt out because it's definitely gonna want to come off at this point. And just pull it off, pads and all.All right, now that we have our factory caliper uninstalled from the truck, we can put it side by side with our Power Stop caliper. And, as I've said before, the biggest difference here is the Power Stop caliper has this red finish on it. Otherwise, it's gonna be pretty identical to your OE caliper.It is nice that they do come with these metal clamps for your brake pads as well as additional copper washers for the back of your brake line. But they do need brake pads. So if you're looking to replace your brake pads as well, you will have to buy those separately. But with that said, let's finish up our install.All right, so before we can get the caliper installed on the truck, we do need to prep the caliper bracket a little bit. We need to install these metal clamps here, as well as the brake pads. Now, we are gonna reuse the ones that came off of our truck. This might be a good time to get new brake pads. Just take a look at yours and see what kind of condition that they're in.So you do need to remove the bracket off the caliper itself. You can just twist this out, but if it doesn't want to come, you can use a 19-millimeter socket. Set the caliper aside for now. And now, we can install these metal clips. These hold in the brake pads. These are identical, so just line up the flat part at the top here with the top of the bracket. You want to make sure this tab here on the caliper bracket sits right inside this groove here. So line them up as best you can and then just press them into place.So we're gonna pop these out of our factory caliper bracket. And, again, as I said before, you can definitely install new ones. And if you've gone through this much trouble, that might be the way to go. So now, there are two small tabs. There are these ones here. They're on the factory ones, so if you can't get it off by twisting the brake pad, you may want to put a small flathead in there and just press it down.All right, so at this point, we can place this bracket that we prepared right over the top of the rotor and as we talked about with the brake pads, it might be a good time to maybe take a look at your rotor now. If it looks like it's really worn in, it might be worth replacing, especially since you have the system almost all the way apart. Go ahead and use your factory bolts and thread them into the bracket. Grab your 18-millimeter socket and tighten them down.All right, so now we can install the brake pads. Now, you definitely want to put a little bit of grease in each of these channels here. This is just for demonstration. So we are gonna skip that step. Just slide, the brake pads into these metal clips, and it doesn't hurt to put a little grease on the back and front side of the pads, this metal part that contacts the caliper, just to cut down on noise. Repeat that with the other brake pad and once they're both in, we can install the caliper.Now, you can install your caliper. And it does come with the pistons of the caliper pushed pretty much all the way in. But for some reason, if you do need more distance to clear your brake pads, you can push the pistons in. Thread in the hardware that they have included with this kit.All right, so if these bolts spin, which they may, you just want to stick a wrench on the other side. You will need a skinny wrench. And it should be a 3/4 that holds it down. And then just double check that you got it tight if they are spinning.All right, so we have our old caliper here and the last thing we're gonna do is transfer over the brake line. So we have a clamping tool. This is optional. Some people don't like to use this on their brake line, but as long as we're not absolutely killing it, it should be fine. Clamp down on your brake line.Now, if you don't use this, it will just spill more brake fluid. That's the only difference. We just want to try to be as less messy as possible. Grab an 11-millimeter socket and remove the banjo bolt that's holding on your brake line.Now, just be careful because brake fluid can still come out even though we clamped it. And we're gonna take the copper washers off. Now, one of ours didn't really want to come off, so we're using our pliers. And then once it's off, there is one on the other side of this banjo bolt. So you want to get that one as well.All right, so we're gonna install two new copper washers, one on each side of your brake line. These do wear out, so you definitely want to replace them if you're doing a caliper. And it is nice that they included them. And then line it up with your caliper.All right, now, you can grab your 11-millimeter socket and tighten this down. Once that's tight, release your clamp and just double check that there's no brake fluid that's still coming out.All right, so you're gonna repeat that process on the other side and once both of your calipers are installed, you're going to want to bleed the system. So we have a tube here that's gonna make it a little easier, you definitely don't need this, and a 10-millimeter wrench. We're installing the tube over top of the bleeder screw so that when it goes out, we can direct it right to our pan.All right, let's grab a friend and we'll bleed our brakes. All right, so once you have your friend to help you bleed the brakes, have them pump it up until the brake pedal feels pretty stiff.All right, and then you're going to hold. So hold the brake pedal. And all the while, you do want to keep an eye on the reservoir. And then you can crack the bleeder loose and let it run until the fluid's pretty clear and then tighten it back up. Go ahead and pump the brakes. And you want to keep doing this until the fluid has absolutely no air bubbles in it. You can see some that are still in there. Now, you can repeat that with the other caliper.All right, so make sure when you're bleeding your brakes, you start with the caliper that is farthest from the reservoir. This should cut down on air bubbles getting stuck in the system. So that means starting on the passenger side first and bleeding the driver's side one last. Once you've done that, make sure your reservoir is full of brake fluid and just double check your brakes before you drive anywhere.But that is gonna do it for the review and install of these calipers. For all things Silverado, keep it at americantrucks.com.
Subscribe to our YouTube Channel
Features, Description, Reviews, Q&A, Specs & Installation
Information on PowerStop's proper Break-In Procedure can be found here: https://www.powerstop.com/brake-pad-break-in-procedure/
Fitment:
PowerStop S4918A
CA Residents: WARNING: Cancer and Reproductive Harm - www.P65Warnings.ca.gov
Installation Info
Installation Time
(approx) 2 Hours
Difficulty Level:
Light to Moderate mechanical skill required.
What's in the Box
10 More Questions