Talk to a Silverado 1500 Sales Tech
1-888-706-1096
M-F 8:30A-11P, Sat-Sun 8:30A-9P
$20K Sweeps! 10 Chances to Win! Enter Daily >

K&N Series 77 High Flow Performance Cold Air Intake (19-24 5.3L Silverado 1500)

Item S114129-53
Verify parts fit and get product recommendations.
Silverado 1500 Sales Techs: Connect Now M-F 8:30A-11P, Sat-Sun 8:30A-9P
$0.00
On Sale

$349.99 (kit)

FREE Shipping Market Price $459.99 You Save 24% ($110.00) Up to 10% off for Military & First Responders! See Details

Will this fit your Vehicle?

Select a different vehicle Help?
Update or Change Vehicle
Ship to: Ashburn - 20149
Sorry, please enter a valid US or CA postal code
We're sorry, zip can't be updated at this time.
Recommended Install Shops
How It Works
Install Shops are available near Ashburn - 20149

Add Local Shop Installation

Total cost of service $175.00
    Create a list
    Add to New List

    Saved - View your saved items

    We're sorry. We couldn't save this product at this time.

      Product Videos

      Justin: The Series 77 here from K&N will be for the 2019 and newer 5.3 truck owners who would prefer to go with a polish cold air option from one of the most recognizable and trusted names in filtration. Now, this no-tune required intake does feature a high fluid oil filter along with your polished aluminum intake tube and will land you right in that high $400 price point. Now, install is gonna be extremely straightforward here, so expect solid one out of the three wrenches on the difficulty meter and maybe an hour or so to knock out from start to finish as we'll show you guys later in the video.So, K&N is one of those companies that really needs no introduction as they continue to be one of the most dominant names in motorsports and one of the leaders in filtration. Now, that is represented well on the site, of course, because K&N does offer a few different flavors, if you will, for the 5.3 powered Silverado including the more budget-friendly Series 63 along with the very stealthy Blackhawk, and then finally the Series 77 that we have here today, all pretty similar but with some minor differences between some of the different models. Now, with that being said, the Series 77 is going to be unique from those other K&N options we just mentioned and most of your other aftermarket systems in the category due to the fact that it does utilize a fully polished finish.Now, that's gonna be the biggie here, guys, with this Series 77. Everything else is gonna be, I would say, familiar territory for K&N. Now, with that said, this will obviously be appealing to the truck owners out there who like that flash under the hood. You wanna pop the hood and see that thing shining bright on you. And if that is the case, well then this will certainly be a no-brainer, as opposed to going with something maybe a little bit more stealthy with a black finish that tends to kind of disappear in the engine bay and, let's face it, dominate the category.But besides the added bling of the Series 77, what else can you expect here with the K&N? Well, obviously, a small bump in power is always something to look forward to when installing an aftermarket intake such as this, and according to the gang at K&N, you're gonna be looking at around 10 horsepower, 9 to 10-pound feet of torque respectively, which personally, guys, I think is right on the money when we're talking about using an intake like this without any additional tuning.Now, can you use a tune with this system? Absolutely. And in fact, it'll certainly help maximize your gains, but just know it is not required. But power aside, guys, truck owners can also look forward to a few other benefits when bolting up an aftermarket system such as this. Definitely, more engine noise coming from your 5.3 due to that open filter design. Always one of the biggies I look forward to because you get that nice solid growl. Some owners have actually talked about looking at better throttle response and even in some cases improved fuel economy due to the free-flowing nature of the high-flow filter. Now, don't take my word for it, guys. This is always a perfect time to remind you to read up on some of those customer reviews on the product page, check out some customer-submitted images and get a better feel for what the Series 77 is all about.But breaking down some of the individual components of the K&N, of course, we're talking about the polished aluminum intake tube here. We've already discussed that at length. And of course, you're gonna expect one of K&N's signature oiled filters here. Guys, this thing is washable, it is reusable. Just make sure to re-oil it correctly after cleaning and should last you the life of your truck.Now, aside from that, K&N does also include the molded aluminum intake box here or heat shield. It does come with the weather stripping built-in, so that will help seal it to the underside of your factory or aftermarket hood. And of course, you're looking at all of your couplers, clamps, and hardware needed to complete the installation. But speaking of that install, I will say installing the cold air intake such as this is certainly gonna be one of your easier module ever tackled, so, therefore, the site's gonna call this a strong one out of three wrenches on the difficulty meter and an hour at most from start to finish. But now to give you a better idea of how things will go down on your 5.3 at home, check out our detailed walkthrough and tool breakdown.Man: The tools you'll need for this installation include ratchets. I'll be using 3/8th and quarter-inch drive, 3/8th to quarter-inch adapter, long and short extensions, 4-millimeter and 3-millimeter hex head sockets, T20 and T15 Torx sockets, 10-millimeter and 8-millimeter sockets, a quarter-inch socket, 10-millimeter wrench, a 10-millimeter wrench, a flathead screwdriver, and a trim removal tool. How's it going everybody? Today I have a K&N intake, for the '19 and newer 5.3-liter Silverado and Sierra 1500. We've already taken out the factory airbox. I'm gonna show you that clip now and then I'll be back to walk you through the installation.Justin: Getting started, we need to obviously pop our hood here on our Silverado. And then first step is to unplug your mass airflow sensor. You wanna pull back on this red clip and then release the plug. So, again, slide the red portion back. At that point, you can release the clip. Next up we're gonna work on removing the intake tube portion of the factory intake. Getting started, we can loosen up our clamp here at the airbox connection. Either use a flathead screwdriver for this or an eight-millimeter socket.Next up, we're gonna loosen up the clamp here at the throttle body connection, again, using a flathead screwdriver or an eight-millimeter socket. With our two clamps loosened up, we're about ready to pull out the intake tube portion. But before we do, we have to go ahead and remove our PCV hose on the back here. Push in on the gray clip and pull back. At this point now we can go ahead and remove our intake tube from the engine bay, releasing it from the throttle body and then from the airbox.Next up, we need to remove the upper radiator valance here. There are 10 plastic clips holding this in place. So, grab a trim removal tool, a flathead screwdriver, whatever you have laying around. You're gonna wanna pop the top off this clip and then remove the clip itself. Before we go ahead and remove our upper radiator valance we do need to remove the hood latch release. To do so, you need a T15 Torx tool. With that removed, you can slide it off. With the latch out of the way now you can remove your valance. The reason you removed your upper radiator valance is to gain access to this clip right here. Basically, you need to pop this guy out. With that clip removed, that will allow you to pull back the snorkel just enough to get out of that stock gearbox. Now we can go ahead and remove this 10-millimeter nut down here and that will be our first step in removing our stock gearbox.Next up, we need to remove this wiring harness and clip from the airbox itself. It's actually attached to a bracket there. To do so, you can either use a small pick tool, a flathead screwdriver to release the clip back here and then pull up. At this point, our stock gearbox is ready to come out. A couple little tips here. You're gonna wanna push this out of the way just to kind of secure it underneath one of your hoses. And then also there are two rubber grommets on the backside of the airbox. You don't wanna lose those.Man: Now that we have our factory intake out of the truck, we're gonna lay everything out and we're gonna do a little bit of pre-assembly. With all the parts that we have here, I'm gonna walk you through it step by step. With our factory intake box, we're gonna locate the MAF sensor here, mass airflow sensor. We're gonna remove this and reuse it in our K&N intake. So, we have to take this out using a T20 Torx socket. You should be able to do this by hand as these screws should be in pretty loose. If not, grab a ratchet, get these two screws out, and then the MAF slides right out. After that, we're gonna spin the air intake box around because we need these two grommets. So, we're gonna remove them from our factory box. Once that's done, we can get this out of the way and continue on with our K&N.Now to install the mass airflow sensor into the K&N intake pipe. One thing I wanna note is when you take the mass airflow sensor out, make sure that this gasket is still on the bottom of it. Once you've confirmed that, slide the mass airflow sensor in this orientation with the connector facing this way. Grab the two supplied M4 by 7-millimeter bolts. And with a three-millimeter hex socket, we can secure the mass airflow sensor in place. So, I'm just gonna hand thread these first, make sure the holes line up. You don't want anything cross-threading. When bolts are small, a little hard to work with, but take your time. Make sure you do it right. Once you have some threads in, go ahead and take your three-millimeter hex head, tighten them down by hand. And then you don't wanna over-tighten this. It's a fragile piece of electrical equipment. But you do just wanna give a slight snug to make sure that the gasket is sealed.Next, let's locate the 90-degree quick fitting for our vent. We're gonna thread that into our intake pipe right here. Now, I want you to be cautious. Anytime you're threading a plastic piece into a metal piece, be cautious to not over-torque because you don't want the threads breaking off inside your intake pipe. So, as long as it's snug, you could take a look inside and make sure that the 90-degree fitting is at least flush with the intake pipe, should be good there. And then this is gonna be oriented in a certain position. And if I recall, it should be just about like that.All right. Moving over to our heat shield. We're gonna take the edge trim and install that. One thing I do wanna note in your kit, the edge trim will probably come all in one piece. This has been trimmed previously. And it's not a bad idea actually to trim this little section off because this is a really harsh angle here to try to mold this around. So, if you would like to trim it in order to avoid that, I would recommend it.We're gonna start here, right by this grommet here if you can see for reference. And we're just gonna work it the whole way around the edge of our heat shield. It does make it easier if you kind of bend the edge trim back. And if you do come to a tight corner like this, you can start the following edge first, leave yourself a little bit of slack, and then come back to push it down. It makes that a little easier to see. Continuing on. I'm gonna make sure I have it seated properly around the edge and then take our second piece and slip that on right here.All right. Now I'm gonna spin the heat shield around to show you what we're working on next is this bracket right here. And we're gonna take our grommet mount is this little guy here, and an M6 by 12-millimeter hex head bolt with a lock washer and a flat washer. And we're going to install the grommet mount right here. And then to tighten that down the rest of the way we need a 10-mil wrench and just get that on by hand as tight as possible. Once that's installed, we can put one of our factory grommets over this and that step is done. I'm gonna spin the heat shield around again. So, this hole right here above this grommet, we are going to attach the supplied bulkhead wire bracket.So, we need our bracket, an M6 by 12-millimeter bolt with a flat washer. That's gonna go through the bracket through the heat shield. Then we need another flat washer for the other side and an M6 nylon nut. We kind of work with the round so nothing falls off. Thread the nylon nut on. And then to fasten that down, we're gonna use a 10-mill socket and a 10-mill wrench. I'm gonna hold the nut with my 10-mil wrench. I'm gonna tighten down the bolt, my socket. Now, you don't have to tighten this down all the way yet because we might have to move this bracket around to put the bulkhead wire on once we have it in the car. So, [inaudible 00:16:52] installed there. And just to give you a different angle, there's the nut we installed.Now we're gonna install the filter adapter. So, I'm gonna spin it around to show you guys. This is where the adapter will be installed. This is the adapter itself and it goes in from this side, then you have to line up the threaded holes here with a hole in the heat shield. Then we're gonna grab two of the M6 by 12-millimeter button head bolts each with a lock washer and a flat washer. Then we're gonna screw those in by hand.And to tighten these down we need a four-millimeter hex socket and a ratchet. I'm gonna tighten these both down all the way like so. With our filter adapter installed, we're gonna grab our hump hose and the appropriate size clamp. There are several different size clamps so make sure it's the one. You grab the clamp that fits the hump hose the best. Slide the clamp on to the hose. Seat the hose all the way down against the heat shield and position your clamp. And make sure it's squared up so you're tightening it, sealing the hose all the way around. And then with our eight-millimeter socket, we're gonna tighten this down.Moving on to our vent hose we're going to pre-assemble this before we put it in the car. We need our vent hose itself, the two quick connectors, and the two smaller size clamps. We're gonna take our clamps, slide them over each end of the hose. Slide our quick connectors in on each end of the hose. Then to tighten these down, we're using a quarter-inch socket and ratchet. And then a quick note here. Before I tighten this all the way down, I'm gonna make sure that the clamp is over the quick connector inside the hose so you can feel where the end of it is. So, just make sure that your clamps are above that.With our pre-assembly finished up, we're moving on to installing components inside the truck. And we're at the throttle body right now with our reducer hose. The small end of the reducer hose is going to go on to the throttle body. Make sure you grab the appropriate sized clamp. Slide the clamp over the hose and then the hose over the throttle body. Make sure it's seated all the way down onto the throttle body. Adjust your clamp appropriately. Again, always make sure that they are square on the hose. And with our eight-millimeter socket and ratchet, we're gonna tighten this down in place.Let's grab our heat shield and put that into place. It helps if you squeeze the sides of the heat shield in order to fit it into place. And you might also have to just move some wire harnesses around a little bit. Once you get it to drop down, make sure your grommets fit into place. And then also the grommet insert from the factory, if that got left behind, just make sure you slide that back into the grommet as well. Once that's in position, grab the factory 10-mill nut. Screw that down. And then with your 10-mill socket go ahead and tighten it the rest of the way.Next, let's grab the K&N filter. Install that over the filter adapter. Make sure that you have the large clamp. Clamp will go on the filter itself, filter will go on the adapter. And take your trusty eight-millimeter socket and tighten this down. And make sure that the filter is seated all the way against the heat shield.At this point, let's put our fresh air scoop back into place. So, there is a spot in the K&N heat shield where the fresh air scoop will go. So, just make sure that...make sure you slide that into the hole. Then take the factory plastic clip and push it in place through the fresh air scoop. Since we're right here, let's go ahead and grab the bulkhead wire harness and slide it onto the bracket that we installed on the heat shield. And it just slides right on in place. Then once we have that in place, let's go ahead and grab our 10-mill wrench and tighten the bracket down the rest of the way.Now, let's grab our vent tube that we put together on the table and put that in place. Now, the factory vent tube is still here, we did not remove it from the uninstall. So, we're gonna remove that now. There's a little gray clip at the bottom. You press it in, slide it right off. And this is the clip that I'm speaking of right here. Now that we have that out of the way, let's put our K&N vent tube in place and it just slides over the connector. And this end will go into our intake pipe. All right. Now it's time to install our intake pipe. First, let's grab the clamps. Slide them over our hoses, one on the hump hose, one on the throttle body hose.And I find it easier to put the heat shield end of the pipe in first because there is some movement there so you can wiggle the pipe around and fit it into the throttle body. And just press it in till it's seated appropriately. Now let's grab our eight-mill socket and ratchet, tighten both of the clamps down.Okay. Once that's done, let's go ahead and grab our MAF sensor plug. Plug that into the MAF sensor. Push the locking pin into place so that doesn't come out. Then we can move on to our vent hose. Right? So, just make sure our vent hose adapter is in the right position. And slide the vent hose into place. Last but not least, let's replace our radiator valence and our hood release handle. Tighten the screws down with a T15 Torx socket and then put the factory retaining clips back in to secure the valence.That's gonna wrap up this review and install of the K&N Series 77 High Flow Performance Cold Air Intake for the '19 and newer 5.3-liter Silverado and Sierra 1500. Thanks for watching. And for all things Silverado and Sierra, keep it right here at americantrucks.com.

      Product Information

      Features, Description, Reviews, Q&A, Specs & Installation

      Features & Specs

      • Provides Additional Horsepower and Torque Numbers
      • Utilizes a Cotton Gauze, Red Air Filter
      • Aluminum Intake Is Mandrel-Bent
      • Bright Aluminized Metal Finish
      • Simple Bolt-On Installation
      • No Computer Re-Tune Required
      • Not CARB Certified
      • One Million Mile / 10-Year Warranty
      • Fits 2019-2024 5.3L Chevrolet Silverado 1500 Models

      Description

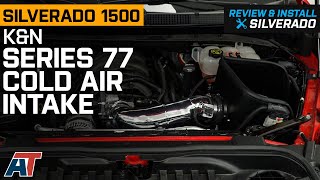
      Significantly Boosts the Truck’s Performance. Command the streets with newfound confidence with the help of K&N’s Series 77 High Flow Performance Cold Air Intake. By replacing your Chevrolet Silverado 1500’s factory air intake, you’ll be able to hit higher horsepower and torque numbers, as well as enhance your truck’s road presence.

      No Tune Required. K&N engineered their Cold Air Intake to improve the performance of your V8 Silverado without the need of reprogramming your computer. By utilizing flow dynamics, this Intake will increase power using the original factory tune. Even though a re-tune is not required for operation, AmericanTrucks recommends a custom tune to reprogram the vehicles computer (ECU) to get the best possible performance from this Cold Air Intake.

      Uses a High Flow Air Filter. Since the air filter in this cold air intake boasts a high flow construction and rating, your engine will consistently receive cooler, cleaner air. As a result, you can rest assured that your Silverado 1500’s engine will remain in great condition even during high-operating driving conditions.

      Incredible Air Intake Build. The Series 77 High Flow Performance Cold Air Intake features a mandrel-bent aluminum intake pipe that’s covered with a bright aluminized metal finish. It also comes with a heavy-duty heat shield that effectively protects the air filter from engine heat. Thanks to these components, this cold air intake makes a great addition to your truck’s powerful setup.

      Easy, Bolt-On Installation. Installing this cold air intake doesn’t require any drilling, so anyone with light mechanical skills and basic hand tools can take care of the procedure with ease. The entire task will also take no more than an hour to complete.

      Covered by a 1,000,000-Mile/10-Year Warranty. This cold air intake is backed by K&N’s 1,000,000-mile/10-year warranty. This, however, only covers defects in materials and workmanship. Interested to know more about the warranty’s terms and conditions? Then check out the manufacturer’s website or contact customer support.

      Not CARB Certified. This K&N Cold Air Intake is not CARB certified, therefore it is not legal for use in California or other states adopting California emission standards. Not legal for use on pollution controlled motor vehicles; not intended for highway use.

      Application. K&N’s Series 77 High Flow Performance Cold Air Intake fits 2019-2024 Chevrolet Silverado 1500 models equipped with the 5.3L V8 engine.

      Shop All Truck Parts And Accessories

      Shop All Cold Air Intakes For Trucks

      Fitment:

      Details

      K&N 77-3110KP

      CA Residents: WARNING: Cancer and Reproductive Harm - www.P65Warnings.ca.gov

      Installation & What's in the Box

      Installation Info

      What's in the Box

      • (1) Air Filter
      • (1) Heat Shield
      • (1) Tube
      • (1) Vent
      • (1) Adaptor
      • (1) Edge Trim
      • Installation Hardware
      4.8

      Customer Reviews (500+)

        Questions & Answers

        10 More Questions

        Will It Fit My Silverado 1500

        • 5.3L V8 - 19, 20, 21, 22, 23, 24