FREE 1 to 3-Day Delivery on Orders $149+ Details
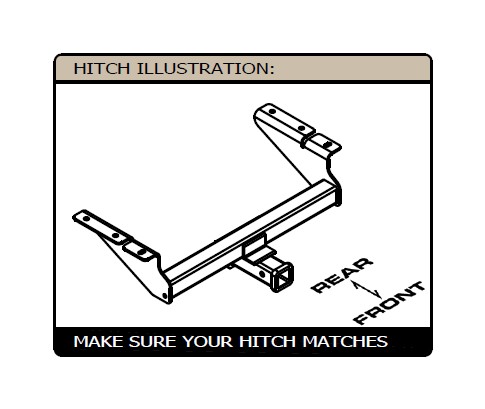
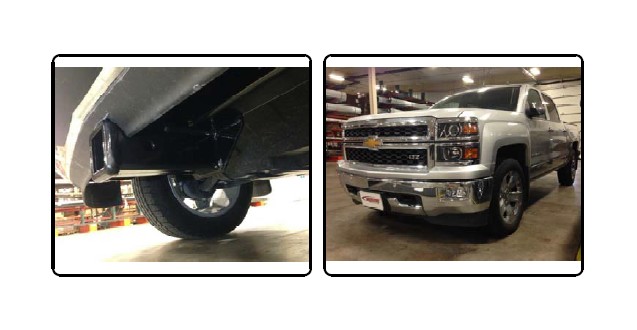
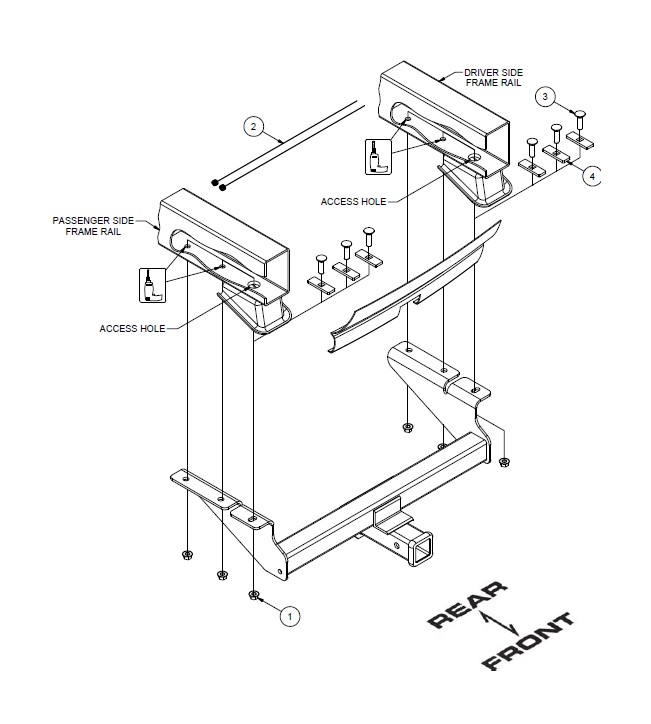
How to Install Curt Manufacturing Front Mount Hitch on your Silverado
Tools Required
- RATCHET
- TORQUE WRENCH
- SOCKET
- POWER DRILL
- AVIATION SHEARS
- DRILL BIT 17/32"
- CENTER PUNCH

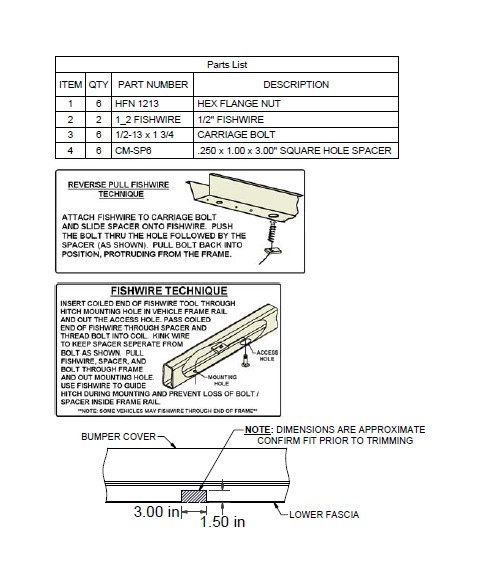
Shop Parts in this Guide
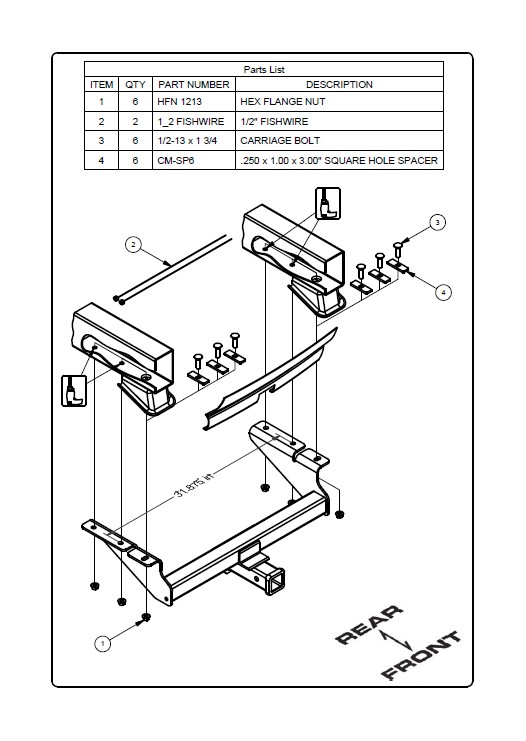
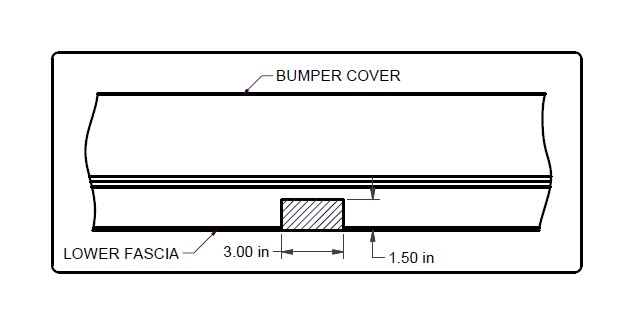
1. Determine if trimming is required on model by raising hitch into position. If needed, mark and trim lower fascia or remove lower fascia and return to owner. (See fascia trim detail) Note: Check for proper fit prior to trimming.
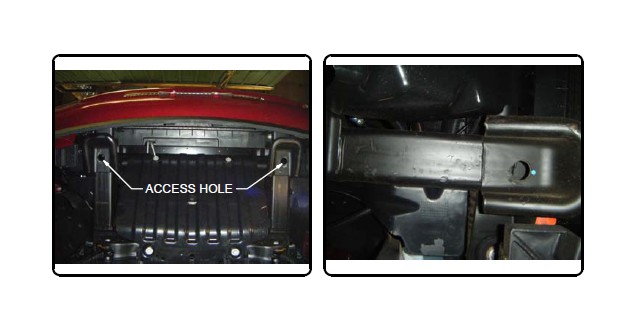
2. Raise hitch into postion aligning the access hole with the forward most hole in hitch.
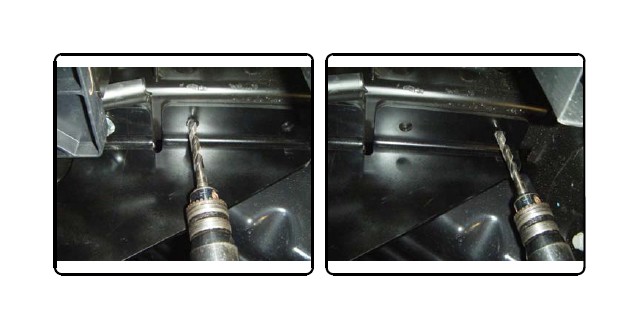
3. Mark the (4) drill holes in both frame rails using a center punch.
4. Lower hitch and drill (4) 17/32" holes marked in Step (3).
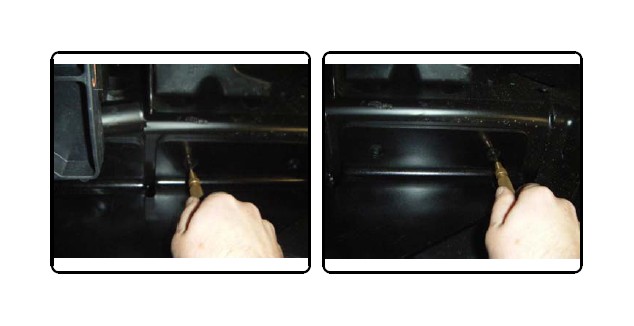
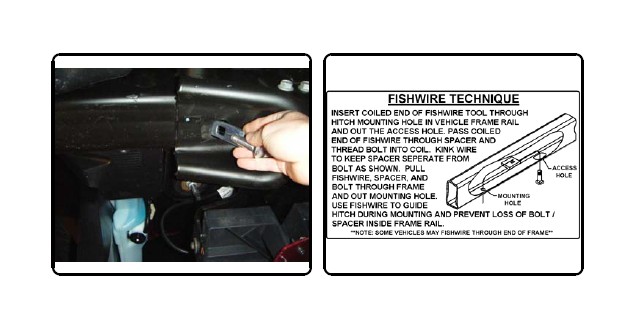
5. Fishwire 1/2-13 x 1 3/4" carriage bolts and SP6 spacers through the access holes and out drilled holes.
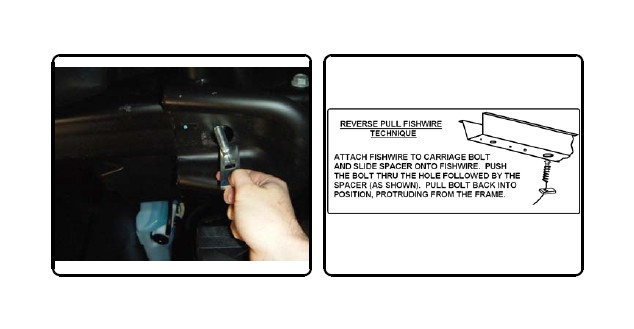
6. Reverse fishwire 1/2-13 x 1 3/4" carriage bolts and SP6 spacers into the access holes.
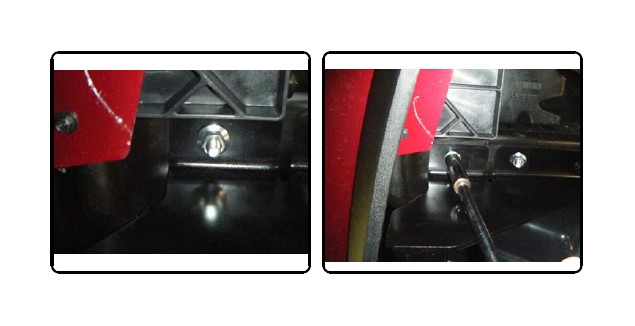
7. Raise hitch into position and secure with 1/2-13 flange nuts.
8. Torque all 1/2" fasteners to 110 ft-lbs.
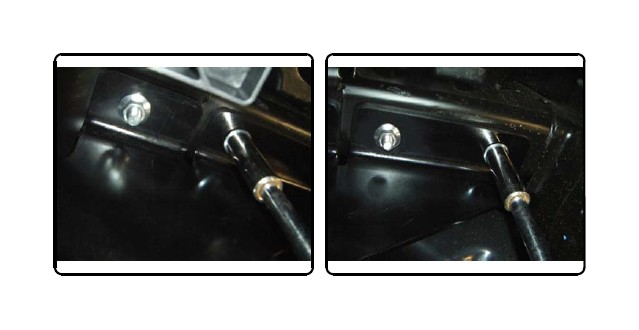
9. Hitch shown installed properly.
10. Installation is now complete.
INSTALLATION STEPS
1. Determine if trimming is required on model by raising hitch into position. If needed, mark and trim lower fascia or remove lower fascia and return to owner. (See fascia trim detail)
2. Raise hitch into position aligning the access hole with the forward-most hole in hitch.
3. Using the hitch as a template mark the (4) drill holes in each frame rail with a center punch.
4. Lower hitch and drill the (4) 17/32" holes marked in Step (3).
5. Fishwire 1/2-13 x 1-3/4" carriage bolts and SP6 spacers through drilled holes. (See fishwire diagram)
6. Reverse fishwire 1/2-13 x 1-3/4" carriage bolts and SP6 spacers into the access holes. (See reverse fishwire diagram)
7. Raise hitch and secure with 1/2-13 flange nuts.
8. Torque all 1/2" fasteners to 110 ft-lbs.
***DO NOT EXCEED VEHICLE MANUFACTURER'S RECOMMENDED TOWING CAPACITY ***.
FRONT MOUNTED ACCESSORIES
1) Do not exceed front axle Gross Weight Rating (GAWR). Consult owners manual or specification plate located on driver's door frame. Measure gross front axle weight by placing front wheels of loaded vehicle on a scale.
WARNING: Exceeding GAWR may overload the front axle and/or suspesion. This could result in accident, property damage and personal injury.
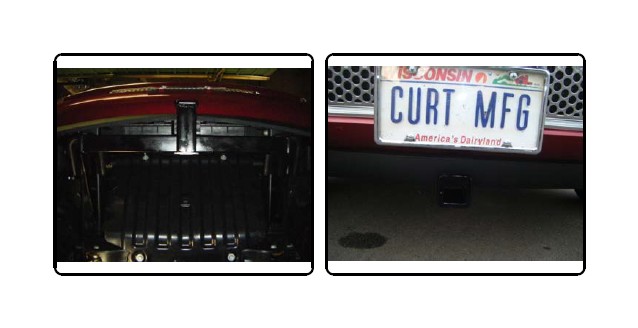
2) Reposition front mounted license plate if obstructed.
3) Do not obstruct vehicle lights.
4) Allow free air flow into grille opening.
5) Rear wheel traction may be reduced. This could effect handling. Reduce speed and drive with caution.
6) Accessories extend front of vehicle. This may reduce approach angle. Use caution when parking and maneuvering.
7) Do not obstruct driver view.
VEHICLE RECOVERY AND WINCHING TIPS
1) Use OEM tow hooks, recovery eyes or a clevis mount for attachment of a tow strap or winch cable.
WARNING: NEVER use a ball and/or ball mount as an anchor point for tow strap or winch cable. Severe personal injury or death could result.
2) Observe winch manufacturer's recommendations, cautions and warnings.
3) Attach return cable to tow hook or recovery eye when using a snatch block (See figure 1).
CAUTION: Do not attach return cable to winch mount. This may overload winch mount and/or front mounted receiver.
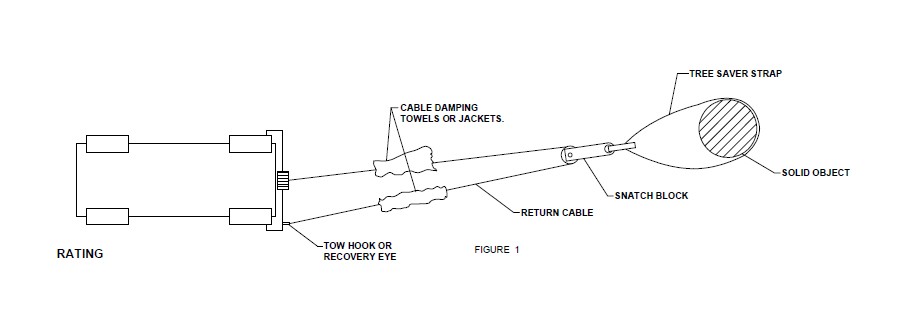
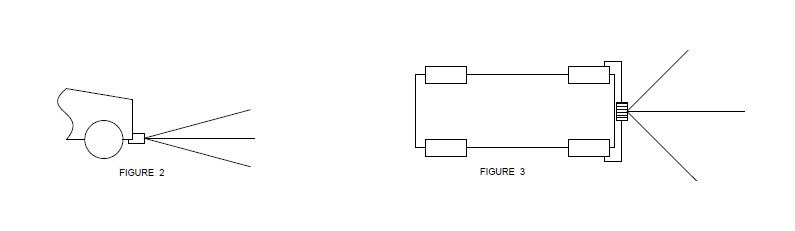
For Maximum line pull rating, winch cable must not exceed:
- 15 degree angle up or down from horizontal (See Figure 2).
- 45 degree angle left or right from straight ahead (See Figure 3).
CAUTION: Exceeding the maximum line pull rating may over load winch, winch mount, and/or front mounted receiver.
Best Sellers
-
 J&L 3.0 Oil Separator; Black Anodized; Passenger Side (11-26 2.7L/3.5L EcoBoost F-150)
 (500+)
$152.10 $169.00
(500+)
$152.10 $169.00