Talk to a Silverado 1500 Sales Tech
1-888-706-1096
M-F 8:30A-11P, Sat-Sun 8:30A-9P
$20K Sweeps! 10 Chances to Win! Enter Daily >

Body Armor 4x4 ECO-Series Front Bumper (14-15 Silverado 1500)

Item S101378
Verify parts fit and get product recommendations.
Silverado 1500 Sales Techs: Connect Now M-F 8:30A-11P, Sat-Sun 8:30A-9P
$0.00
Our Price

$860.99

FREE Shipping + $99.00 Oversized Item Fee Market Price $981.99 You Save 12% ($121.00) Up to 10% off for Military & First Responders! See Details

Will this fit your Vehicle?

Select a different vehicle Help?
Update or Change Vehicle
Ship to: Ashburn - 20149
Sorry, please enter a valid US or CA postal code
We're sorry, zip can't be updated at this time.
Recommended Install Shops
How It Works
Install Shops are available near Ashburn - 20149

Add Local Shop Installation

Total cost of service $299.00
    Create a list
    Add to New List

    Saved - View your saved items

    We're sorry. We couldn't save this product at this time.

      Product Videos

      Hey, guys. Adam here with americantrucks.com, and today we're taking a quick look at and installing the Body Armor 4 X 4 ECO-Series off-road front bumper for the '14 and '15 Silverado 1500. You should be checking this out if you're looking for a bumper that is not only off-road ready, which you really can't say for your factory bumper, but one that is also capable of mounting additional auxiliary lighting if you do so choose to mount that in the future while also retaining your factory tow hooks for that factory recovery opportunity at the front end. This particular option is hand-welded, fully one-piece steel, four-millimeter steel to be exact, which means it is extremely lightweight. That is something I wanna stress in this video which is not normally the case for an off-road bumper like this one you see here. Typically, they're super heavy requiring multiple people to mount. This one, I will say, does require at least two people but it is a lot lighter weight. Because this one is super lightweight, you don't have your front end sagging down as much as you would with those bigger bulkier brush guards or bigger front bumpers in the category. With that, you can also mount cube lighting on each side of the square cutouts that has the honeycomb backing welded on brackets are already available so you don't have to do any drilling or modification if you do so choose to mount them. You retain those factory tow hooks coming through those square cutouts as well, which some options in the category require you to remove without reinstalling. So, you lose those opportunities with some of the other options on the site. You also get that 20-inch light bar mounting opportunity through the square cutout here. You have fins for aerodynamics. You have pre-drilled holes for your front sensors if your truck is equipped with them from the factory. If they are not, there are plugs to plug up those holes so you don't have those ugly opening. Finally, it really does just hug the curves of your Silverado, go straight back to the fender well and has that really good fitment on the corners here. I will say it is a little tricky to mount up, however. Putting those brackets on your front end frame here and lining the bumper up to them to make sure it has a proper adjustment at the front end is a little bit tricky. You will need a helping hand to make sure that you can bolt it up, come back up and look at it, and make the adjustments as needed. There will be a small trial and error process. Might take you a little bit of time, but with patience, you can definitely get it done properly like you see here. One other thing I wanna point out is that that bumper gap you see here between the bumper and the body of the vehicle is relatively normal for aftermarket bumpers like this. When they're all hand-welded in the category, don't expect 110% percent OEM fitment. It does look pretty good in my opinion, but you will see some slight gaps when it comes to these off-road bumpers in the category. So, if you wanna pick up this bumper for yourself, you can do so for just around $700. Install, I'm gonna give two out of three wrenches on our difficulty meter because anytime you're doing body panels, it's a little bit more tricky than a simple bolt-on, but it doesn't require any modifications. So, two out of three seems fitting. You'll get it done in about two hours or so from start to finish with very simple hand tools. And like I said, have a helping hand on deck because although it is lightweight, it still can be tricky to hold in the place yourself while working the ratchet. Without further ado, I wanna show you guys how this gets done so let's just get to it.Tools used in this install include an impact gun, extensions, three-eighths ratchet, 7, 10, 13, 15, 16, 18, and 19-millimeter deep sockets, panel removal tool, hammer, 16-millimeter wrench, and an 18-millimeter wrench.Now, the first step of the uninstall is to grab your panel removal tool or a flathead screwdriver does the trick if you don't have one of these handy. Remove all of the plastic rivets or the push pin clips holding on that factory radiator shroud on top to give you access to your upper grille bolts. There's 12 of them all around the edges. Grab that tool, pry up, and remove them. Once you get this last one off, you can pop the entire radiator shroud out one piece. Next step are the four 10-millimeter bolts at the top of our grille. Now, those were given access to by removing the radiator shroud. That's why we had to pop that off. So, grab your 10-mil socket and remove all four of these. So, the next step here is to crawl underneath the front end. There's two 10-millimeter bolts holding on the bottom of your upper grille as well as two more clips that are snapping it into place. We're gonna pop off those 10-millimeter bolts and then we'll be able to pull our grille off.Next up we have to remove our trim panel underneath our headlights. Grab a 7-millimeter socket and remove the one bolt in your wheel well. With those bolts out of place, the next step here is to pull off that lower trim panel to gain access to a couple of bolts underneath of that lower grille. So, with that, pull them off from the side, work your way all the way around, pop that right off, set it aside. The next couple of bolts you wanna remove are right where the grille meets that headlight underneath of that grille portion. Grab your 10-mil socket and your extension, and you're gonna get this off. Same thing on the other side. All right, now we can get our upper grille out of place. Next up, there are two bolts, one on each side underneath of your bumper on a crossbar, like a support crossbar. Grab a 13-millimeter socket and remove those bolts. All right, now we're gonna do the same thing on the other side. There are four bolts holding the front of the bumper in place. Grab an 18 socket and get these off. All right. There's one down low directly next to that one. So, once you have everything disconnected from your stock bumper, it's time to pull it off.Next, we have to remove our tow hooks. Before we get that far, we're gonna take off that faceplate. There are three bolts on the front of it. Grab your 15-millimeter socket and pop these off. Same thing on the other side and then we'll tackle removing your tow hooks. All right. Next up is your tow hooks. Grab an 18 socket and remove the solo bolt on the one side. The secondary bolt has a nut on the opposite end so grab an 18 wrench, hold onto that. Set this aside to be reinstalled later. So, we finally got our factory Silverado bumper off of our 2014 1500 and we've got it underneath of the Body Armor 4 X 4 ECO-Series. And night and day difference to say the absolute least, this bumper in every way, shape, and form is gonna completely change the way your front end looks, but also how it performs. This bumper up top from Body Armor is made from a four-millimeter thick steel plating. Very durable but extremely lightweight stuff. Some of the other bumpers in the category are quarter-inch, half-inch thick which is absolutely massive making them extremely, extremely heavy. This is something you can honestly carry by yourself. It is a little bit heavy for one person, but it's still compared to what other options in the category weigh, this is seriously, seriously lightweight. On top of that, it's got that beautiful textured black powder coating, gives it a really stealthy aggressive finish, it gives it a scratch-resistance, but more importantly, a corrosion and rust-resistance. So, that's something to keep in mind. It's also got these thin cutouts which are very different from the way this factory bumper looks. These thin cutouts are mainly for airflow, increase all the air flow to the engine bay making it a little more aerodynamic.As you can see, it's got these square cutouts on the side as well with the honeycomb background. Those are perfect for two cube lights, one on each side, of course. And then in the middle, that's the golden boy, right in the middle. This has a mounting bracket already welded to the backside. Here, you guys can't see it from where you are, but there's two slots here for you to mount up to a 20-inch LED light bar. If you wanted to pick that up separately, you don't have to do any drilling, any welding, any cutting, any none of that nonsense, you just bolt it right up with the brackets provided in the kit. There are a couple of L-brackets to make that a little easier, but you can get a little custom with that as well depending on what you pick up. Those square cutouts in the middle here openings for your tow hooks. Fantastic. You can retain your tow hooks giving you a small recovery opportunity at the front end. Some other bumpers on the market will force you to lose your tow hooks if your Silverado came equipped with them from the factory.Finally, I wanted to point out the BA, Body Armor logo on each corner cut out of the materials. That's pretty unique. A lot of times bumper brands will just put a stamped plate right on the front, right, front, and center sticks out like a sore thumb. These actually blend in really well with the bumper. It's cut out so nothing is really in your face or popping off, it just looks really sleek on the ends. Well, with all that said, you can just clearly tell that this one is meant to take a beating while your factory one would be dented up, fallen off, and otherwise, just really terrible for ground clearance. You can see this has really good approach angles on the new one which I mentioned in the beginning there. So, we already touched on that but I wanna show you guys how it gets installed.So, the first thing I'm gonna do is assemble our tow hooks onto our brackets on the front end where the factory tow hooks were located. So, we'll do the tow hook extension brackets and then we'll do the brackets for the bumper and then we'll toss the bumper up on the vehicle. If you have an LED light bar or cube lights that you're mounting to the bumper, now is the time to do it. I think it's a little easier to do off the truck rather than on the truck when you're working with a little bit of room. So, do it now. Of course, we don't have any that are included in the kit so we're just gonna be installing exactly what you see here. Let's get to it.Well, guys, the first step of the install is to grab the extension plate for your tow hooks. What we're gonna do is take the double-nut bolt plate, the black one and then we'll go on the outside of the left here. We're gonna put it through the inside so that the plate is on the inside with the long extension part facing us. From here, we're gonna take a flat washer and a lock washer as well as our 19-millimeter nut and just tighten it down by hand. That'll hold it in place while we do the other one, and then you're gonna grab your 19-millimeter socket and really tighten everything down. All right, we're gonna do the same thing to our golden one. That's gonna go through the opposite end. You wanna make sure you're lining this up with the open hole. I'm doing the same thing here. All right. Now we can grab our tow hook and install it to the end of this extension plate using our factory hardware and then we'll repeat the exact same thing for the other side. Now, we're gonna take our factory tow hook and the shims included in the kit. We're gonna use one shim on each side just because without it, it has too much room to play. So, with the shims, it adds a little bit of space to cover that up. So, we're gonna put our factory hardware through and just thread it down by hand to hold it in place. On the opposite side, just slide that shim in and that'll reduce the amount of plate that it has. Take the long bolt, put that through as well. Gives any trouble, ball peen hammer will definitely do the trick.All right. Now, we can grab that factory 18-millimeter nut, put it on the end. Grab our 18-millimeter socket and tighten this down, 18-millimeter wrench to hold the other side. All right. Guys, now we can do the same thing for the other side. All right. Now, we can install our tow hooks with the bolt plate facing the opposite direction. What we're gonna do a slide that in with our shims and line is up to the open holes. Throw our long bolt in first, slide that through with the 19-millimeter nut on the back end. And finally, this one will go in the tow hook itself. We're gonna tighten that down with our 18 socket. All right. Now, we can install our brackets that are gonna go where our faceplates went. All right. Now, as I said, the next stop is our bracket that's gonna hold our bumper to the truck. You wanna make sure you're picking the site-specific ones. The bracket that has that L, this is gonna be facing the outside of the truck. So, this one here since it's on the left is gonna go on our passenger side. We're gonna reuse our factory bolts that held on that upper faceplate that was above our factory tow hook location. We're just gonna bolt those down with our 15-millimeter socket. All right. So, we're gonna put those factory bolts through those open slots. I'm just gonna tighten it down by hand just to get it to hold itself up. Now, the next one, same thing. Do everything by hand before you start tightening down with your impact gun or your ratchet.As you can see, it's slotted, so it moves back and forth. A good positioning to put it in would be the dead center or as much in the center as you can and then tighten them down. If you need to make adjustments later, you can come back and do so, but starting in the center gives you a good gauge of where this needs to go. Grab your socket. I like to start with the one at the top holding this in the center. All right. Now, repeat this exact thing for the other side. Now that we have this installed, we can grab our Body Armor bumper, set it into place on this bracket and use the hardware provided for us in the kit to tighten them down to three open slots on the outside of this bracket. Now that we have those brackets into place. Before we can actually throw our bumper on, we wanna make sure our grille is in place. Otherwise, we won't have access to the bolt holes on the bottom. So, next step is grille. We're not gonna be putting back on that trim panel that goes underneath the grille. Instead, the bumper takes up that excess space. So, you're gonna leave that trim piece out if you're Silverado was equipped with it. From there, grille straight to the bumper. But first, let's cross that grille on.All right. With this in place, let's grab our factory 10-millimeter bolts from the bottom and the top. We'll tighten them down and then it's bumper on. All right. Guys, once you have your bumper on, I definitely recommend having a helping hand. I got my buddy, Travis, here with me. Although it is very lightweight, it still needs two people to get into place and one person to hold while you head underneath to work the ratchet. So, let's get the bolts provided for us in the kit, head underneath and tighten it down. All right. Now, we can take our hardware provided in the kit, put them through the open hole slots, and we'll tighten them down. All right, guys, go back with your 18-millimeter socket and wrench and tighten down the top two. And as you saw, I just took off that bottom one simply because we only put it on the holder positioning so we could tighten the rest down so it didn't pop out of alignment. Now that everything else is tight, we're gonna take this off. And as you saw, we just put on our flat washer and our lock washer with the nut to make sure all of them have the appropriate washers. Now, for the third one, we can grab our socket and wrench again and just tighten that last one down. All right. Repeat this exact process for the other side making sure your bumper is properly aligned. Well, guys, that's gonna wrap up my quick review and install of the Body Armor 4 X 4 ECO-Series front bumper for the '14, '15 Silverado 1500. If you wanted to pick this up for your own Silverado, you can do so right here on americantrucks.com.

      Product Information

      Features, Description, Reviews, Q&A, Specs & Installation
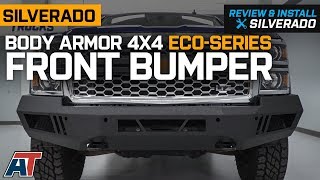
      Features & Specs

      • Rugged 4mm Steel Plating
      • Dual Power Coat Finish
      • Textured Matte Black
      • Aggressive Angled Styling
      • Corner Pentagon Pockets for LED Lights
      • 20" Dual Row Light Bar Front Mounting Point
      • Lower Vents Provide Additional Cooling
      • Simple Bolt-on Installation
      • Designed to Fit 2014-2015 Chevy Silverados

      Description

      Rugged Protection. The Silverado ECO-Series Front Bumper doesn't mess around when it comes to affording your Chevy some serious protection. With steel plating and a solid one-piece design, the ECO-Series Front Bumper protects and looks just as good as it performs, adding aggressive front end style.

      LED Light-Ready. the ECO-Series provides smart utilities with pre-cut areas for LED lights. You'll get mounting points for (2) cube LEDs on either side, on top of a front mounting point for a 20" dual-row LED light bar.

      Steel Construction. The 4mm-thick steel plating and one-piece welded design of the ECO-Series Front Bumper tackles touch trails and road debris with confidence. A carefully crafted angular front end allows the ECO-Series to deflect rocks, branches, dirt and mud at the optimum approach angle you need on extreme terrain.

      Powder Coat Finish. The ECO-Series will look just as a good as it performs in austere environments thanks to its double powdercoat, tough-as-nails textured finish. A matte black touch provides industrial style and brushes off scratches, dents and dings, looking great even with a few bumps or knocks.

      Bolt-on Installation. The ECO-Series certainly departs from any OEM or factory style, but it still installs just as easily as any factory bumper. No custom modification is needed for your Silverado - this bumper simply attaches using basic hand tools.

      Application. The Body Armor 4x4 ECO-Series Front Bumper is specifically designed as a bolt-on upgrade for 2014-2015 Chevy Silverado models.

      Freight Notes. Freight items can only be shipped within the continental 48 states, no expedited methods. What is freight shipping? Your Answers are Right Here!.

      Shop All Truck Parts And Accessories

      Shop All Truck Bumpers

      Shop All Front Truck Bumpers

      Fitment:

      Body Armor 4x4 GM-19335

      CA Residents: WARNING: Cancer and Reproductive Harm - www.P65Warnings.ca.gov

      Installation & What's in the Box

      Installation Info

      What's in the Box

      • (1) Front Bumper
      • Mounting Hardware
      4.4

      Customer Reviews (32)

        Questions & Answers

        10 More Questions