FREE 1 to 3-Day Delivery on Orders $149+ Details
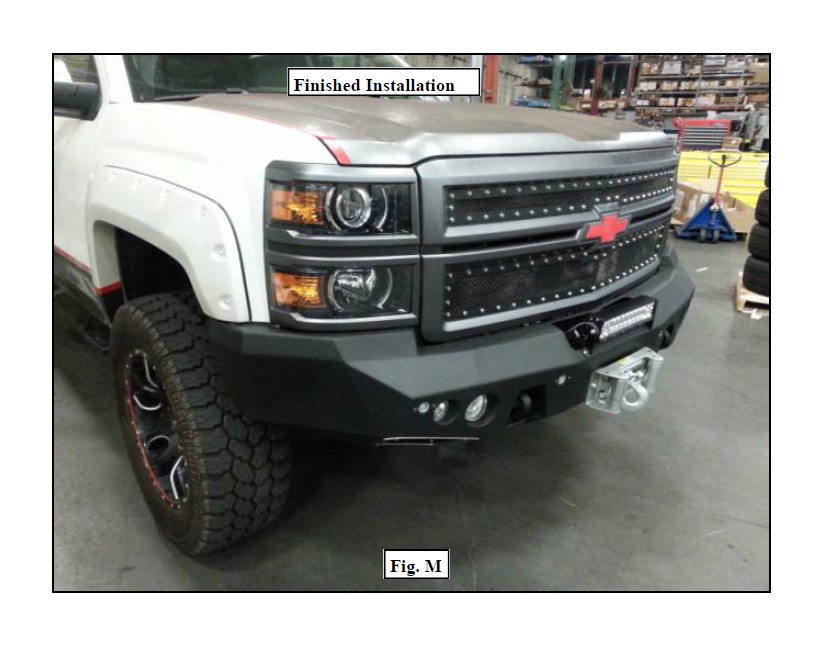
How to Install Smittybilt M1 Full Width Front Winch Bumper - Textured Black on your Silverado

Shop Parts in this Guide
NOTE: Carefully read entire instructions thoroughly before attempting to install this part.
INSTALLATION:
Step 1: Place masking tape on the areas of the front fenders, headlights and grill that can be scratched by removal of the OE front bumper.
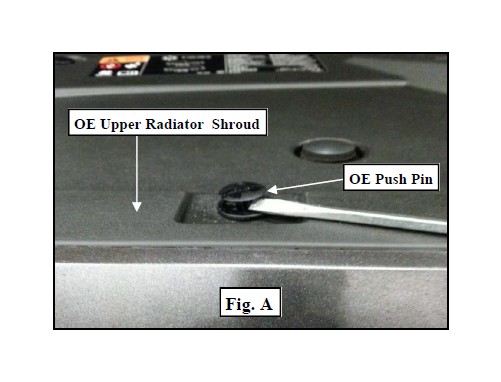
Step 2: Unclip and remove the OE upper radiator shroud by removing the (12) OE push pins. (Fig A)
Step 3: Unclip the wiring harness for the fog lights and parking sensor from the OE front bumper if so equipped.
Step 4: Unbolt and remove the front license plate from the vehicle. Save for reinstallation.
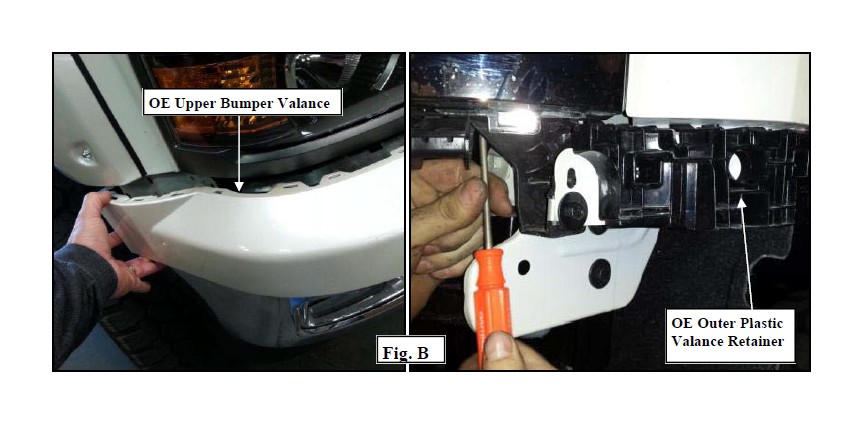
Step 5: Remove the OE upper bumper valance by removing the (2 per side) OE bolts located to the outer edge of the valance. Carefully, pry the OE upper bumper valance away from the vehicle and remove it. Remove the OE outer plastic valance retainers located on the side outer bumper mounting surfaces. (Fig B).
Step 6: Remove the (8) OE screws (4 top and 4 bottom) from the OE grill. Carefully pry the OE grill from the vehicle. (Fig C)

Step 7: Unbolt and remove the OE tow hooks from the vehicle frame rails. Save the OE bolts for reinstallation.
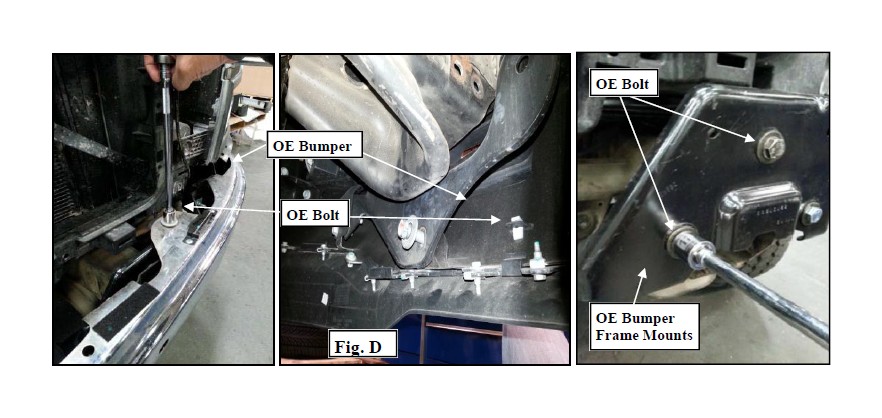
Step 8: Unbolt the (3 per side) OE bumper mounting bolts from the frame and carefully remove the OE front bumper from the vehicle. Unbolt and remove the OE frame to bumper mounts. Save OE hardware for reinstallation. (Fig D)
IMPORTANT!: Refer to your GM factory manual for your, vehicle specific, bumper removal instructions.
IMPORTANT!: If you are installing a winch, do so at this time. The winch will be secured to the winch mounting plate (93-9656) by the hardware supplied in the winch kit. Be sure to pull the winch cable and hook through the window in the winch mounting plate. Leave at least 3 to 4 feet of slack in the cable.
Step 9: Install the crush sleeves (90-8338) into the winch mounting plate (93-9656) mounts. (Fig E)

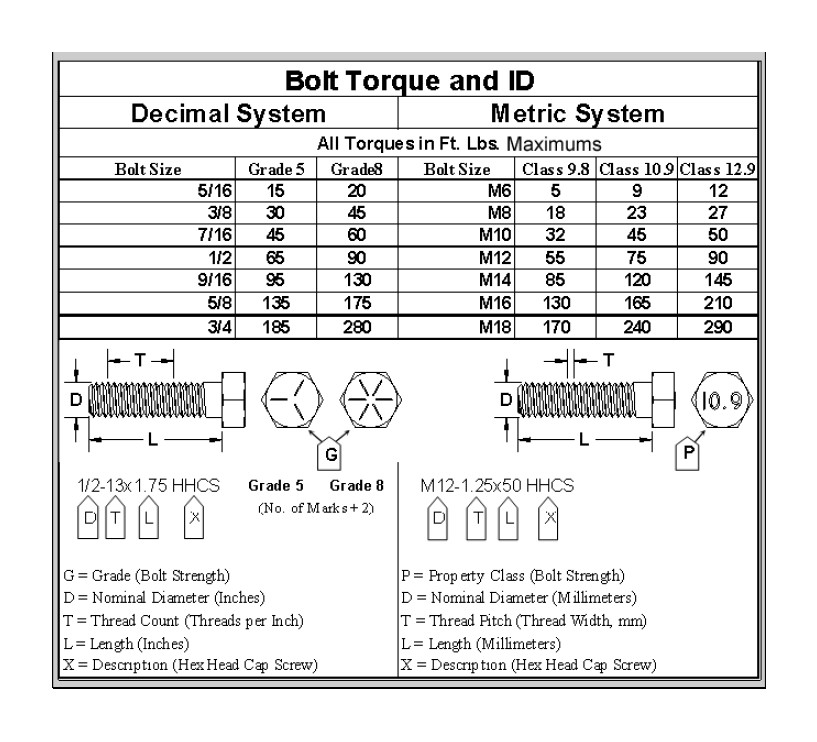
Step 10: Lift the winch mounting plate (93-9656) onto the OE frame rails. Secure the winch mounting plate and the frame rail support brackets (93-9650) to the frame rails using the supplied (2 per side) 7/16” X 5 1/4” bolts and hardware. Install Be careful not to hit the radiator or coolers. Tighten the 7/16” hardware according to the torque chart on page 9. (Fig F)
NOTE: Be sure to center the cradle between rails, due to irregularities from the manufacturer, you may need to adjust the winch mounting plate left or right to center the Drings for the front bumper shell installation.

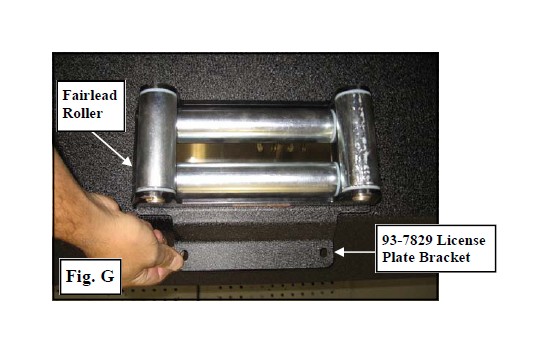
Step 11: Install the license plate bracket (93-7829) and fairlead roller onto the new M1 bumper (93-9665). (Fig G) Secure the license plate to the license plate bracket using the (2) supplied 1/4” X 3/4” bolts and hardware.
NOTE: Bracket may be installed above or below fairlead.
Step 12: Modify the vehicle wiring harness and DLAA fog light connector.
IMPORTANT!: DO NOT connect the winch or fog lights wiring harnesses until the bumper is fully installed.
Step 13: Install the bracket (90-7318) to the 2 1/2” amber DLAA fog light (LA5070) as a replacement for the included mounting bracket from amber driving light kit (S/B612800-02). (Fig H)
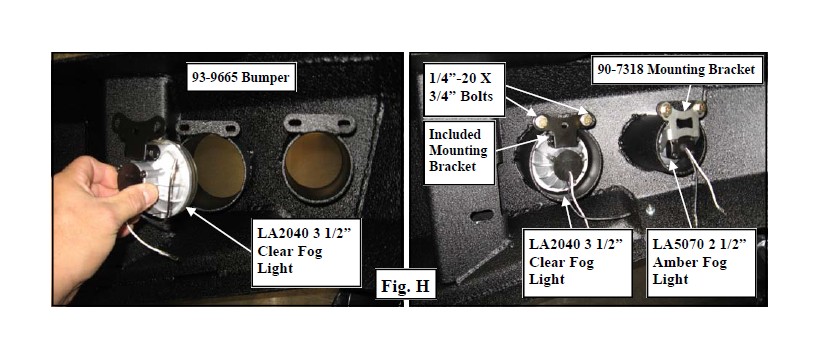
Step 14: Install the included mounting bracket to the 3 1/2” clear DLAA fog light (LA2040) from clear driving light kit (S/B612800-01). (Fig H)
Step 15: Install the fog lights into the new M1 front bumper (93-9665) using the supplied (4 per side) 1/4”-20 X 3/4” bolt and hardware. (Fig H)
Step 16: Install the stainless steel window bezels (90-9651 drvr and 90-9652 pass) to the new M1 front bumper (93-9665) using (4 per side) 10-24 X 3/4” stainless button head bolts and #10 hardware. (Fig I)
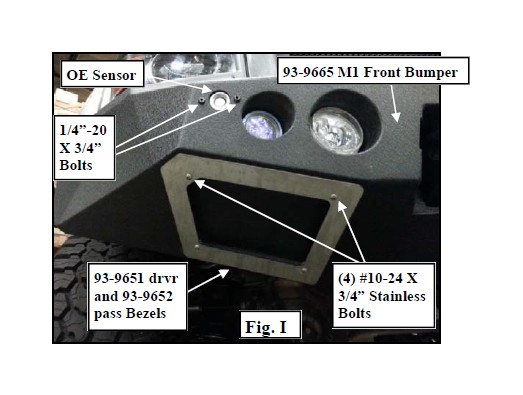
Step 17: If equipped, install the previously removed OE sensor into the M1 front bumper (93-9665) (Fig I)
NOTE: For vehicles without sensors, attach the sensor cover plates (93-9345) to the M1 bumper instead.
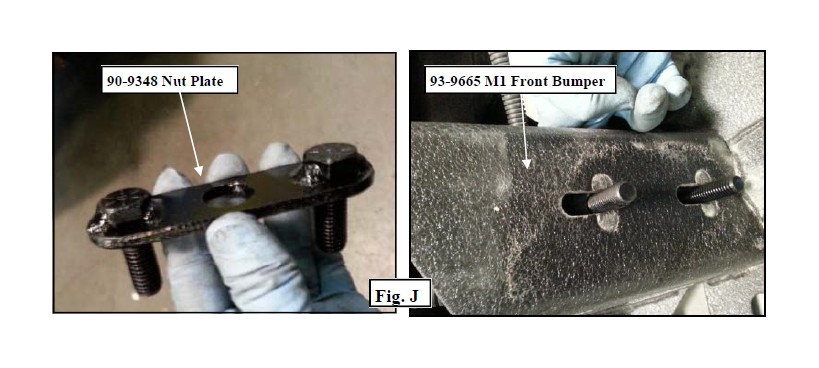
Step 18: Insert the (4) nut plates (90-9348) into the bumper mounting flanges. (Fig J)
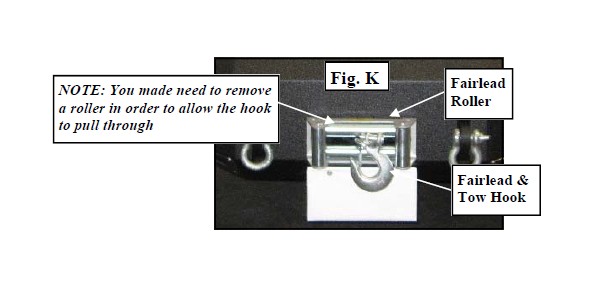
Step 19: Pull the tow hook through the roller fairlead on the bumper. (Fig K)
Step 20: Carefully raise, while pulling the winch cable and keeping it tight, and install the new M1 bumper (93-9665) assembly onto the winch plate (93-9656). Secure using the supplied (4) nut plates (90-9348), (8) 1/2” nuts and SAE 1/2” washers. (Fig L)
NOTE: 1/4” shims (90-9654) and 1/8” (90-9655) shims are provided to assist proper bumper alignment, if necessary. Install the shims as necessary and tighten the 1/2” hardware.

Step 21: With the M1 bumper (93-9665) properly aligned on the vehicle, torque the 1/2” bumper mounting bracket hardware according to the torque chart on page 9. Center the Drings on the bumper and tighten. (Fig L)
Step 22: Reinstall the OE front grill using the previously removed OE screws.
Step 23: Reinstall the OE upper radiator shroud using the previously removed OE push pins.
Step 24: Install the winch wiring per the manufacturer’s instructions. Carefully route the ( ) lead keeping it clear of sharp metal, areas of excessive heat or any moving parts. Secure the leads using zip ties.
NOTE: Be sure to select clean area and sand away the wax coating/paint to ensure a proper ground connection.
Step 25: Connect the fog light and OE sensor wiring connectors to the connectors on the vehicle. Test, aim & adjust the fog lights at this time.
Step 26: Installation is now complete. (Fig M)