 FREE 1 to 3-Day Delivery on Orders $149+ Details
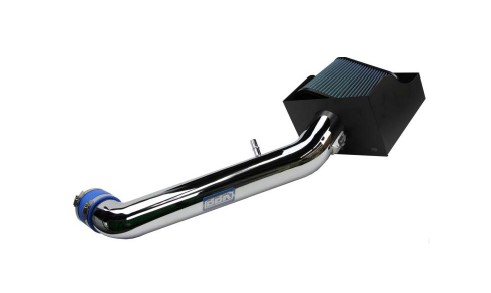
How to Install a BBK Chrome Cold Air Intake Kit on your Ford F-150

Shop Parts in this Guide
Follow these instructions carefully to ensure correct fitment and operation.
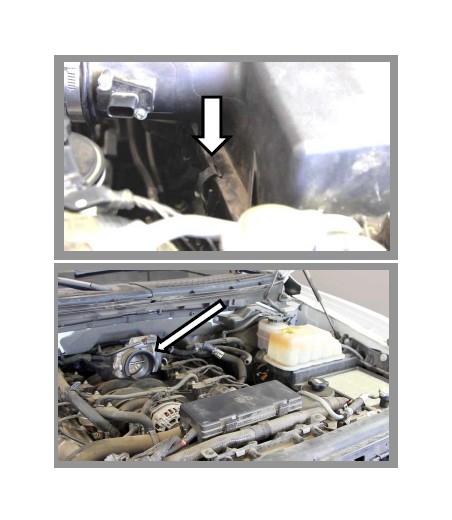
STEP 1: Disconnect the Mass Air Flow (MAF) Sensor.
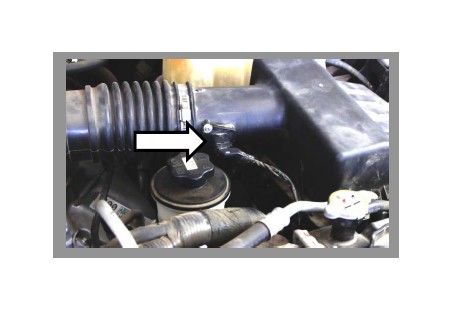
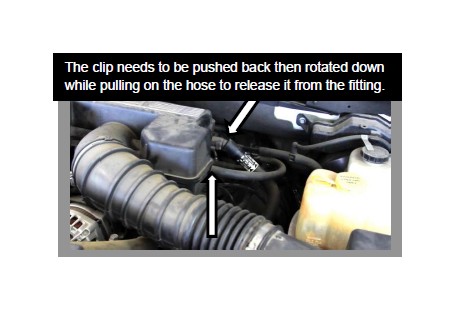
STEP 2: Remove the two vent hoses going into the factory intake system.
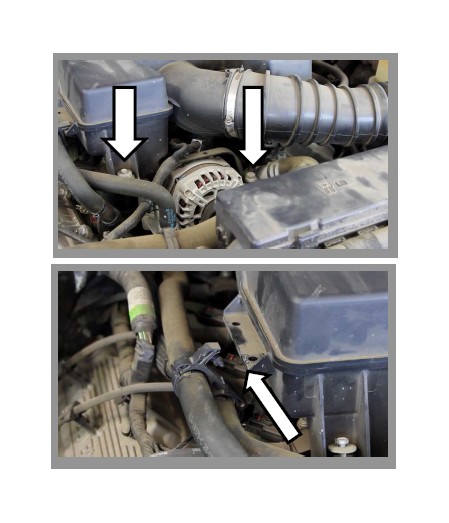
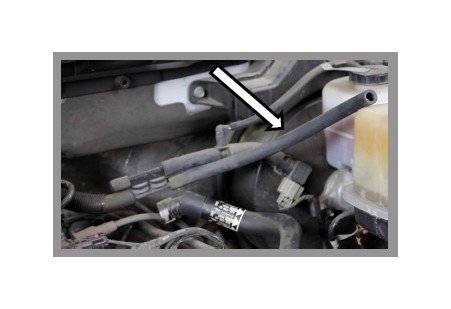
STEP 3: Loosen the two 10mm mounting bolts that secure the factory intake system to the vehicle. Also remove the clip on the passenger side of the stock intake system using pliers.
STEP 4: Unclip the three clips at the air box and remove the entire system out of the vehicle.
NOTE!!! The rubber coupler also needs to be removed from the throttle body.
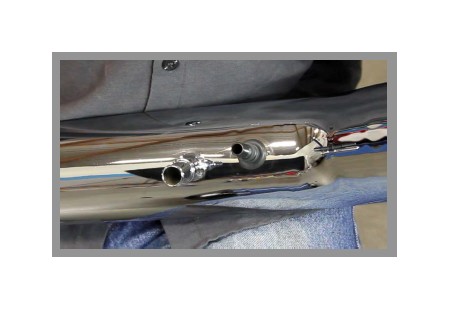
STEP 5: Remove the MAF Sensor from the stock intake system using a T-20 Torx and install it into the BBK Cold Air Tube using the supplied hardware. NOTE!!! The Air Flow of the sensor needs to be going towards the throttle body, the sensor should only fit one way because of the stagger in the hole pattern.

STEP 6: Install the supplied rubber grommet and straight fitting into the BBK Cold Air Tube.
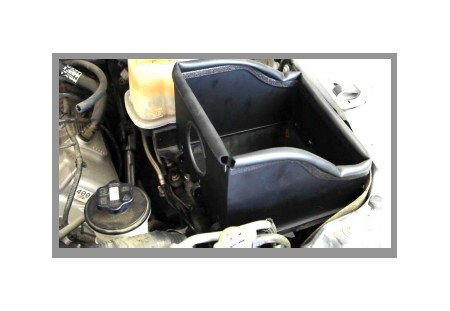
STEP 7: Install the sponge trimming onto the BBK Cold Air Intake shield and install the supplied plug into the BBK Air Filter.

STEP 8: Place the cold air shield into the vehicle on the bottom half of the factory air box and use the three original clamps to secure the shield.
STEP 9: Install the blue BBK Coupler and BBK Intake Tube to the throttle body.
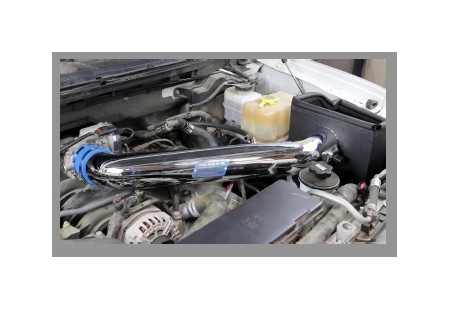
STEP 10: Remove the factory vent hose and replace it with the supplied 3/8” hose. Connect the supplied 3/8” hose to the plastic straight fitting on the BBK Intake Tube. The Valve Cover vent hose with the clip will be connected to the larger welded tube coming off the BBK Intake Tube. NOTE!!! Be sure that the clipped vent hose is pushed onto the welded tube until it clicks into place.
STEP 11: Install the supplied Air Filter, plug in the MAF Sensor and be sure all the clamps are tight.

STEP 12: Start the vehicle and let idle for a few minutes to ensure that there are no leaks and that the check engine light doesn’t come on.

