FREE 1 to 3-Day Delivery on Orders $149+ Details
How to Install Barricade Extreme HD Tubular Rear Bumper w/ LED Work Lights (07-18 Silverado 1500) on your Chevy Silverado
Contents
(1) - Bumper
(2) - Mounting Brackets
(2) - Mesh Grilles
(2) - Trailer Plug Brackets
(1) - License Plate Light
(6) - M14 x 2.00 x 45mm Bolts
(8) - M4 Allen Screws
(8) - M4 Flat Washers
(1) - Allen Wrench
(4) - Rubber Camera Sensor Covers
(2) - Plastic License Plate Inserts
(10) - Zip Ties
(12) - M14 Flat Washers
(6) - M14 Lock Nuts
(4) - M12 x 1.75 x 35mm Bolts
(8) - M12 Flat Washers
(4) - M12 Lock Nuts
(2) - M10 x 1.50 x 50mm Bolts
(4) - M10 Flat Washers
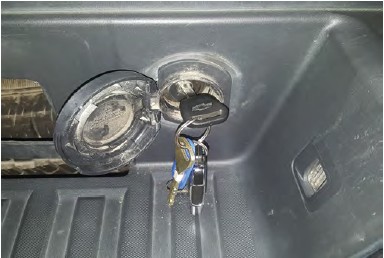
STEP 1 // Unplug the factory license plate light harness and the trailer plug connector.

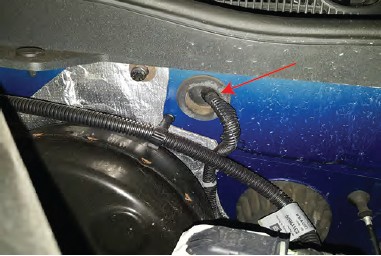
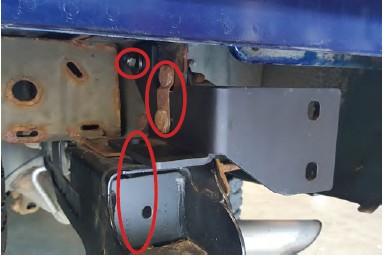
STEP 2 // Remove the 21mm nut that holds the bumper to the bottom frame rail.
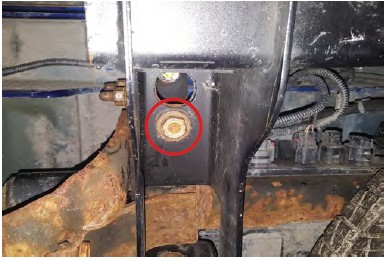
STEP 3 // Remove the (2) 18mm nuts , double bolt plate, and 15mm bolt that holds the bumper to the top frame rail. Remove bumper from vehicle. **Note Factory 18mm nuts, and double bolt plate will be reused.
STEP 4 // Using a flat head screw driver, push in the metal tabs around the trailer plug connector and remove it from the factory bumper.
STEP 5 // Using your factory, turn the spare tire lock clockwise and remove the spare tire lock from the factory bumper.
STEP 7 // Install the bolt on mesh covers. Secure the cover to the bumper using the provide (2) M6 nuts and flat washer. Optional LED lighting: Install the LED lights using the hardware provided in the light packaging. **Note: Mesh cover can not be used with the LED lighting.
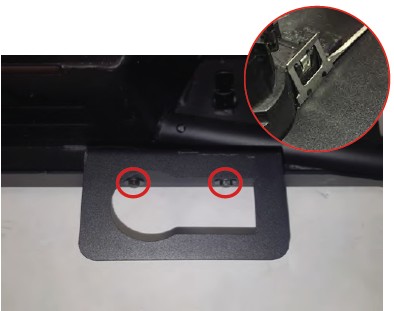
STEP 8 // Insert the included license plate light in the Barricade bumper. The aftermarket light only requires a 12V power source, it is grounded through the bumper. Use a test light to determine which factory wire is the 12V for the factory light. Splice the aftermarket power supply into the corresponding factory wiring.
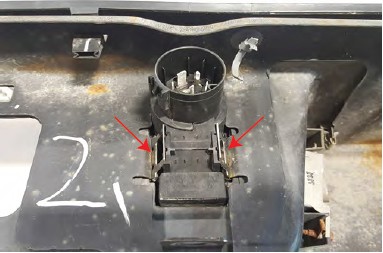
STEP 9 // If vehicle is equipped with rear backup sensors, remove and carefully install them in the new Barricade bumper by using the (2) M4 screws. If vehicle is not equipped with the sensors, install the (4) rubber sensor covers.
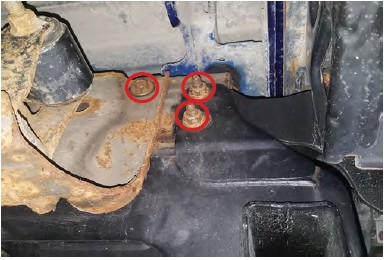
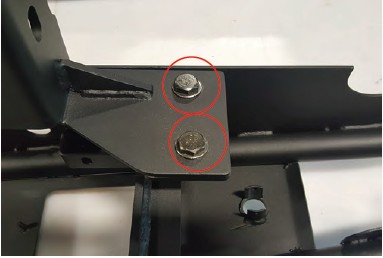
STEP 10 // Attach the new Barricade bumper bracket to the frame using the factory double bolt plates, 15mm nuts, and the M10x1.5x50mm bolt, flat washer, and lock nut through the top part of the bracket. Insert the M14x2.00x45mm bolt, flat washer, and lock nut in the lower part of the bracket securing it to the frame. Do not fully tighten the bolts.
STEP 11 // Attach the Barricade bumper to the bumper bracket using (2) M12x1.75x35mm bolts, flat washers, and lock nuts. Do not fully tighten.
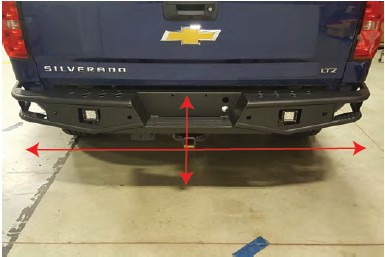
STEP 12 // Center the bumper, and adjust height of bumper to desired location. Then fully tighten all nuts and bolts.
STEP 13 // Install the trailer plug bracket that fits your vehicle by using the (2) M6x1.0x15mm bolts, washers, and lock nuts. Reinstall the trailer plug into the new bracket. If it does not clip in, use a small screw driver to expand the clips.
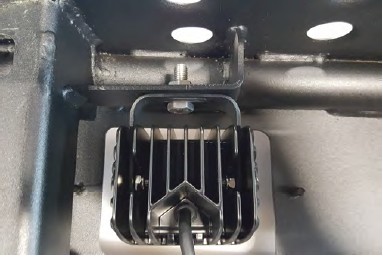
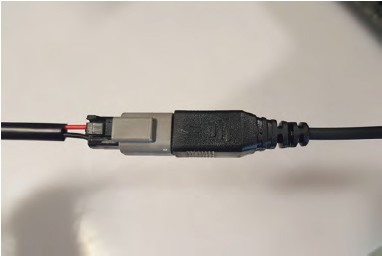
STEP 14 // Optional LED light wiring: Connect the supplied wiring harness to the bumper lights. Secure any loose wiring away from any hot/moving drivetrain components.
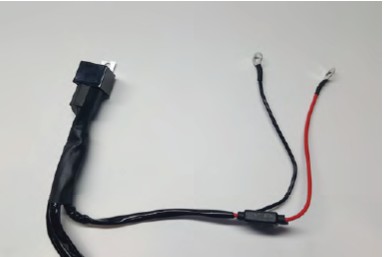
STEP 15 // Optional LED light wiring: Install the Red 12 volt wire to the positive battery terminal. Connect the black ground wire to the negative battery terminal. Secure any additional wiring away from hot/moving drivetrain components.
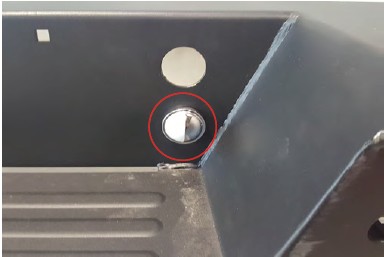
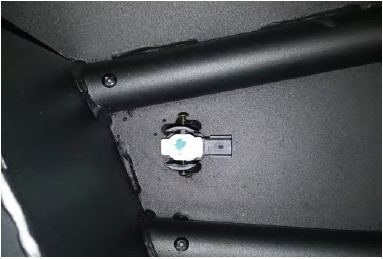
STEP 16 // Optional LED light wiring: Route the on/off switch to the interior of the vehicle using a suitable body grommet. Mount the switch in the desired location. Zip tie any extra loose wiring out of the way.