FREE 1 to 3-Day Delivery on Orders $149+ Details
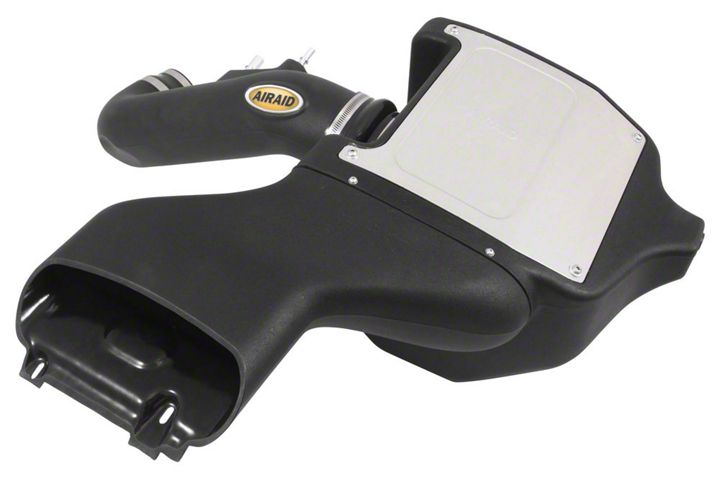
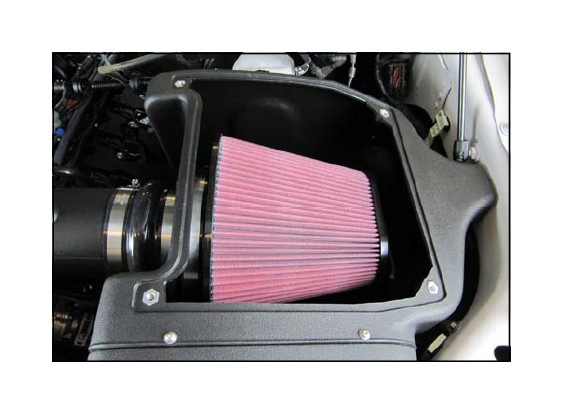
How to Install Airaid MXP Series Cold Air Intake w/ SynthaFlow Oiled Filter on your F-150
Shop Parts in this Guide
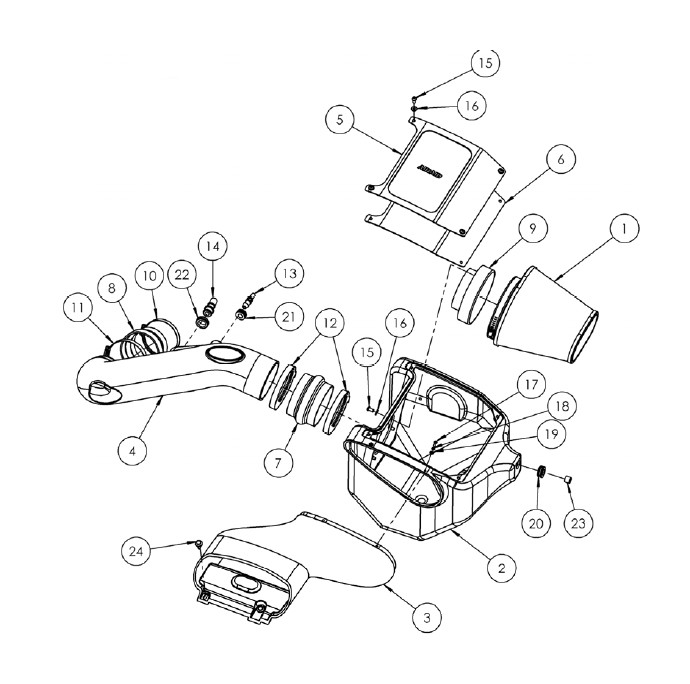
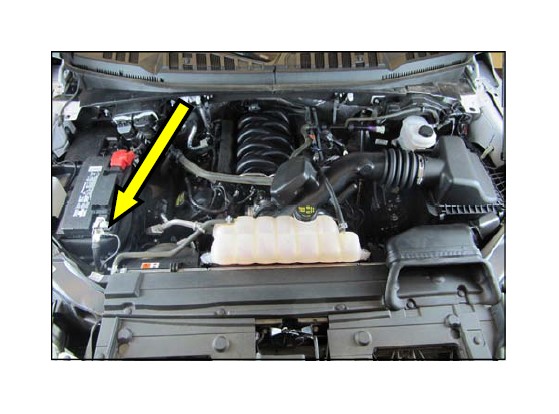
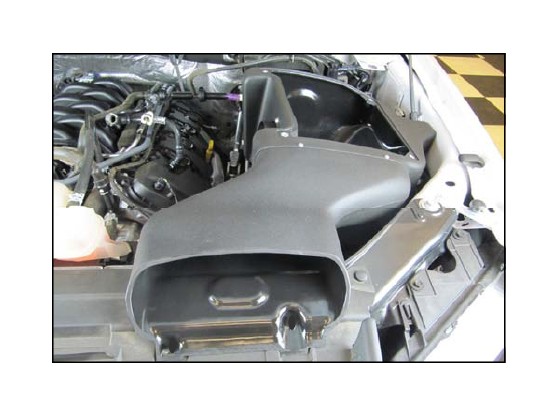
Component Identification
1. Disconnect the negative battery terminal.
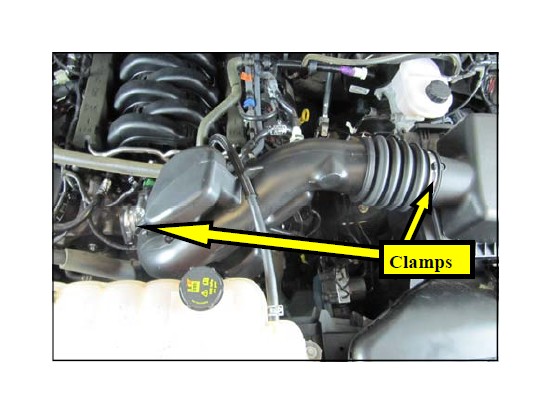
2. Loosen the intake clamps on the throttle body and the air box outlet.
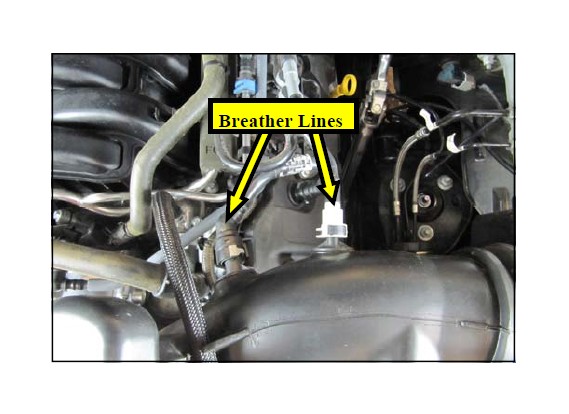
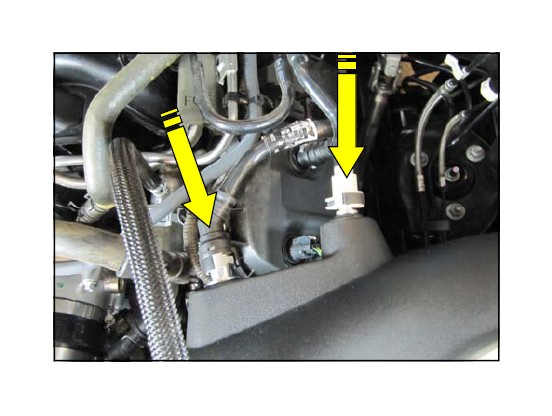
3. Disconnect the two breather lines and remove the intake tube from the vehicle.
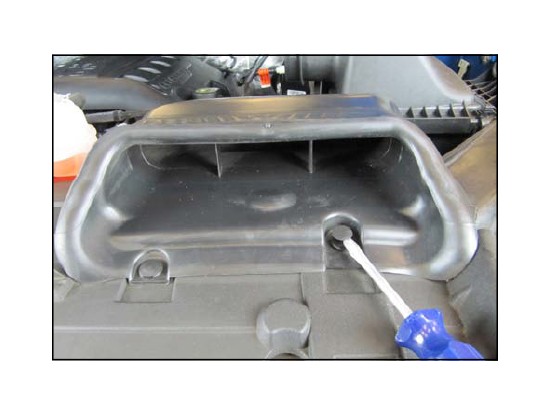
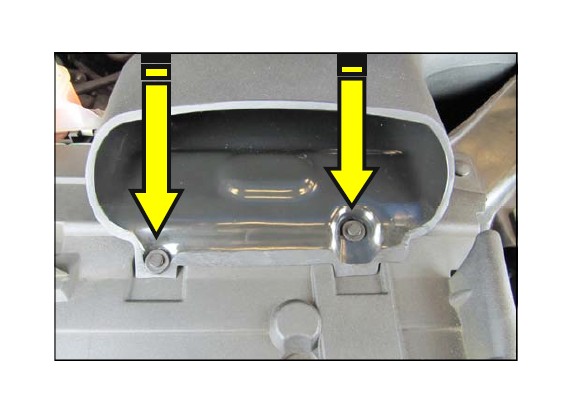
4. Using a standard blade screwdriver, gently pry up the center posts of the plastic rivets in the air inlet and remove them.
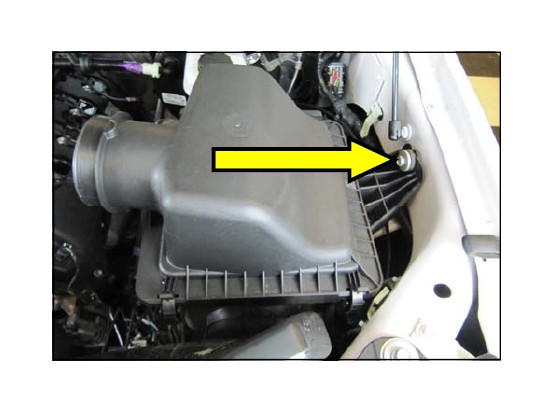
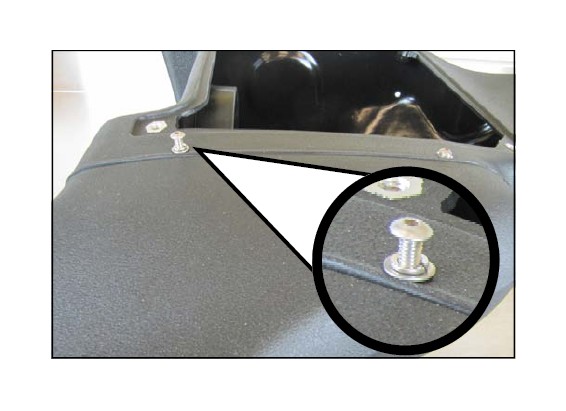
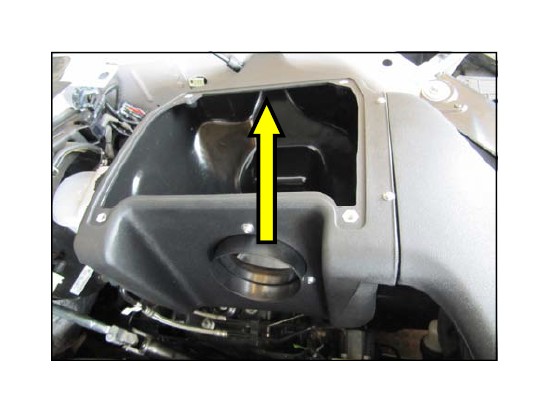
5. Remove the 8mm fender bolt in the air box and remove the entire air box/scoop assembly from the vehicle.
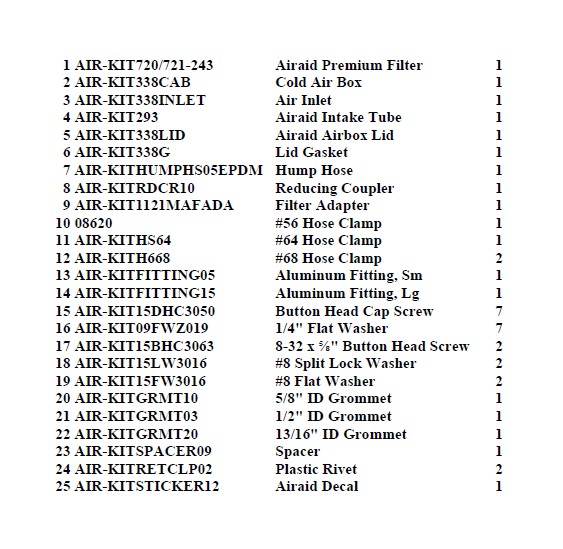
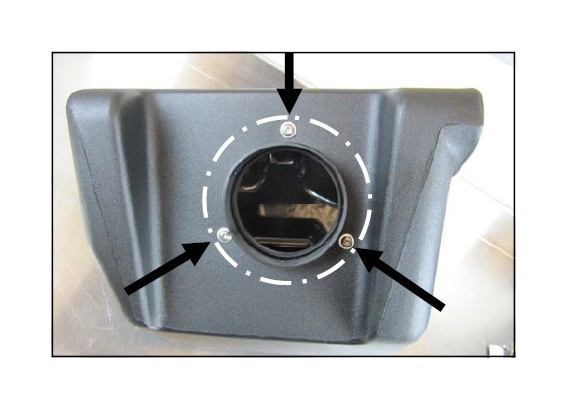
6. Mount the Filter adapter inside of the Airaid Air Box as shown using three sets of the 1/4-20 Button head Screws and Flat washers.
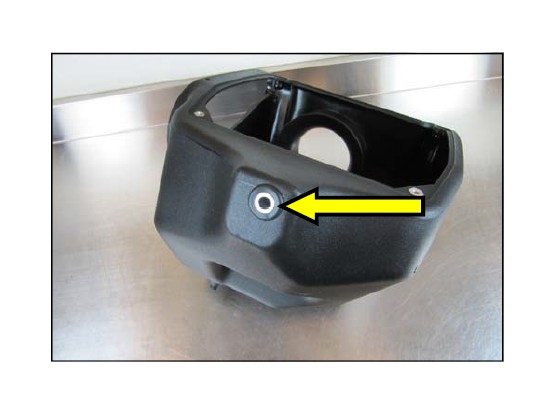
7. Insert the 5/8"Grommet and Spacer into the opposite side of the Airaid Air Box.
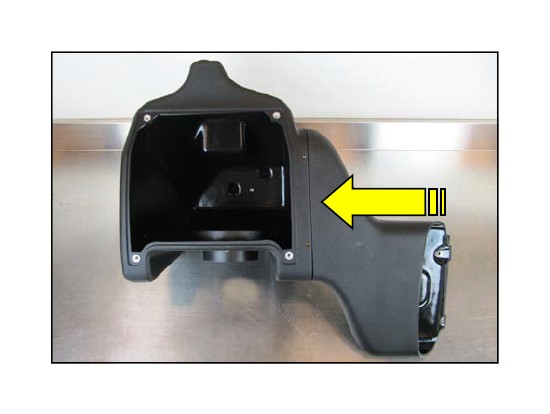
8. Snap the new Air Scoop into the Airaid Air Box as shown.
9. Secure the Scoop to the Air Box using the two sets of 8 -32 Button Head Screws, Lock Washers and Flat washers.
10. Place the Airaid air Box/Inlet assembly into the inner fender area of the vehicle as shown.
11. Align the mounting holes in the Inlet with the core support holes and secure it using the new, Airaid supplied, Plastic Rivets.
12. Secure the Airaid Air Box to the inner fender using the 8mm bolt removed in step 5.
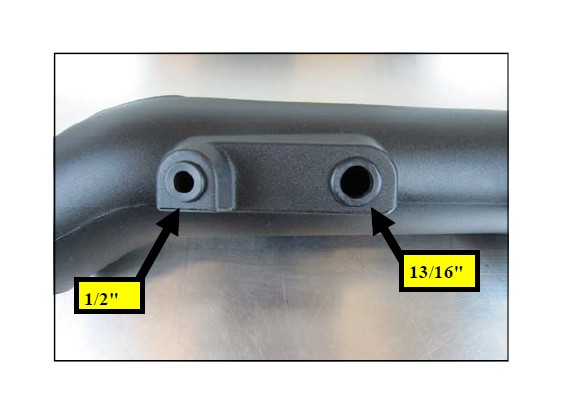
13. Carefully insert the 1/2" and 13/16" Grommets into the Airaid Intake Tube as shown.
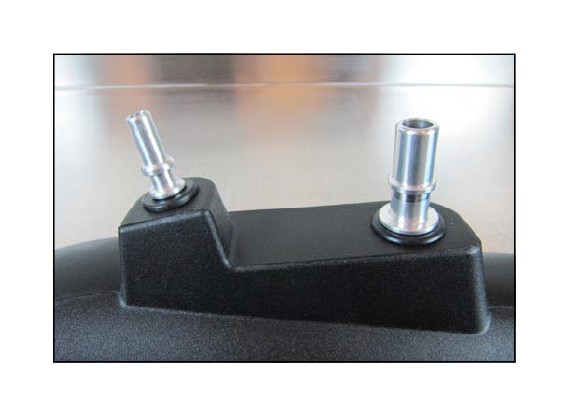
14. Gently insert the Aluminum Breather Fittings into the Grommets. Hint: Soapy water makes for a good Grommet lube .
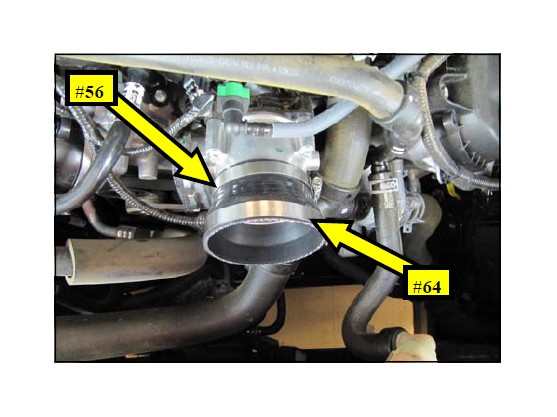
15. Slide the Reducing Coupler and Clamps onto the throttle body as shown. The Small end will use the #56 Clamp and the Large end is to use the #64 Clamp.
16. Slide the Hump Hose and Clamps onto the Filter adapter, as shown.

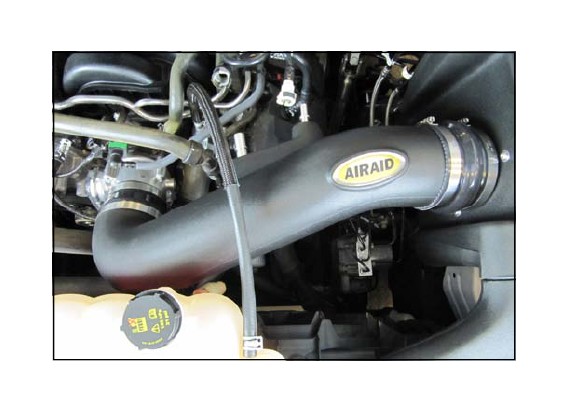
17. Insert the Airaid Intake Tube into the throttle body coupler, then into the Air box Hump Hose. Rotate the Tube forwards and backwards until proper alignment is achieved and tighten all four Clamps. Apply the Airaid Decal onto the Tube as shown.
18. Reconnect the breather lines to the Aluminum Fittings in the Intake Tube. When properly installed a distinct " Click" will be heard.
19. Install the Airaid Premium Filter onto the Filter Adapter and tighten the clamp.
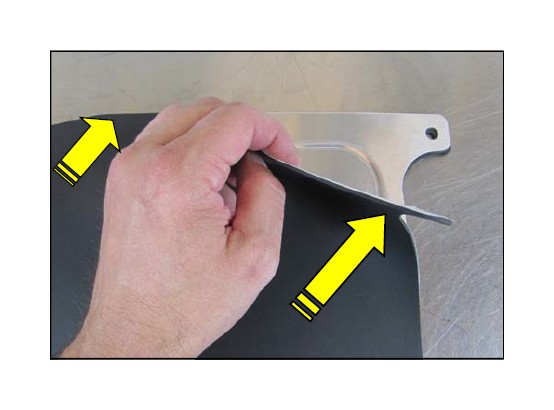
20. Remove the protective film from the top of the Air Box Lid. Prepare the underside for the Lid Gasket by cleaning it using a prep-sol or equivalent. Carefully apply the self adhesive Gasket onto the Lid as shown.
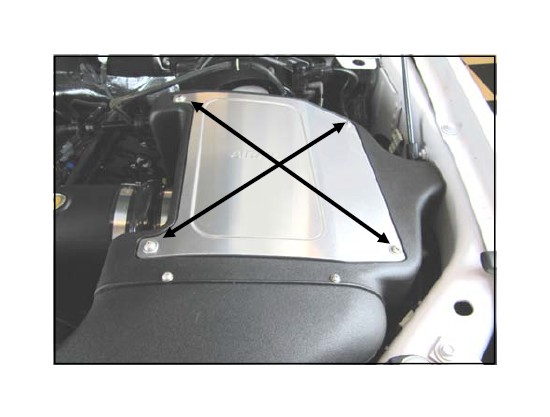
21. Mount the Lid onto the Air Box using the remaining Button Head Screws and Flat Washers. Double check your work!
Make sure all clamps, hoses, bolts, and screws are tight. Reconnect the negative battery cable!