FREE 1 to 3-Day Delivery on Orders $149+ Details
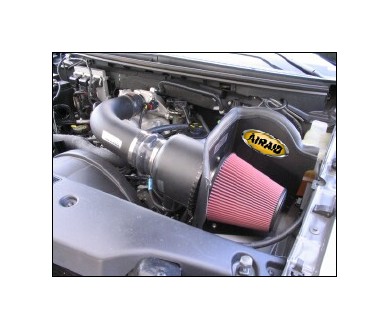
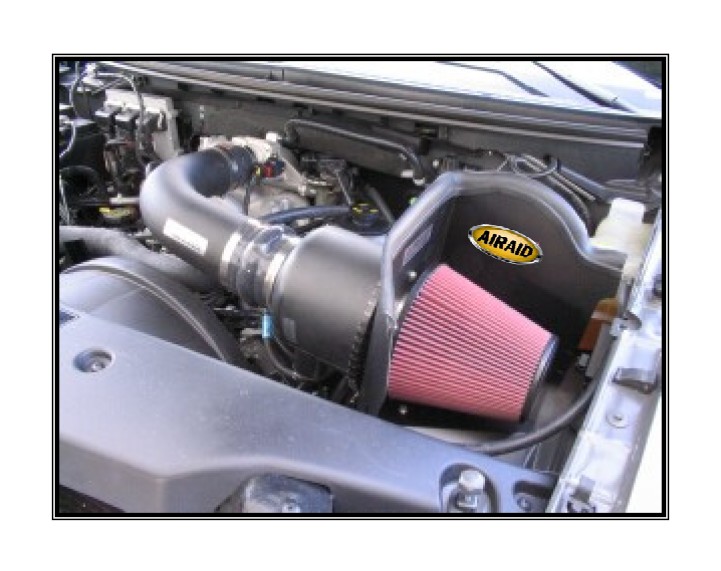
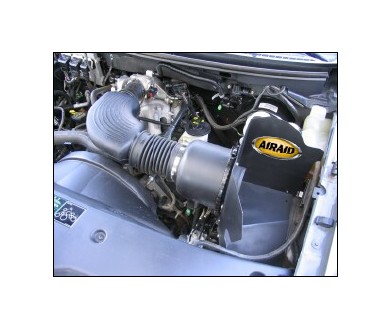
How to Install Airaid Cold Air Dam Intake w/ Black SynthaMax Dry Filter on your F-150

Shop Parts in this Guide
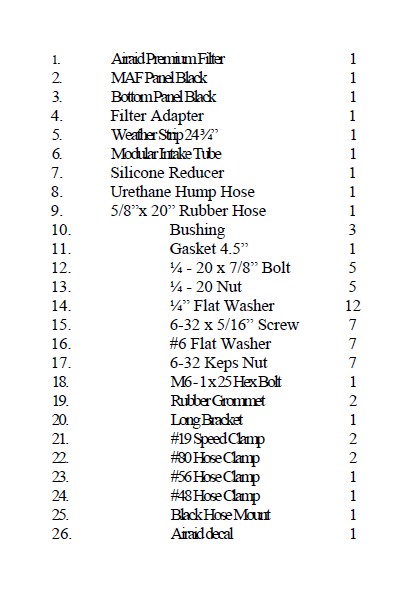
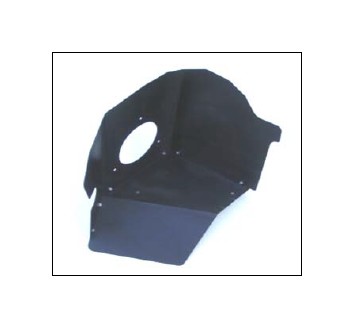
Component Identification
1. Disconnect negative battery cable. Unclip factory filter housing from intake assembly.

2. Remove air filter and air box from vehicle.
3. Assemble the Airaid Cool Air Dam assembly using the supplied #6 screws, washers and nuts as shown above.
4. Assemble the Airaid Filter Adapter plate using the supplied ¼ inch bolts, washers, spacers and nuts provided as shown above.
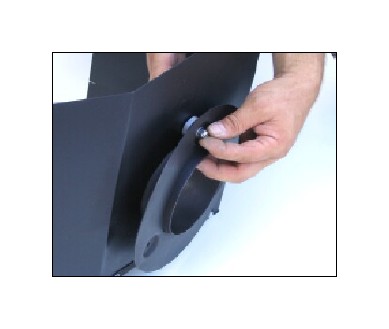
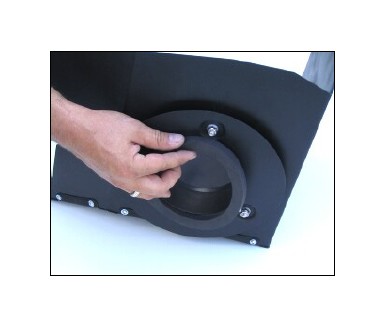
5. Install the supplied gasket on the Airaid filter adapter as shown.
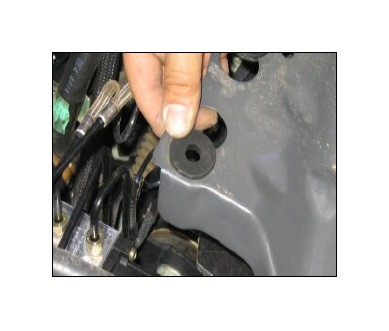
6. Remove the two factory grommets from the body and discard.
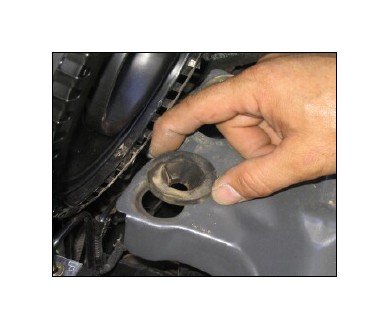
7. Install the supplied rubber grommets in place of the factory grommets previously removed.
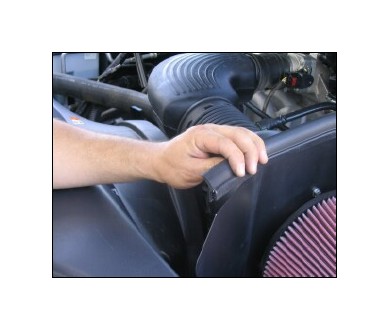
8. Install the Airaid Cool Air Dam assembly on vehicle using the factory intake tube clamp. Apply the Airaid Foil Decal onto the Panel as shown.
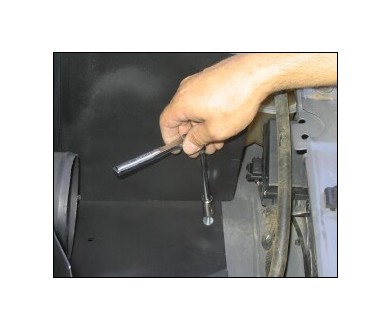
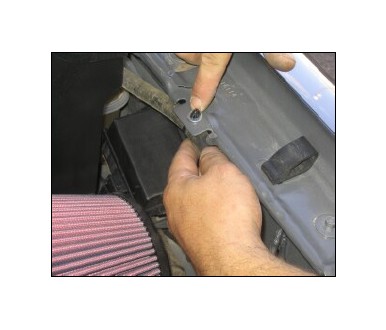
9. Mount the Airaid Cool Air Dam assembly to the vehicle using the supplied metric bolt and washer and the factory bolt hole as shown above.
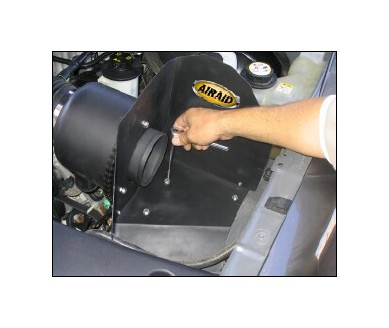
10. Finish mounting the Airaid Cool Air Dam assembly to body using the supplied ¼” nuts, bolts, washers and long bracket as shown. Note: The long bracket must be mounted under the factory mounting plate and grommets
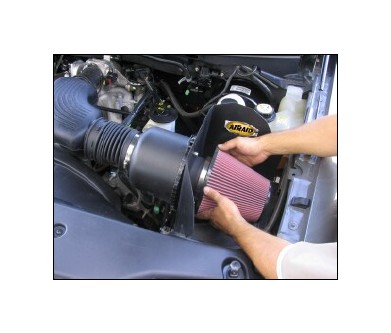
11. Mount the Airaid air filter on to the filter adapter using the supplied hose clamp.
12. Install the supplied weather strip on the top edge of the Airaid Cool Air Dam. Note: The weather strip is pre cut to the proper length. Start from one end and work your way around to the other end to insure even placement.
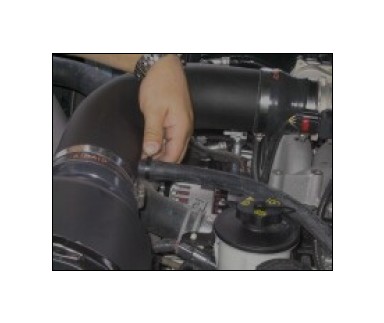
13. Mount the factory coolant hose to the inner fender using the supplied black plastic hose mount and washer as shown above.
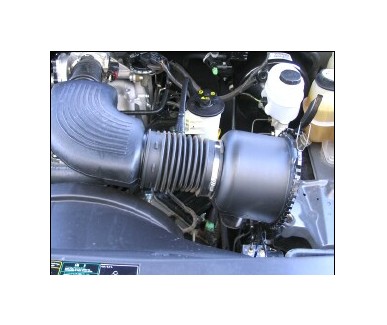
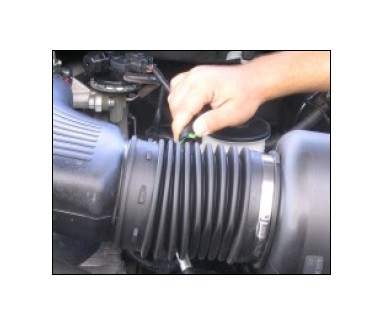
14. Disconnect valve cover breather hose from factory intake tube and valve cover.
15. Loosen hose clamps connecting the factory intake tube to the air filter assembly and throttle body.
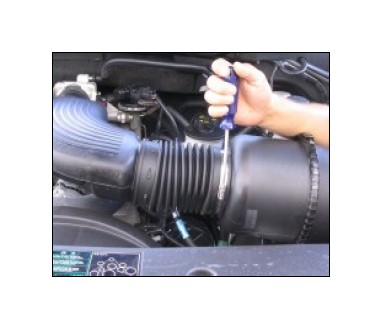
16. Remove the factory intake tube assembly from engine.

17. Install the supplied urethane hump hose and two #80 hose clamps on factory air filter assembly. Leave hose clamps loose until final assembly.
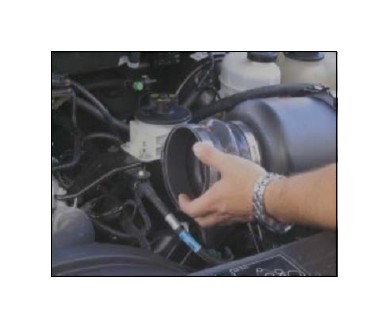
18. Install supplied silicone reducer on end of throttle body. Install #48 hose clamp on small end of the reducer and #56 hose clamp on the big end of the reducer. Leave hose clamps loose until final assembly.
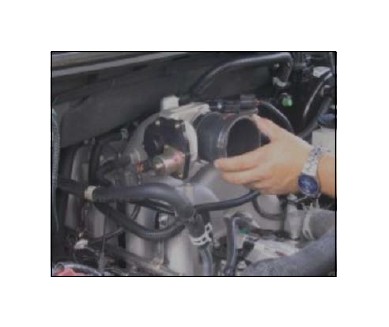
19. Install the Airaid Modular Intake Tube on engine.

20. Tighten hose clamps on both ends of the Modular Intake Tube.
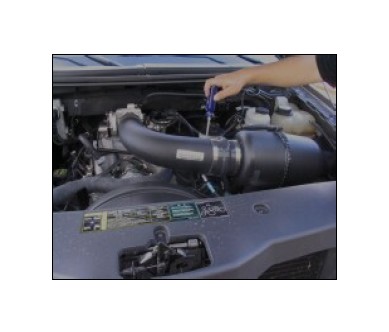
21. Install the supplied rubber hose on the Modular Intake Tube. Connect the other end of the hose to the valve cover. Secure both ends of the hose with the supplied speed clamps.
22. Double-check your work to be certain that all nuts, bolts, and clamps are securely fastened. Check for proper hood clearance before shutting hood.
23. Reconnect the negative battery cable.