 FREE 1 to 3-Day Delivery on Orders $149+ Details
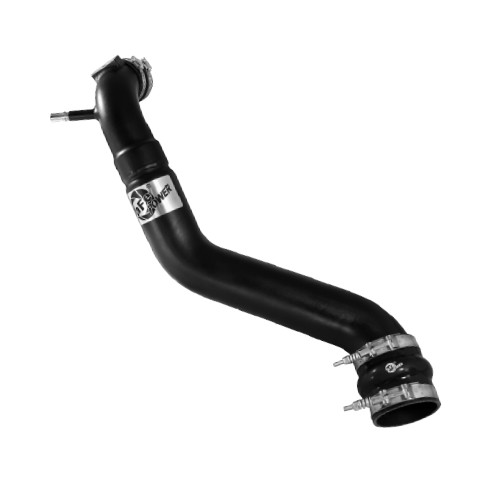
How to Install AFE BladeRunner Intercooler Hot & Cold Side Tubes on your F-150
Installation Time
2 hours
Tools Required
- Flat Screwdriver, Medium
- Flat Screwdriver, Small
- T15 Torx Driver
- 7/16” Deep Socket
- Ratchet

Shop Parts in this Guide
Parts Included:
• Tube (05-60264)
• Coupling Straight (05-01245)
• Coupling Hump (05-60025)
• Clamp 3.75" (x2)
• Clamp #048 (x2)
• Screw, Cheese Head (x2)
CAUTION: Allow time for your vehicle to cool down prior to installation. When working on or under your vehicle proceed with caution. Exhaust systems reach high temperatures and may cause serious burns. Wear protective safety equipment; eye goggles and gloves to ensure a safe installation. aFe recommends professional installation on our products.
1. Disconnect the vent tube by depressing the ends of the retaining clip and pulling the clip upwards then pull the vent tube to seperate from tube.
2. Disconnect the wire harness from the sensor by depressing the tab and pull to separate.
3. Remove the sensor for reuse in your new intercooler charge tube.
4. Loosen the band clamp at the throttle body connection and pull the tube to loosen.
5. From under the front of the vehicle remove the clips that retain the flexible splash shield.
6. Use a small screwdriver to free the wire retaining clip at the lower tube connection.
7. Pull the loweer tube connection apart and remove the tube from the bottom.
8. Place the 3" X 2-1/4" silicone coupler over the throttle body and secure it with a #48 clamp.
9. Place the 3.5" x 4" silicone hump coupler over the intercooler outlet. Place (2) T-bolt clamps over the hump coupler but do not tighten at this time.
10. The new intercooler tube can be installed from top or bottom. Insert the lower end into the hump coupling but do not tighten yet.
11. Slide the remaining #48 band clamp over the top of the new tube and install the tube into the throttle body coupler. These clamps can now be fully tightened.
12. Reinstall vent tube onto new intercooler tube until it bottoms out on the fitting then press the retaining clip down to lock in place.
13. Install the sensor with the (2) small screws provided and connect the wire harness.
14. Before tightening the lower coupling clamps, push the hump coupler as far as it can go over the intercooler and push the lower end of the tube into the coupler as far as it can go.
15. Tight en the T-bolt clamps securely and reinstall the lower splash shield.

