 FREE 1 to 3-Day Delivery on Orders $149+ Details
Whipple Cold Air Intake (15-19 3.5L EcoBoost F-150, Excluding Raptor) Installation Guide
Installation Time
60 minutes
Tools Required
- 7mm socket wrench with extension
- 8mmsocket
- Sheers or scissors
Prior to beginning installation, ensure the engine compartment is free from loose debris and/or dirt.
Installation Instructions:
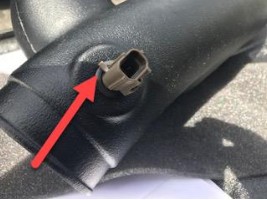
Step 1:
Squeeze the tab on the factory intake air temperature (IAT)sensor wiring harness and disconnect it from the factory air tube.
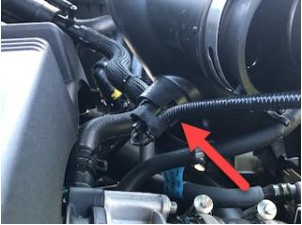
Step 2:
Carefully detach the coolant hose from the clip on the factory air tube.
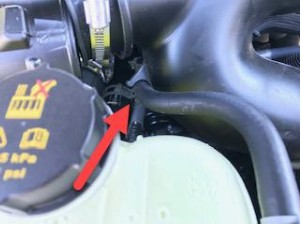
Step 3:
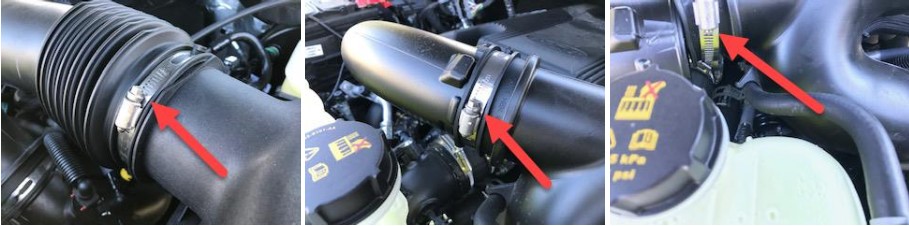
Locate the three clamps on the factory air tube. Loosen each and remove the air tube from the engine.
Note: In order to loosen the clamp on the back of the air tube, you will need to leverage a socket extension.
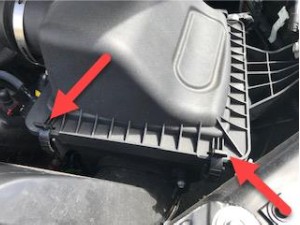
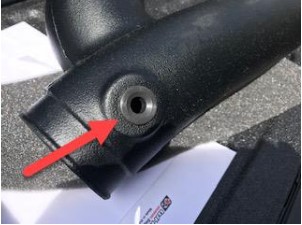
Step 4:
Locate and unlatch the two air box retaining clips on the factory filter and remove it, as well as the factory filter.
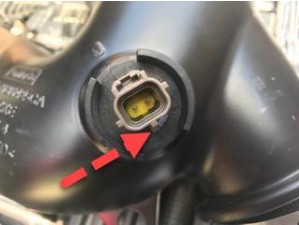
Step 5:
Gently twist the factory IAT sensor a quarter turn and remove it from the stock air tube. Rotate in the direction of the below arrow. The clip on the IAT needs to be raised over the lip on the stock air tube. Ensure the factory O-ring remains on the sensor and is free from damage.
Step 6:
Install the provided IAT sensor grommet (cone side down) into the Whipple air tube.
Step 7:
Gently and slowly push the IAT sensor onto the Whipple air tube. Be sure to stop once the tab on the sensor reaches the grommet on the air tube.
Step 8:
Using the supplied clamps and an 8mm socket, install the silicone hose couplersto the Whipple air tube. You will use one of the provided #64 clamps on the 4” end of the Whipple air tube and the provided #56 clamp on the 3.5” end of the air tube. Tighten the clamps(44 inch-pounds torque), being careful not to overtighten.
Step 9:
Insert, but don’t tighten, the second #64 clamp on the other end of the 4” hump hose and the provided #48 clamp on the 2.5” reducer hose.

Step 10:
Starting from the bottom and working your way up, install the included, small air box trimto the inlet hole of the air box heat shield.Using a scissors or shears, remove any excess to ensure a tight fit and nice seam.
Step 11:
Insert, but don’t tighten,the included #56 hose clamp to the Whipple air filter.
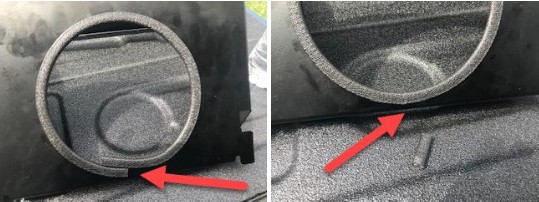
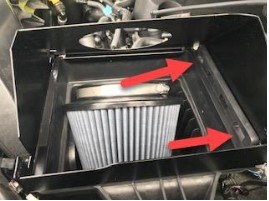
Step 12:
Place the included air box heat shield on top of the factory air box. There are two clips on the right side (see picture below) that will insert into the factory air box. Latch the two factory air box retaining clips to the heat shield. Place the new Whipple air filter in the factory air box.
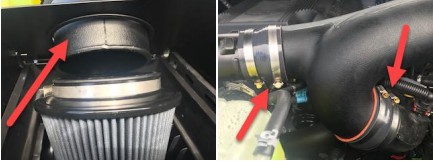
Step 13:
Install the Whipple air tube to the engine. Begin by setting the inlet side through the air box and then install the other ends to the factory air tubes. Tighten the clamps to secure the Whipple air tube to the factory tubes.
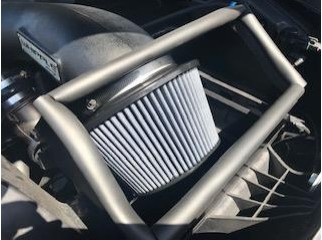
Step 14:
Tightly secure the Whipple air filter onto the inlet tube and tighten the clamp (44 inch-pounds torque).
Step 15:
Connect the IAT wiring harness to the IAT sensor on the Whipple air tube.
Step 16:
Install the included, weather strip to the edge of the air box, which will require cutting at each 90 degree turn.
Installation Instructions Written by AmericanTrucks Customer Nick Husslein 4/30/2019

