FREE 1 to 3-Day Delivery on Orders $149+ Details
How to Install a Westin Ultimate 3 inch Bull Bar - Chrome - on your Ford F-150
Installation Time
3 hours
Tools Required
- 9/16” SOCKET
- 9/16” WRENCH
- 15MM SOCKET
- RATCHET
- SOCKET EXTENSION
- TORQUE WRENCH
APPLICATION:
2003-08 FORD EXPEDITION/LINCOLN NAVIGATOR 2/4WD
2007-08 FORD EXPEDITION EL/LINCOLN NAVIGATOR L
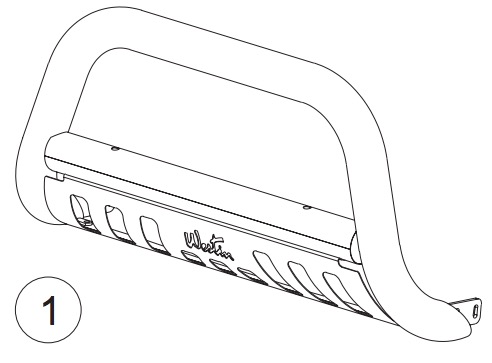
BULL BAR ASSEMBLY
| ITEM | QTY | CONTENTS |
|---|---|---|
| 1 | 1 | BULL BAR ASSEMBLY |
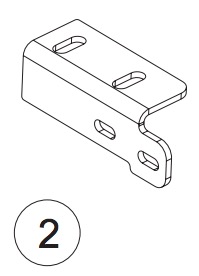
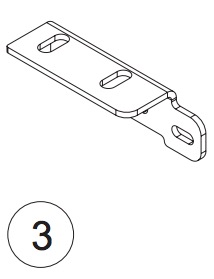
| 2,3 | 2 | BRACKET, PASSENGER (2) AND DRIVER (3) |
| 4 | 2 | PLASTIC PLUG |
| 5 | 4 | RUBBER BUMBER |
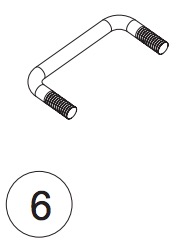
| 6 | 2 | U-BOLT |
| 7 | 4 | 3/8-16 X 1.25” HEX HEAD BOLT |
| 8 | 8 | 3/8” SAE FLAT WASHER |
| 9 | 4 | 3/8” USS FLAT WASHER |
| 10 | 8 | 3/8” LOCK WASHER |
| 11 | 8 | 3/8-16 HEX NUT |
Step 1
Remove the contents from box and check for damage. Verify all parts are present. Read instructions completely before beginning. NOTE: Westin advises the installer to use a thread lubricant on all of the stainless steel fasteners.
Step 2
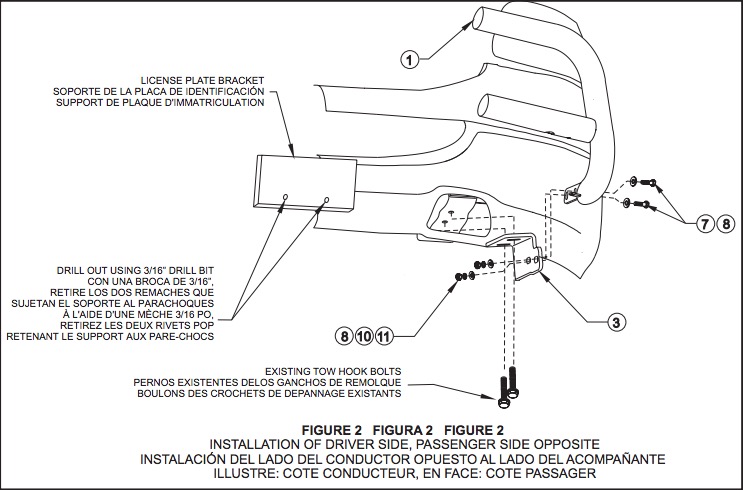
NOTE: It will be necessary to remove the front license plate and bracket. Remove license plate from bracket. Using a 3/16” drill bit, drill out the two pop rivets that hold the bracket to the bumper. If local/state laws requires a license plate, license plate relocation kit 32-0055 is available.
VEHICLES WITH TOW HOOKS
Step 3
Remove tow hooks by removing front and rear bolts. NOTE: Tow hooks will not be reinstalled. Make sure nut plate in frame stays aligned with holes.
Step 4
Position bottom bracket up to bottom of frame and replace tow hook bolts. SEE FIGURE 2. Go to step 6.
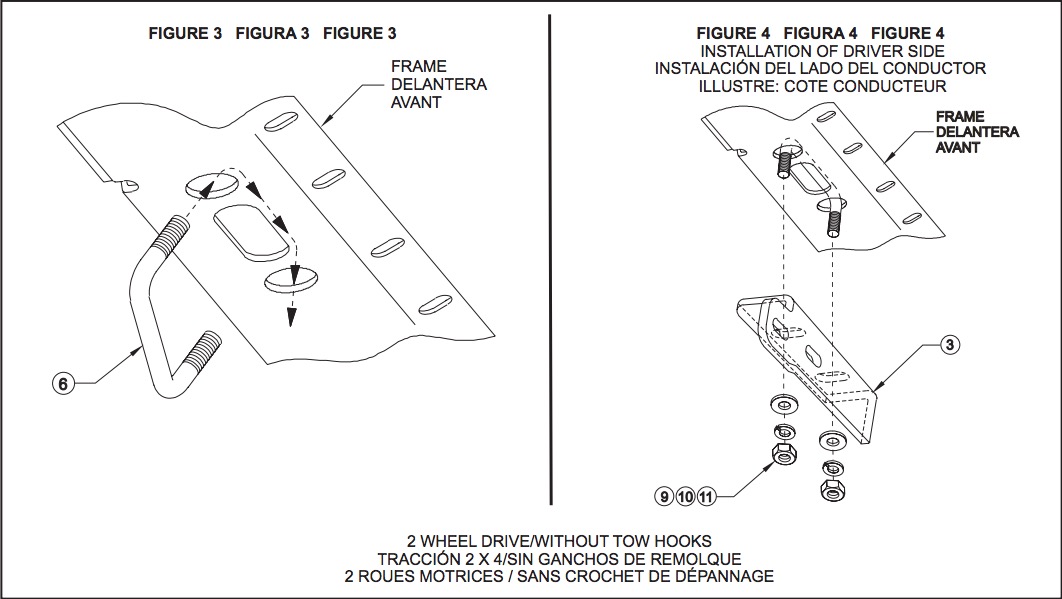
VEHICLES WITHOUT TOW HOOKS
Step 5
Insert u-bolt in frame as shown. SEE FIGURES 3 AND 4. Attach bracket to u-bolt using 3/8" fasteners as shown. SEE FIGURE 4. Hand Tighten.
Step 6
Attach Bull Bar to mount brackets using 3/8" fasteners. Maker sure Bull Bar and brackets are properly aligned and tighten all fasteners. Recommended torque values are 17 ft. lbs. for 3/8" fasteners.
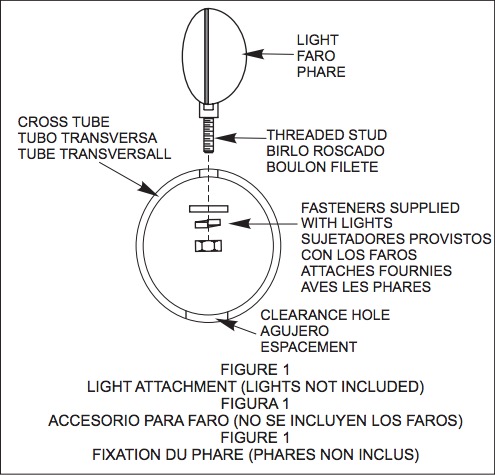
LIGHT INSTALLATION:
Insert threaded stud on base of the light through hole in cross tube. Using a ratchet, extension and socket for correct size of nut supplied, insert through large clearance hole in bottom of cross tube. Thread nut and washers on stud and tighten. SEE FIGURE 1. NOTE: A short socket, not a deep well works best to get the nut started.
NOTE: Fits most 6" round or rectangle lights. Some lights may require replacing included mount/isolator with rubber bumpers provided. Mounting stud of 1/2" or less required. Plug mount holes with caps provided if not installing lights.
FINISH PROTECTION
Westin products have a high quality finish that must be cared for like any other exposed finish on the vehicle. Protect the finish with a non-abrasive automotive wax, (e.g. Pure Carnauba) on a regular basis. The use of any soap, polish or wax that contains an abrasive is detrimental, as the compounds scratch the finish and open it to corrosion.