 FREE 1 to 3-Day Delivery on Orders $149+ Details
How to Install Westin Thrasher Boards - Textured Black on your F-150
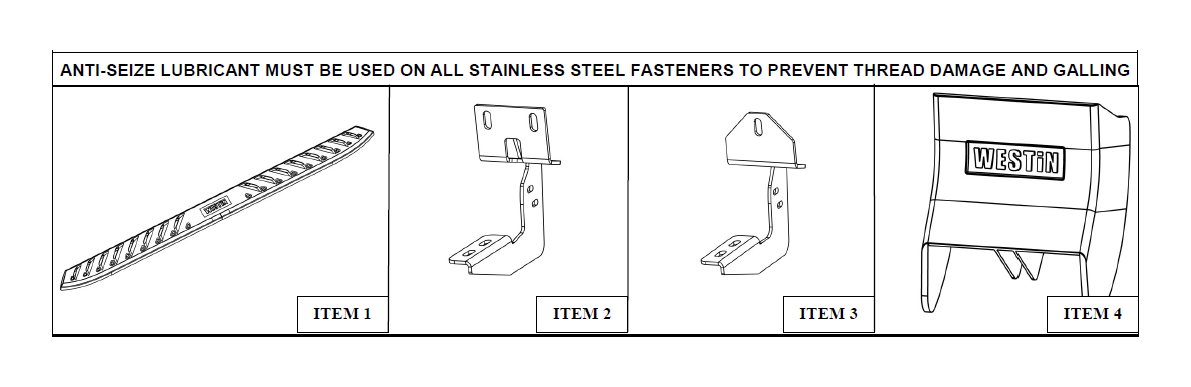
ANTI-SEIZE LUBRICANT MUST BE USED ON ALL STAINLESS STEEL FASTENERS TO PREVENT THREAD DAMAGE AND GALL
PROCEDURE
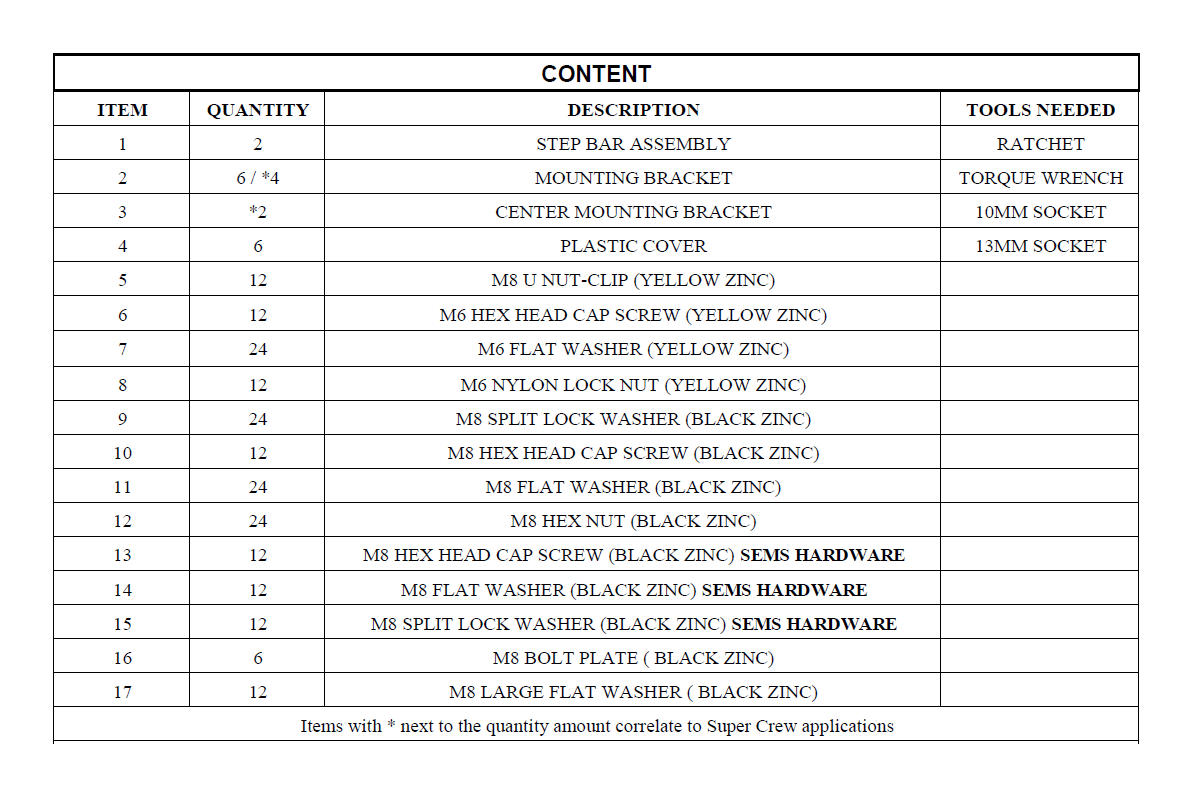
1. Remove contents from box, verify if all parts listed are present and free from damage.
Carefully read and understand all instructions before attempting installation.
Failure to identify damage before installation could lead to a rejection of any claim.
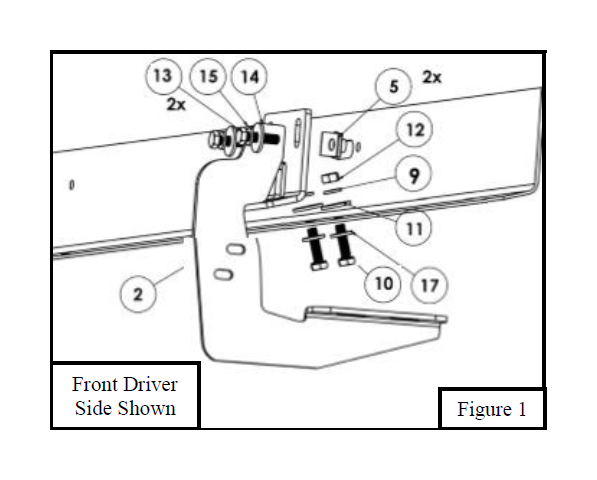
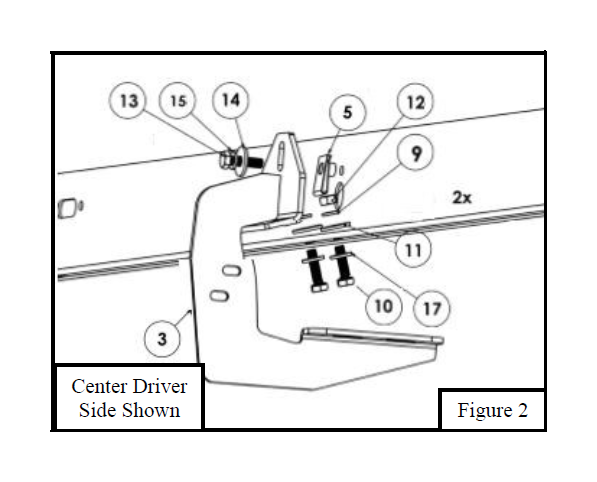
2. Start installation on driver’s side. On the rocker panel find locations with factory holes to insert (2) M8 u nut-clips (Item 5) at all mounting locations for SuperCab applications, for Super Crew applications only (1) M8 u nut-clip (Item 5) is needed for center mounting brackets. See Figure 1 and 2 (Note: SuperCab will have 6 mounting brackets and SuperCrews will have 4 mounting brackets and 2 center brackets.)
3. Hold up mounting bracket (Item 2) and loosely install (1) M8 hex head cap screw (Item 13), (1) M8 lock washer (Item 15), and (1) M8 flat washer (Item 14) SEMS hardware into previously installed M8 nut clips. Then loosely install M8 hardware to mounting bracket and holes in the pinch weld; (1) M8 hex nut (item 12), (1) lock washer (item 9), (2) M8 flat washers (item 11), and (1) M8 hex head cap screw (Item 10). Similar installation for center mounting bracket. See Figure 1 and 2.
4. Repeat steps 1-2 for all other mounting locations.
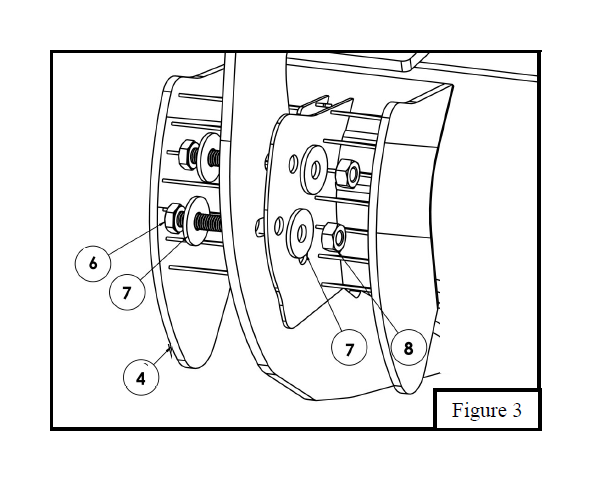
5. Locate (1) Plastic Bracket Cover (Item 4) and loosely secure it to the (6) previously installed brackets using the provided M6 hardware: (2) M6 hex head bolt (Item 6), (4) M6 flat washer (Item 7), and (2) M6 nylon lock nut (Item 8). Repeat for every bracket. See Figure 3.
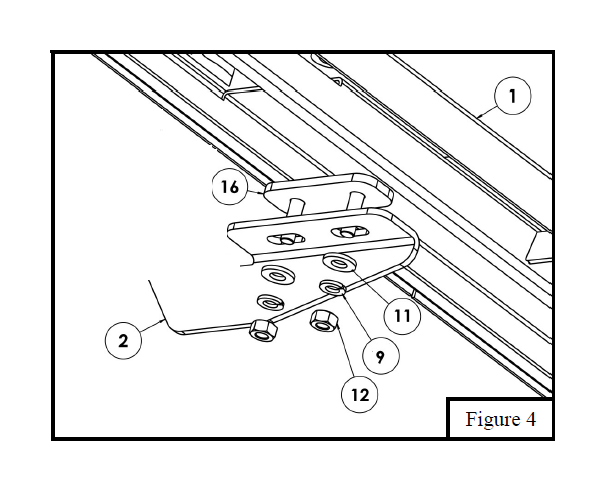
6. For Step Board installation to the previously installed mounting brackets use the supplied M8 bolt plates andM8 hardware. Slide bolt plate into the board rail located underneath the step board, then loosely install with M8 hardware. See Figure 4.
7. Align step bar and brackets to desired positioning then torque and tighten all: M8 hardware to 20 ft-lbs and M6 hardware to12 ft-lbs .
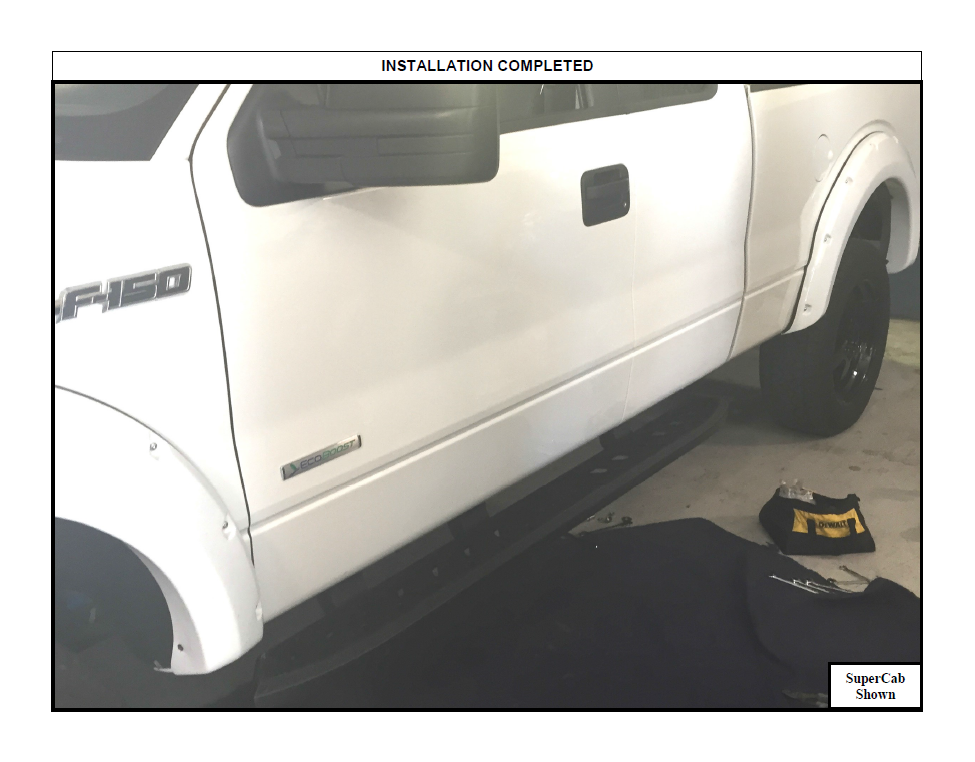
INSTALLATION COMPLETED
Failure to follow these instructions could lead to death, personal injury, and / or property damage.
FASTENERS: All Westin supplied fasteners must be utilized and installed in accordance with the installation in-structions and apply torque to the specifications as defined. DOUBLE CHECK ALL FASTENERS BEFORE INITIAL USE, AND PERIODICALLY IN THE FUTURE TO ENSURE PROPER FUNCTION AND SAFETY.
DRILLING: Most Westin products do not require drilling for installation. If drilling is defined as required, use caution when drilling a vehicle. FAILURE TO REVIEW AN AREA TO BE DRILLED MAY RESULT IN PERSONAL INJURY AND/OR INJURY TO OTHERS AS WELL AS VEHICLE DAMAGE.
EYE PROTECTION: ALWAYS WEAR SAFETY GLASSES OR GOGGLES DURING THE INSTALLATION PROCESS TO AVOID PERSONAL INJURY.
MAXIMUM TOWING/CARRYING CAPACITY: The Westin Receiver Hitches will have a visible tow rating label affixed directly on the product. Us-er should never exceed the vehicle manufacturers maximum tow and weight rating regardless of the capacity of the hitch. FAILURE TO FOLLOW THESE GUIDELINES WILL VOID THE WESTIN WARRANTY AND MAY RESULT IN PERSONAL INJURY AND/OR INJURY TO OTHERS AS WELL AS VEHICLE DAMAGE.

