FREE 1 to 3-Day Delivery on Orders $149+ Details
How to Install Westin Sportsman Tail Light Guards - Black on your F-150
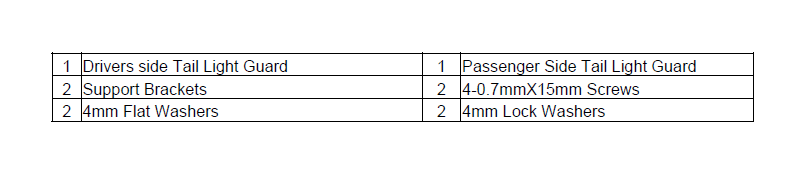
PARTS LIST:
PROCEDURE:
1. REMOVE CONTENTS FROM BOX. VERIFY ALL PARTS ARE PRESENT. READ INSTRUCTIONS CAREFULLY.
2. Open the tailgate and loosen the passenger’s side Torx (T50 size) Bolt that retains the tailgate cable ¼” off of side of bed. (Fig 1).
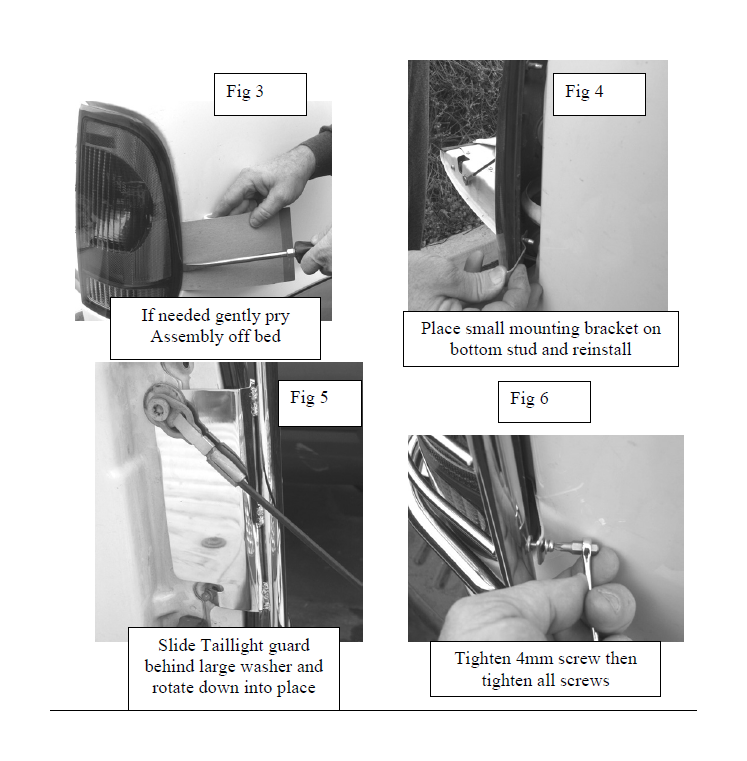
3. Remove the two screws holding the taillight assembly using a 10MM socket wrench (Fig 2). Grasp the taillight assembly with one hand and pull gently. Be sure to pull straight out to avoid possible damage (Fig 3) If it is too tight, then using a large standard flat screws driver and something like the cardboard backing of a note pad or towel to protect the paint from damage. Gently pry off the outside of the taillight assembly out from the bed. This is the same procedure required to change a burnt out taillight in the assembly.
4. Install the small bracket over the bottom taillight locating stud and reinstall the tail assembly, hold on to the bracket so not to damage paint. (Fig 4)
5. The top hole of the taillight guard mounting bracket is open ended to slide over the tailgate cable bolt, slide it behind the large washer and rotate the guard down to line up the bottom hole with the lower taillight assembly mounting screw position and reinstall the lower screw, reinstall the top assembly screw also leave both screws loose. (Fig 5)
6. Install the 4mm screw, lock washer flat washer through front bracket and finger tighten, check fit, then tighten the small 4mm screw and all other screws and bolts. (Fig 6)
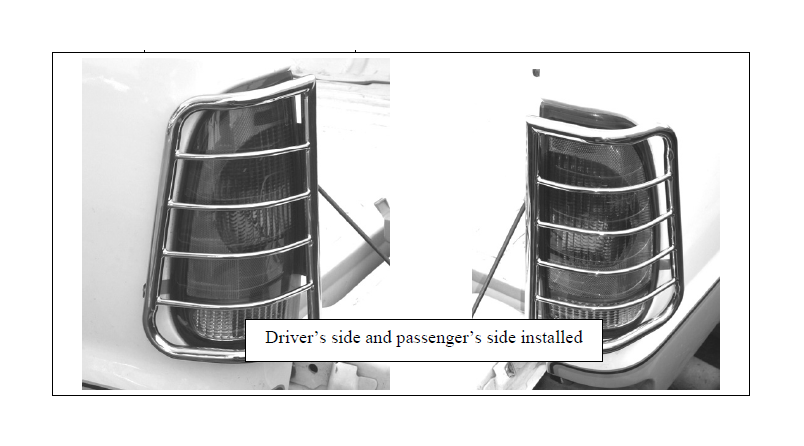
7. Repeat process on opposite side of truck.