FREE 1 to 3-Day Delivery on Orders $149+ Details
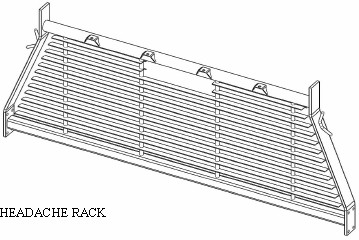
How to Install Westin HDX Headache Rack - Black on your F-150

Shop Parts in this Guide
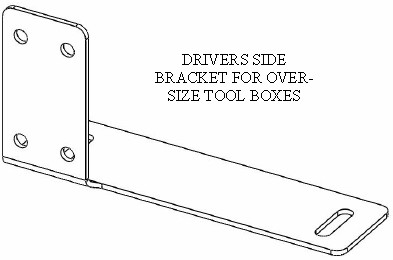
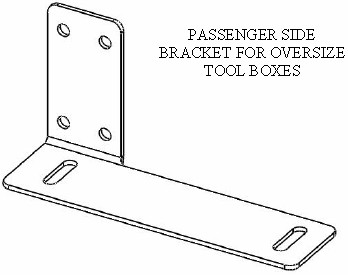
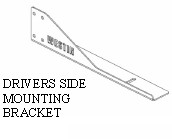
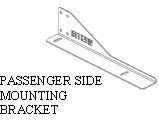
1. Remove all contents from box, verify all parts listed are present and free from damage. Carefully read and understand all instructions before attempting installation. NOTE FOR VEHICLE WITH OVER SIZE TOOL BOXES AN OPTIONAL BRACKET KIT PART # 57-8095/8093 IS AVAILABLE, THESE BRACKETS REPLACE THE DRIVERS AND PASSENGER SIDE MOUNTING BRACKETS. SEE PAGE THREE FOR IMAGES OF THESE BRACKETS
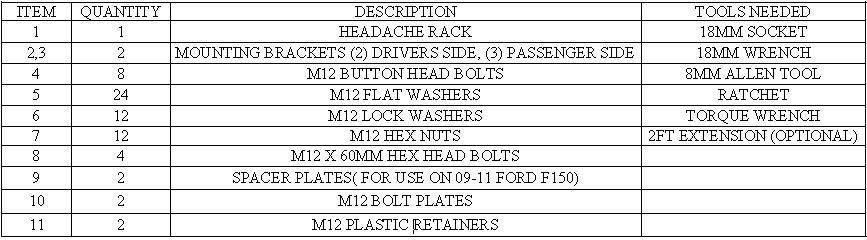
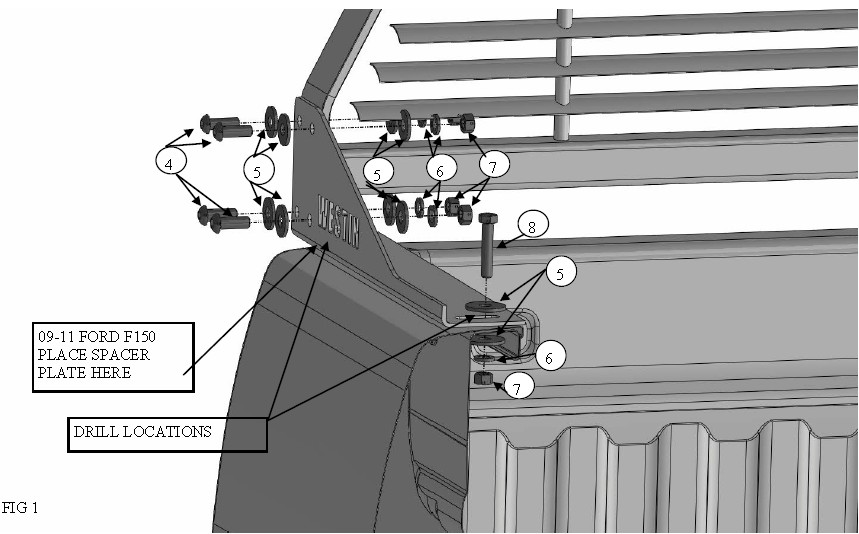
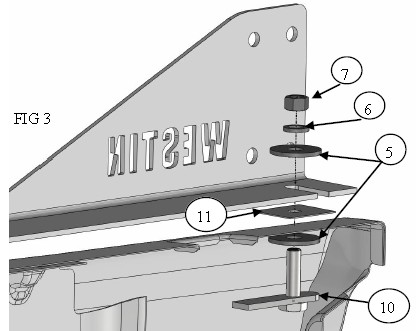
2. Assemble the drivers and passenger side mounting brackets to the headache rack using (8) M12 button head bolts, (16) M12 flat washers, (8) M12 lock washers, and (8) M12 hex nuts. Do not fully tighten at this time. Fig 1
3. Take the assembled headache rack and place it on the bed rails and center the assembly. Mark the four drill locations then remove the rack and brackets. Fig 1
4. Drill the previously marked holes with a 9/16” drill bit. NOTE: 09-11 FORD F150’s using the factory bed caps should use the provided spacer plates under the front of the mounting brackets to level the headache rack.
5. Install the driver side mounting bracket starting with the forward most mounting location using the options detailed in Figs 1 and 2. Rotating the mounting bracket 90° allows access to the fasteners through the stake pocket. Repeat for passenger side bracket.
6. Install the headache rack to the mounting brackets as in step 2. NOTE : the light tabs on the upper cross-member face the cab.
7. Align and adjust the headache rack as needed then fully tighten all hardware. Torque all M12 fasteners to 50-55 ft lbs.
CARE INSTRUCTIONS
REGULAR WAXING IS RECOMMENDED. DO NOT USE ANY TYPE OF POLISH OR WAX THAT MAY CONTAIN ABRASIVES
STAINLESS STEEL PRODUCTS CAN BE CLEANED WITH MILD SOAP AND WATER. STAINLESS STEEL POLISH SHOULD BE USED TO POLISH SMALL SCRATCHES.
GLOSS BLACK FINISHES SHOULD BE CLEANED WITH MILD SOAP AND WATER
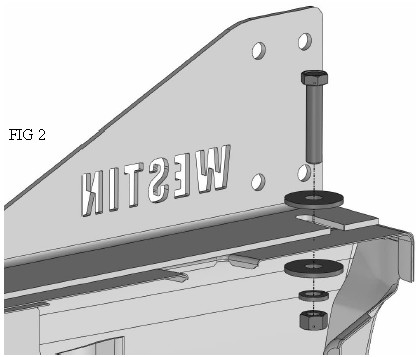
OPTION A: USE THIS BOLT/WASHER/NUT INSTALLATION METHOD IF ACCESS TO THE LOWER NUT IS AVAILABLE. A 2FT RATCHET EXTENSIONS WORKS WELL FOR THIS.
OPTION B: USE THIS BOLT PLATE INSTALLATION METHOD IF THERE IS NO ACCESS FOR OPTION A. USE A PLASTIC RETAINER TO PREVENT THE BOLT PLATE FROM FALLING.