FREE 1 to 3-Day Delivery on Orders $149+ Details
How to Install Westin Sportsman Brush Guard - Black on your F-150

Shop Parts in this Guide
1. Remove contents from box, verify if all parts listed are present and free from damage. Carefully read and understand all instructions before attempting installation.
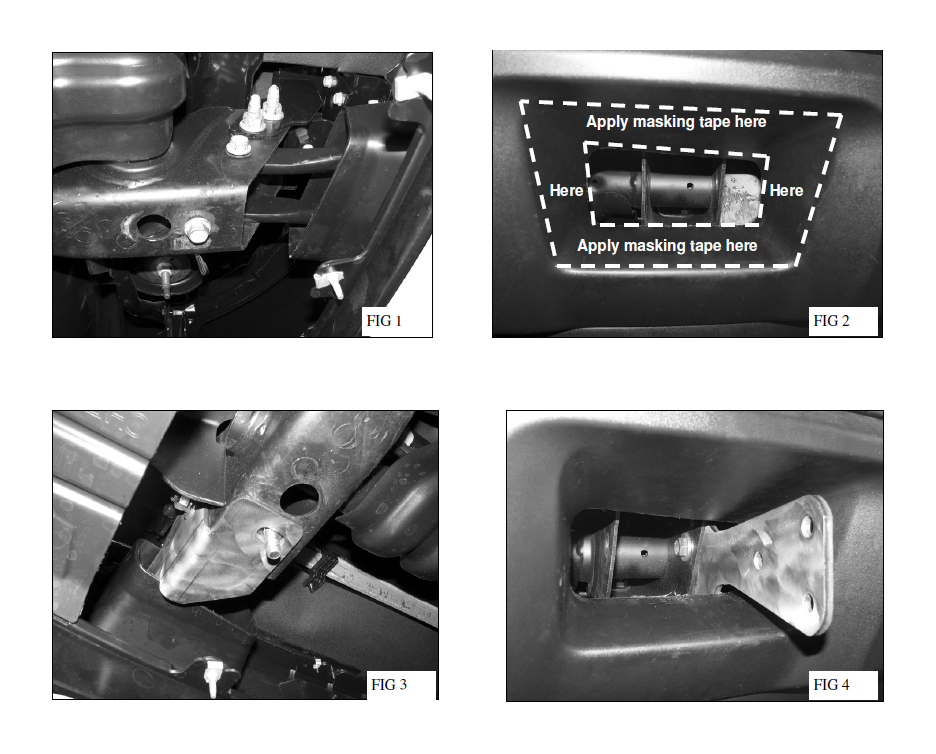
2. Start installation under the front of the vehicle, (Figure 1). Remove the two factory bolts holding the driver side tow hook in place and remove the tow hook from the vehicle. NOTE: Tow hooks cannot be reinstalled with this Grille Guard. Apply a protective layer of removable tape, (masking tape for example), to the inside of the inlets in the plastic bumper for the tow hook, (Figure 2).
3. Select the driver side frame Mounting Bracket. From behind the bumper, insert the Bracket through the inlet for the tow hook, (Figure 3 & 4). Line up the two holes in the Bracket with the holes for the tow hook hardware. Bolt the Bracket to the frame with two (item 7 ) M12 Hex Bolts, four (item 8) M12 Flat Washers, two (item 9) M12 Lock Washers and two (item 10) 12mm Hex Nuts. Remove the protective tape. Do not tighten hardware at this time.
4. Repeat Steps 2 - 3 for passenger side Mounting Bracket installation
5. Open the hood and using a flat screwdriver, remove the clips holding the plastic cover in place on top of the radiator, between the radiator and the grille insert. Gently pry up the center button to release, then remove entire clip.
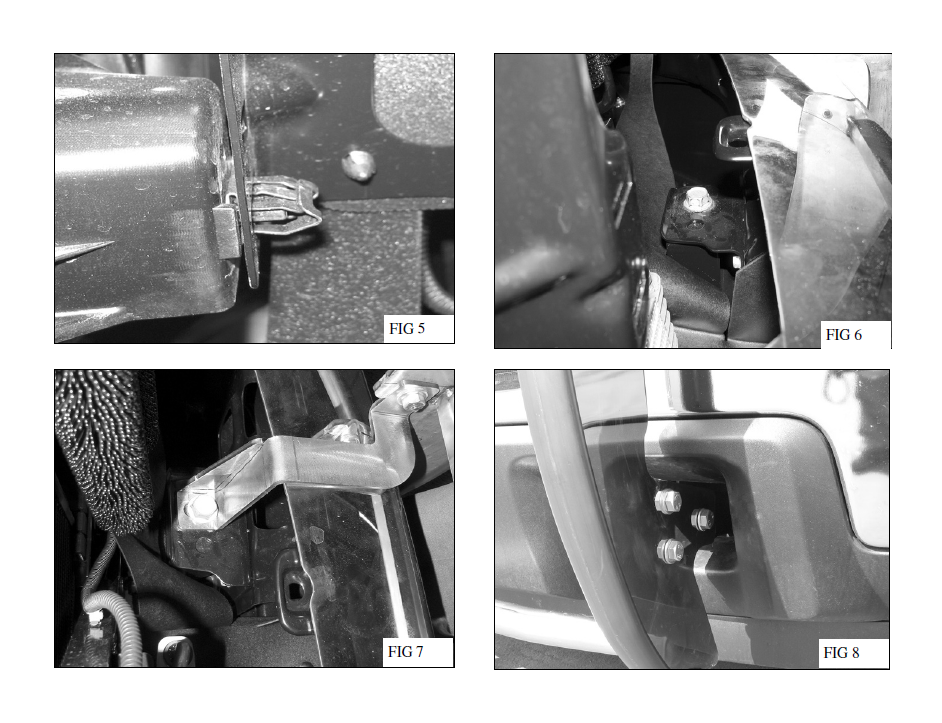
6. Remove the grille insert. NOTE: Use a pair of “needle nose” pliers to squeeze the grille mounting clips to release, (Figure 5). Once all clips have been released and any other hardware removed, gently pull the grill insert forward from the vehicle.
7. Pull back the rubber air deflector at the driver side-bottom of the grille opening to locate the top bumper bolt, (Figure 6). Remove the factory bolt. Select the driver side Top Mounting Bracket. Apply a section of Adhesive Backed Foam Tape to the underside of the Top Bracket to prevent the Bracket from scratching the plastic bumper cover, . Trim as necessary. Next, line up the bottom hole in the Bracket with the hole in the bumper bracket and bolt the Top Bracket to the bumper bracket using the factory hex bolt, (Figure 7). Repeat this step for passenger side Top Bracket installation.
8. With assistance, hold the Grille Guard up to the outside of the Frame Mounting Brackets. Align the holes in the Frame Mounting Brackets with the Grille Guard and bolt together using the included six (item 12) M12 Hex Bolts, twelve (item 13) M12 Flat Washers and six (item 14) M12 hex nuts, (Figure 8). Do not tighten hardware at this time.
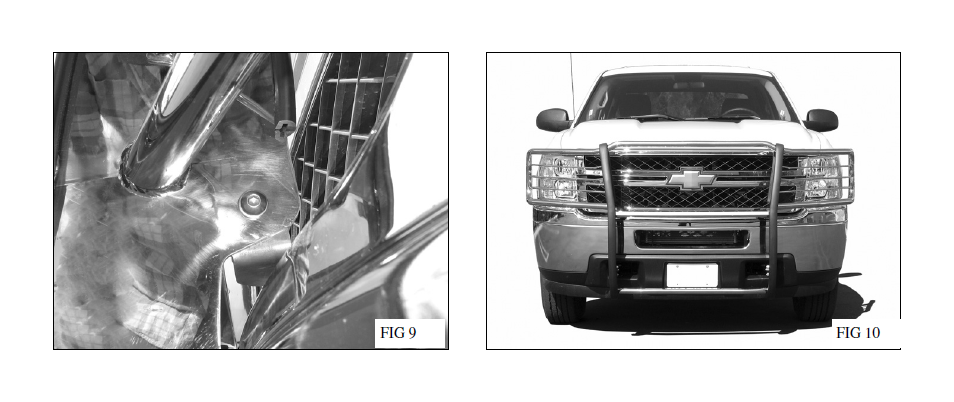
9. Attach the Grille Guard to the Top Brackets using the included two (item 15) M10 Button Head Bolts, four (item 16) M10 Flat Washers and two (item 17) M10 Nylock Nuts, . NOTE: Insert the M10 Button Head Bolt with M10 Flat Washer in from the outside of the Grille Guard. Do not tighten at this time. ( Figure 9)
10. Level and adjust the Grille Guard and tighten all hardware.
11. Reinstall the grille insert and plastic shroud using the factory hardware.