FREE 1 to 3-Day Delivery on Orders $149+ Details
How to Install a Weathertech DigitalFit Rear FloorLiner - Tan on your Ford F-150

Shop Parts in this Guide
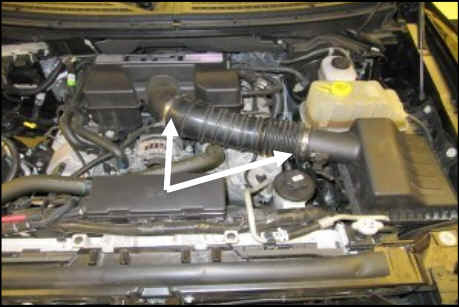
1. Disconnect the negative battery cable! Loosen the two intake clamps and remove the Factory intake tube.
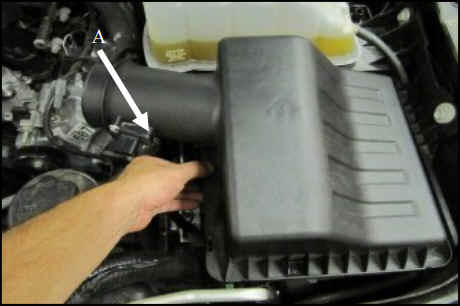
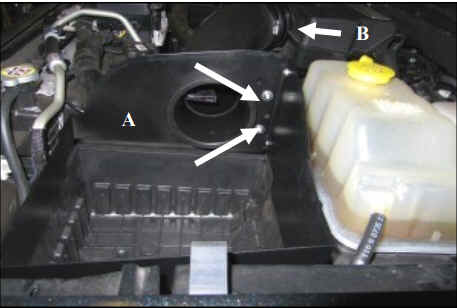
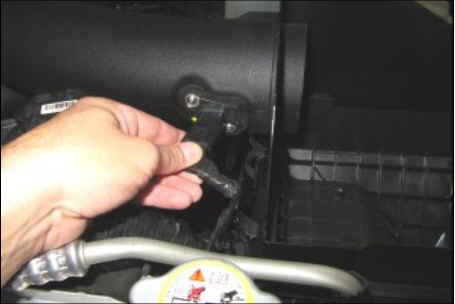
2. A.) Disconnect the Mass Air Flow (MAF) Sensor.
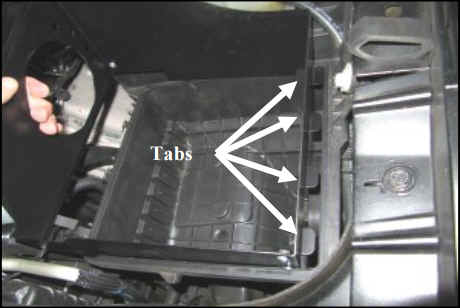
B.) Unfasten the three airbox clips on the left side, and remove the upper half of the factory airbox
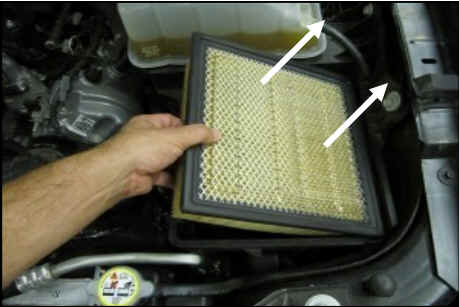
3. Remove the factory air filter from the lower half of the airbox.
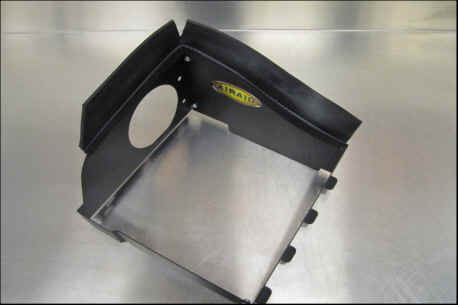
4. Assemble the two Quick Fit panels (#3 & #4) as shown using four 6-32 screws (#7) flat washers (#9) and kep nuts (#8).
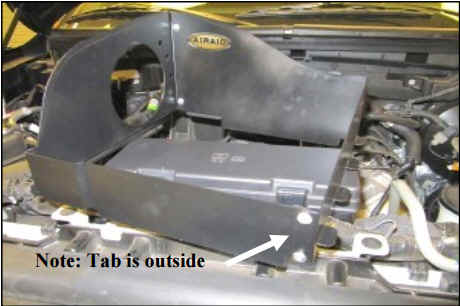
5. Install the assembly onto the lower half of the factory airbox. Slide the metal tabs into the airbox slots, and fasten the 3 airbox clips.
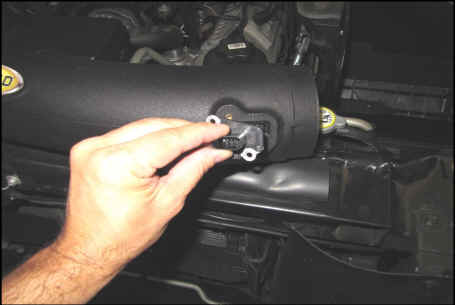
6. . Transfer the MAF sensor into the Airaid Intake Tube (#2) and secure using two 8-32 x 1/2” button head screws (#10). Do Not Use The Factory Torx Head Screws
7. Install the Hump Hose (#5), and the clamps (#13) onto the Intake Tube. Slide the hump hose and clamps down the tube as far as they will go and leave the clamps loose for now.
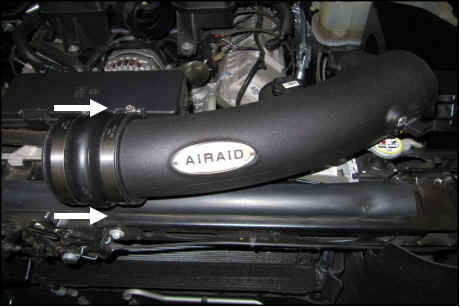
8. A.) Mount the Intake Tube to the Rear Panel using the two 1/4-20 Button Head Bolts (#11) and 1/4” Flat washers (#12). B.) Slide the Hump Hose and clamps onto the engine air inlet, check for alignment, and tighten the clamps.
9. Re connect the Mass Air Flow Sensor.
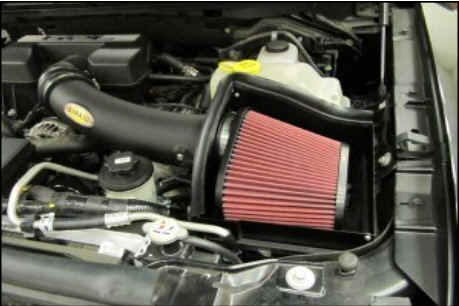
10. Install the Airaid Premium Filter (#1) to the mounting flange inside the quick fit assembly. For SVT Raptor vehicles: Complete the installation by attaching the Short Weather Strip (#6a) to the top of the panels as shown.
11. For F-150 Harley Davidson, Lariat, and Platinum models:
Complete the installation by attaching the Tall Weather Strip (#6b) to the top of the panel as shown.
12. Double check your work! Make sure there is no foreign material in the intake path. Make sure all clamps, hoses, bolts, and screws are tight.
Periodically check the tightness of all hose clamps.
13. Re-connect the negative battery cable!
Full color instructions can be viewed on our web site at Airaid.com. Use the Product Search function to find your part number, and click View Details.
Thank you for purchasing the Airaid Intake System. Contact Airaid @ (800) 498-6951 8:00 AM - 5:00 PM MST weekdays for questions regarding fit or instructions that are not clear to you. Your Airaid Intake System was carefully inspected and packaged. Check that no parts are missing, or were damaged during shipping. If any parts are missing, contact Airaid. The air filter element is protected from direct exposure to water and debris; care should be taken not to drive through deep water. WATER INGESTION IS THE DRIVERS RESPONSIBILITY! The air filter is reusable and should be cleaned periodically.
FILTER IDENTIFICATION
720-478 Airaid Oiled Media
721-478 Airaid SynthaMax Dry Media - Red
722-478 Airaid SynthaMax Dry Media - Black
723-478 Airaid SynthaMax Dry Media - Blue
For your Oiled media filter we suggest using the AIRAID Filter Tune-Up Kit!

Synthamax Air Filters do not require oil. Service air filter as needed by cleaning with common non-petroleum all-purpose household cleaner and water. Simple Green®, Formula 409® or equivalent works great. Apply cleaner to outside of air filter and allow to soak. Then flush filter clean from the inside out with a garden hose and repeat steps if necessary. Do not apply high pressure water or air to clean filter. Allow filter to air dry and reinstall.