FREE 1 to 3-Day Delivery on Orders $149+ Details
How to Install True Edge Sportz Fender Flares - Smooth on your F-150
Parts
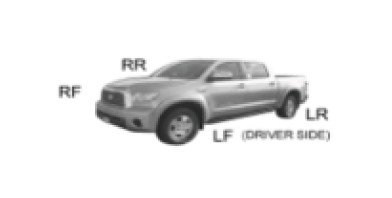
Qty (1) Fender Flare Left Front (LF)
Qty (1) Left Front Inner Piece (LF-L)
Qty (1) Fender Flare Left Rear (LR)
Qty (1) Fender Flare Right Front (RF)
Qty (1) Right Front Inner Piece (RF-R)
Qty (1) Fender Flare Right Rear (RR)
Qty (1) Rubber Seal (enough for four flares’s outer edge)
Qty (2) U-Clips & Flange Type-D Screws
Qty (8) Long Clips & Truss Type-A Screws
Qty (8) Plastic Fasteners
Qty (38) Allen Bolt, Nut & Washer (Torx Bit required)
Qty (8) Self Tapping Screws (see option B)
Step 1. Pre-Installation
Prefit both driver side and passenger side fender flares to the vehicle before painting or installation. You may remove any moldings, strips or existing flares from the vehicle for fitting or installation. You can cut the fender flare to fit any body side molding.
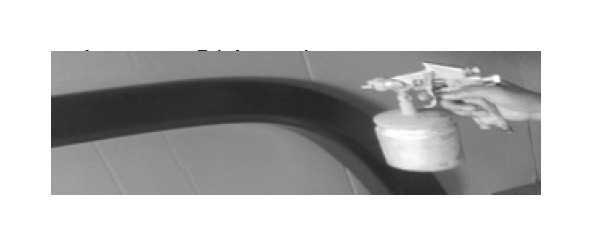
Step 2. Painting (optional)
Professional paint or body shop recommended to paint flares. Follow all the paint manufacture specifications to paint the flares. Clean fender flare surfaces with clean water and a mild detergent before painting, do not use lacqure thinner or any solvent based products.
Step 3. Cleaning
Wash and wipe dry the areas of contact on the vehicle body. Clean the surface and inside edge of the fender flare where the rubber seal is to be attached.

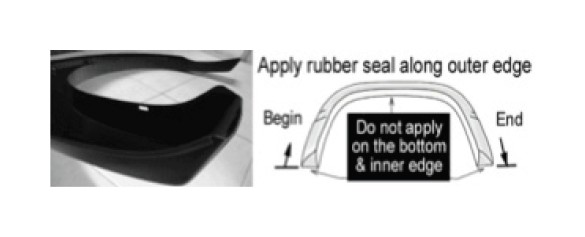
Step 4. Apply Rubber Seal
Remove about 1 inch of tape liner from rubber seal and apply it to the flare. Start at one end of the flare along the edge that comes in contact with the body panel. Apply pressure on the tape to ensure adhesion, and trim excess rubber seal at the end.
Step 5. Installation (Left Front Flare Shown)
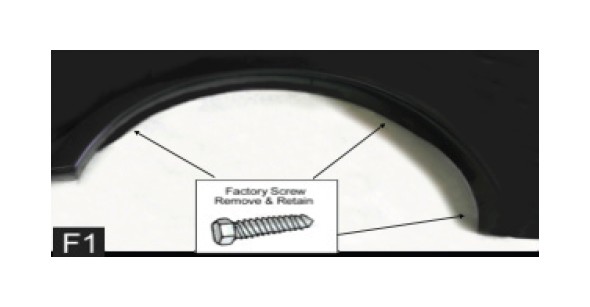
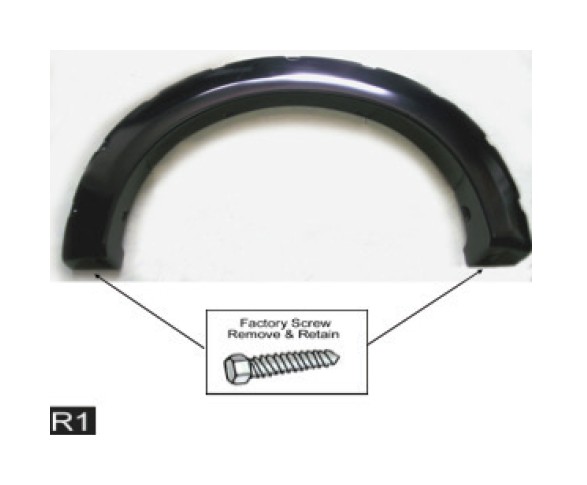
Remove the three existing factory screws with proper wrench and save it for reinstallation, as shown.
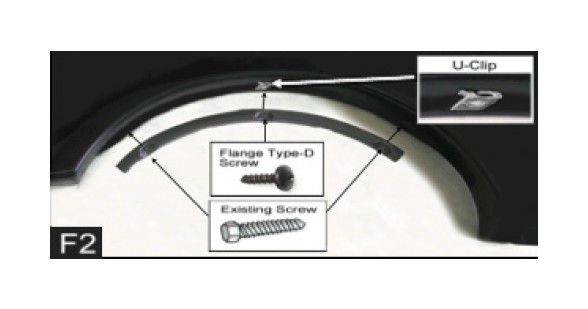
Install a U-Clip over existing factory hole on the fender well lip, as top shown. Fasten the 2 existing factory screws through inner piece & into the original location, as bottom shown. Apply one Flange Type-D screws through inner piece & U-Clip to the vehicle on the uppermost hole, as center shown.
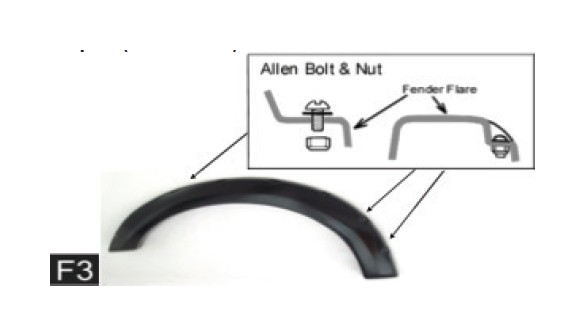
Use hex key to tighten allen bolt & put firmly on every pocket of the fender flare, as shown.
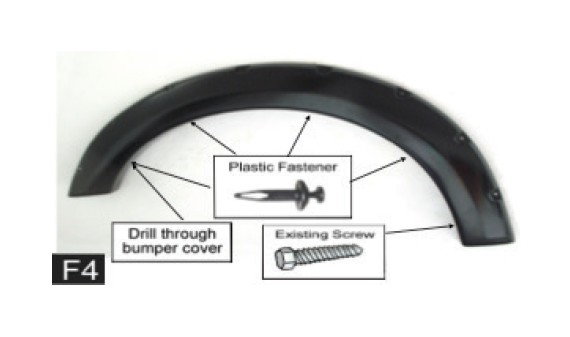
Fasten the 1 existing factory screw into the original location that was previously removed, as bottom right shown. Drill through bumper cover with a 1/4” drill bit from the forward most hole in the flare, as bottom left shown.
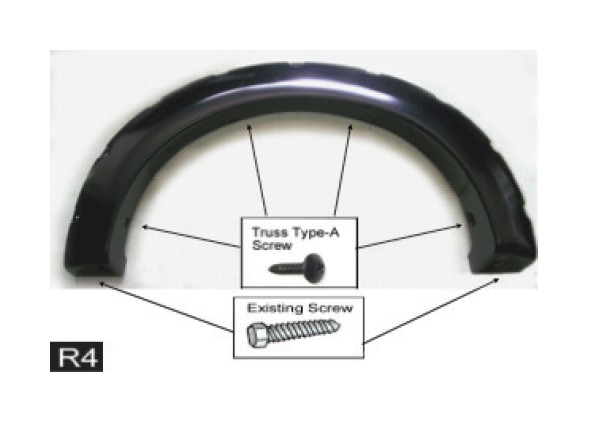
Step 6. Installation (Left Rear Flare Shown)
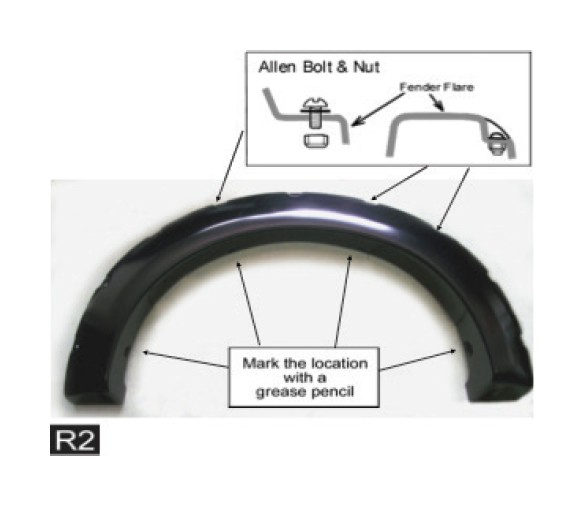
Remove the two existing factory screws with proper wrench and save it for reinstallation as shown.
Use torx bit to tighten allen bolt & put firmly on every pocket of the fender flare, as top shown. Place the flare on the vehicle, mark the four holes location into the vehicles, as bottom shown.
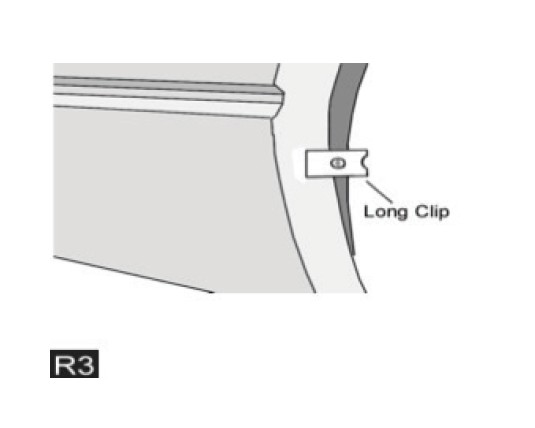
Apply four long clips over the marks that were made in Step R2 as shown.
Secure the flare with four Truss Type-A screws to the vehicle, start the two screws on the two topmost holes, as top shown. Fasten the 2 existing factory screws into the original location that were previously removed, as bottom shown.