Talk to a F-150 Sales Tech
1-888-706-1096
M-F 8:30A-11P, Sat-Sun 8:30A-9P
$20K Sweeps! 10 Chances to Win! Enter Daily >

Supreme Suspensions Front Angled Control Arms (04-08 2WD/4WD F-150)

Item T543761
Verify parts fit and get product recommendations.
F-150 Sales Techs: Connect Now M-F 8:30A-11P, Sat-Sun 8:30A-9P
$0.00
Our Price

$649.95 (pair)

FREE Shipping Market Price $747.99 You Save 13% ($98.04) Up to 10% off for Military & First Responders! See Details

Will this fit your Vehicle?

Select a different vehicle Help?
Update or Change Vehicle
Out of Stock

Ship to: Ashburn - 20149
Sorry, please enter a valid US or CA postal code
We're sorry, zip can't be updated at this time.
Recommended Install Shops
How It Works
Install Shops are available near Ashburn - 20149

Add Local Shop Installation

Total cost of service $399.00
    Create a list
    Add to New List

    Saved - View your saved items

    We're sorry. We couldn't save this product at this time.

    or use

      Product Videos

      It's Joe from AmericanTrucks. In this video, we're going over the Supreme Suspensions Front Angled Control Arms fitting all '04 and newer two-wheel drive and four-wheel drive F-150s excluding Raptor models. Now, this is going to be a great option for any lifted or even a stock ride height F-150 owner that might be having some upper control arm issues. Maybe you have a small leveling kit and at full droop, you're impacting the shock, or maybe you have a small leveling kit and that ball joint is bottomed out, maybe just worn out altogether. Or if you're at stock ride height, you might just be looking for some extra durability with an upgraded upper control arm set. So, what do we have going on here with this upper control arm set? First things first, let's talk build quality. And suffice to say this is going to be a huge upgrade in the durability department over the factory stuff, because what this is made out of tubular chromoly steel in a nice silver finish, all TIG welds, and you got some gussets. There's one behind the ball joint right here, and you've got some around the bushings as well, both top and bottom so as far as durability goes, this is going to be some really tough stuff.Next up, let's talk about our joint right up here at the front. Now, this is going to be Teflon-coated uniball, which is going to be different from the factory stuff, which is just a standard old ball joint. Now, what this is going to do, give you the most amount of range of motion possible out of your suspension, allowing more articulation out of the wheel, more up and down, which is going to be great for off-roading in any scenario at the worksite, at the trail, or just doing some yard work, something like this is always a good thing to have, more range of motion is always a big plus. Now, one thing to mention about this design, you can see the uniball's basically just out in the open air. So, longevity isn't going to be as good as that factory ball joint that has that rubber cover over top of it. Now if that's not that big of a deal to you, and you're looking to get the most performance out of your suspension possible, this is going to be great for the guys looking for longevity, maybe just a stock pair of upper control arms would be your best bet. But suffice to say, these are gonna perform a lot better. Moving to the rear side of the upper control arms, you can see we have some energy suspension bushings back here, really high-quality stuff, a little bit harder than factory, but durability is definitely there. Adding onto that fact, we do have zerk fittings on both sides, allowing you to keep those nice and greased. And if you do that, you should be able to extend the longevity of those even further, which I think is a really nice touch.So, some other benefits of this, just to break down a stock ride height truck versus something like this that has a two-inch lift on it. Stock ride height, you're really not going to see a lot of benefits. The upper control arms from the factory do a great job as far as range of motion goes. One thing you will see though as far as stock ride height trucks, a lot of durability. This is going to be way better than any stamped steel tubular chromoly, like I said earlier, are going to be a huge upgrade. Now, when you get into a spacer lift or really any lift in general, again, this truck does have a 2-inch spacer lift on it. Really, that kind of stuff does tend to throw off the geometry of the truck even after an alignment. So, something like this being purpose-built with a lift in mind can really help bring the driving dynamics back to where they were. So, let's talk a little bit about pricing. Now, these are going to be a performance part, so a little bit more expensive than the factory stamped ones, but that's to be expected. Pricing is going to be right around 650 bucks and they come with a satisfaction guarantee and a limited lifetime warranty as well. So, if you're looking for upper control arms, whether you're stock or lifted, these could be a great buy.Install, not going to be too bad either. No modifications required. These are gonna be a straight bolt-on. However, we are going to be seriously digging into our suspension components here. Nothing to worry about, I'll walk you through every step in just a second here. I'm going to give this a harder two out of three wrenches on our difficulty meter. It should take you about three hours to get this job done. But without any further ado, let me show you what tools you'll need and how it's done. Tools I use for this install will include: the impact, pry bar, flat-head, hammer, dead blow, some safety glasses are going to be a must, trim panel removal tool, a couple of ratchets, some spray lubricant like PB B'laster, vise-grips, U-joint, 5-millimeter Allen key, 9/16-inch 12-point socket. That's really the only oddball, the rest are going to be metric sockets, 8 millimeters all the way up to 22, 18, 21 and 10-millimeter wrenches, ratcheting will help you a lot there. Caliper hanger, vacuum pump, and last but not least, not pictured in the shot will be the floor jack. So, like I said, guys, there is a little bit of suspension disassembly that goes into doing upper control arms on F-150. And where we're going to start here is our brake and ABS lines. As we're taking this apart, you definitely don't want those to get stretched. So, we're just going to remove the brackets, they're held on with 8 and 10-millimeter bolts.This bolt right here is going to be an 8-mil. And then I'm going to thread that right back in for safekeeping. One right behind it, this is going to be a 10-mil. We're going to do the same thing. And the next one is going to be up top here and that is going to be a 10-mil as well. Next thing we're going to work on is our tie rod. This is held on with a 21-millimeter nut at the bottom. Now, if this ball joint spins, you can hold it still by holding it with a wrench right here. But we're going to try to get it with the impact first. Now, what I'm going to actually do is thread that right back on. Reason being this ball joint is pretty much stuck in this collar right here. I'm just going to thread the nut on to protect the threads from what we're going to do next. Now, before we actually do that thing, when you're working with one of these, make sure you apply your safety squints, pair these just to be safe. See that pop loose. That's removed.Up next, we're going to take care of the sway bar. So, the nut on the end link, that is 18 millimeters, I'm going to use the ratcheting wrench to get that off. Now, I suspect this ball joint is going to spin on us and if that happens to you, you can hold the top still with an 8-millimeter wrench. In our case, we're gonna use the vise-grips just to get a strong hold on that. Next thing we're going to remove is the 18-millimeter nut on our upper ball joint here. Now, if you're lucky and you got a little bit of extra room in there, you can get the socket around it with the U-joint, otherwise, you'll be using the open-ended wrench, which we might have to do. That is spinning. So, what we're going to do is use a wrench to hold that still and an 18-millimeter wrench to back that nut off very slowly.Now that we've got the nut off, we can separate the two. So, at this point, we have pretty much all of our basic suspension components disconnected. We're going to have to do a little bit of extra work here, and this isn't going to apply to just this truck, but all F-150s of this generation in general. So, let me explain what it is we're going to have to do. Now, on F-150s of these years, really the lower control arm just doesn't drop enough to allow you to get the upper part of the strut assembly out of the bucket and, therefore, get the clearance needed to remove those bolts in the upper control arm. So, what you have to do is disconnect the CV axle from the hub and basically drop the knuckle out of the way, maybe even loosen up the lower control arm and just basically swing that whole thing down and out of the way, allowing you the clearance you need. Now, one thing to note, when you're disconnecting the knuckle here and swinging it down out of the way, this little baby ABS line does take a lot of tension. So, what we're going to have to do is disassemble the braking assembly in order to get that out and then we can disconnect the CV axle here and drop the knuckle down and out of the way, getting us the clearance we need to finish up the job.So, we're going to move on to our brakes, get that all disassembled, and then we'll pick right back up on top of the strut assembly. So, the first thing we're going to take care of is the caliper. Now, it's tough to see, so I'm sorry if you guys can't see it, but there are 2, 21-millimeter bolts back here. I'm going to use the 21-mill socket and a U-joint to get to those, then we pull off the caliper and hang it up. So, just starting with the one on the bottom, and, of course, this one up at the top and here's the second one. I'm just going to put those aside. And then you can pull the caliper off the rotor and use the caliper hanger tool to hang it up on the frame. With that gone, go ahead and pull off the rotor and the dust shield right behind it is held on with three 8-millimeter bolts. Now, we have access to the sensor. This bolt right here is going to take a 5-millimeter Allen key, and then you can remove it. And that's for safe-keeping, we're just going to thread that right back in. So, the next thing we're going to take care of before we disconnect the axle from the hub, it's going to be this guy right here. This is a vacuum tube. And what this does is this goes to your IWE actuator. Now, what that does is basically puts the truck in and out of four-wheel drive and it's run off vacuum from the engine. Now, the gears in there, they are just plastic. So, what you want to do is disconnect the vacuum hose, and that just pulls off like you guys just saw, and then you can come in here with your hand pump and you're going to put that on the larger of the two nipples. And then we're going to draw 24 inches of vacuum just to disconnect those gears that are basically held together with plastic. You don't want to break them during the disassembly. So, you can see them at 25 inches of mercury there. So, I'm just going to put the pump aside. Then we can go to the front end and remove the nut.So, the nut we're going to have to remove is under this little dust cover here. Now, ours has been off a bunch of times and you're supposed to replace these every time. So, it's going to pop out real easy. And if I hold it up here, you can see we have a dimple started there. Usually, you'd work your way around it with the screwdriver and hammer and just sort of tap in, break it loose and then that'll fall off and reveal your 13-millimeter nut. Now, you still have vacuum pulled, and we're just going to break that nut-free. And once that's done, you can go ahead and pull the knuckle away from the CV. And then we can go ahead and release pressure on our vacuum and remove the hose from the nipple. Up at the top of the strut assembly, we got three 17-millimeter bolts. Now, our truck does have a spacer on it, so those are not going to be factory in your case, probably gonna use a 15-millimeter socket to remove the nuts in this step. But anyways, save the front one for last, just because it's the easiest to get to. There's one and two and number three.Now that we're loosened up, you can grab a pry bar, push down on the lower control arm, and you can see that it's going to come out of the top of the bucket and just rest on that corner right there. Now we're going to try to see if that's enough and basically wiggle out this upper control arm by getting the wrench in here on both sides and removing the hardware. But I think that'll be enough if this strut assembly stays still. So, now, we can get into that hardware with an 18-millimeter wrench for the bolthead, 21-millimeter wrench for the nut, and we're just going to loosen up our upper control arm. It's a little tight, you're going to end up dropping them, but hey, it's loose. We're going to do the same thing for the other side. And with all that removed, you can go ahead and rip out the factory upper control arm. So, now that we have the factory control arm removed from our F-150, figure now would be the perfect time to grab our new upper control arm, put the two side by side and see what the improvements are going to be with the new stuff.Now, first things first, let's talk about build quality, silver finish versus a black finish. That's going to be obvious. But over here with the factory one, we do have stamped steel, which is okay for factory applications, not the strongest thing in the world. The tubular over here is going to be a lot stronger. On top of that, it's got some nice gussets as well back here around the bushings. And there's a nice big one behind the joint itself, which is a nice touch. Durability definitely improved overall with that new upper control arm. Now, let's talk about a big one. Range of motion on the ball joints. Now, really not too much of an improvement if you're looking for the raw angle of the ball joint, you can see I went ahead and threw the stud in there just to kind of highlight this for you guys. But range of motion, not that much greater, maybe a few degrees, nothing too drastic. The stock one does a pretty good job at basically turning out pretty far and really not too much room for improvement there. One thing I did notice between the two upper control arms is the ball joint is basically going to move back an inch or two. And I'm sure that plays into the suspension geometry. And again, this one is just designed to accommodate a lift better overall. Now, last but not least, back here, we have our bushings. Now, for factory, this is basically just going to be a soft rubber compound. Over here, this is going to be a little bit stiffer and it's a little bit thicker as well. So, longevity is definitely there when it comes to build quality alone. You also have the zerk fittings, which allows you to keep them greased and extend the longevity even further in terms of bushing life, which I think is a nice touch.So, let's go ahead and put the zerk fittings in. We're going to do that right now with a 10-millimeter wrench. They just go into these threaded holes right here. So, over by the truck, you can see I have the upper control arms started. I just lined this up off-camera. It is a little bit tight. You might have to tap this in with a dead blow. I use something like this to do that. Once you have it lined up, you can go ahead and take that factory hardware and get that started. What I'm going to do is push that up and get the strut back into the bucket like that and then we can run in our nuts from the outside. So, now that we have the upper control arm in, we're going to reinstall our 17-millimeter hardware. Again, in your case, this is probably going to be 15-millimeter nuts. Next, we're going to reinstall our CV axle. I'm just going to reach behind here and install our vacuum pump to the larger of those two nipples like you guys saw earlier, and then you can draw 24 inches. Put that aside. We're just going to get the two seated into each other. Now, one thing when you're doing this, you want to make sure that they're all the way together and I'll show you what that looks like when I get it here, but you'll see. It definitely looks a little bit different, sorta like that. So, you should be able to see sort of that concave edge at the bottom of the threads. And then once you have it there, you could reinstall your 13-millimeter nut and run it down. At this point, go ahead and release the vacuum, pull the pump off, and you could reinstall that dust cover over top.Next thing we're going to do is secure the upper control arm into the knuckle. Now, you're going to have a few pieces here. The rest of your spherical bushing is going to go in the top and on the bottom. [inaudible 00:20:15] here are actually kind of impressive, feels really sort of smooth. Yeah. That is good machining for sure. They barely fit. And then it's gonna be as simple as pretty much just like that. Come down and get that taper seated. And then on the bottom here, we're just going to start a flat washer and the 22-millimeter nut that comes in the kit. And we're just gonna hold that still and tighten it down. You're going to need a 12-point up in the top here. Let me grab that and we'll be right back. As far as I'm concerned, that's the hard part. The bottom CV axle's the hard part and we're past all of it. Now, we're just going to reassemble the rest of our suspension and brakes, call this one a day. So, we're going to start with our wheel speed sensor. It's going to pop right back in its home and secure with that bolt. Again, 5-millimeter Allen key for this one. Next step, we have our brake dust shield, and now it's going to go right back in place and secure with the three 8-mils. And then after that, go ahead and pop back on the brake rotor and just hold it still while we put the caliper on, I'm going to thread on the lug nut. And we can move right onto the caliper and secure that with the two 21 mils from the back.Next, we can tighten down our sway bar and this is going to get the 18-millimeter nut. And we're going to hold the ball joints still with the vise-grip. Cool. So that nut is tightened all the way down without the need for a vise-grip. But if you do need it, something like this will help you out, or you could use the 8-millimeter wrench. Last big component we're going to have to connect here is going to be the tie rod. That's going to go right into its collar like so, and we're going to reattach that with a 21-millimeter nut. Next up, we're going to reinstall our vacuum tube to the IWE actuator and that's just going to slide around like so. Now, we can move up here, ABS line, brake line, all that is going to get reinstalled using the factory 8 and 10-millimeter hardware. Just to wrap things up here a little bit guys, of course, you want to make sure all the components here are torqued to your factory spec. Then you can put the wheel back on, lower the truck and torque those to factory spec as well. And as always when you're doing suspension components like this one, take the truck for a good alignment.But that's going to do it for my review and install of the Supreme Suspensions Front Angled Control Arms fitting all '04 and newer two-wheel drive and four-wheel drive F-150s, excluding the Raptor models. As always guys, thank you so much for watching. Make sure you keep it right here at AmericanTrucks for all things F-150.

      Product Information

      Features, Description, Reviews, Q&A, Specs & Installation

      Features & Specs

      • Improves Driving Comfort and Handling
      • Front Placement
      • TIG-Welded With Tubular Chromoly Steel
      • With Energy Suspensions Bushings
      • Features Teflon-Coated FK UniBall Joints
      • Direct Installation
      • Sold as a Pair; With Hardware
      • Includes a 30-Day Satisfaction Guarantee
      • Limited Lifetime Warranty
      • Made to Fit 2004-2008 2WD/4WD Ford F-150 Models

      Description

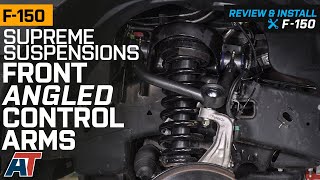
      Enhances Driving Comfort. For a more comfortable off-road drive, equip your Ford F-150 with these Supreme Suspensions Front Angled Control Arms. These suspension components make your vehicle more stable as it drives through rugged trails. What’s more, they help improve your truck’s cornering abilities, as well as your overall handling.

      Durable Construction. For maximum strength, these control arms are TIG-welded with tubular chromoly steel. This allows them to support the weight of your vehicle, as well as its load without bending or breaking. Furthermore, these control arms are made to withstand the harshest driving conditions, making them ideal to use for your light-to-moderate off-road drives.

      Direct Installation. For your convenience, these control arms are designed to directly install to your truck’s factory mounting points. However, if you don’t have any experience installing this kind of suspension component, please seek the help of a professional mechanic.

      Warranty. Supreme Suspensions is offering this product with a 30-day satisfaction guarantee, so that you may return it if you are not satisfied with your purchased item. Furthermore, they are also backing this product with a limited lifetime warranty. To learn about the warranty terms and conditions, please visit the official website.

      Application. These Supreme Suspensions Front Angled Control Arms are made to fit 2004-2008 2WD/4WD Ford F-150 models.

      Shop All Truck Parts And Accessories

      Shop All Truck Control Arms And Accessories

      Shop All Truck Suspension

      Fitment:

      Details

      Supreme Suspensions FDF104CTRARM

      CA Residents: WARNING: Cancer and Reproductive Harm - www.P65Warnings.ca.gov

      Installation & What's in the Box

      Installation Info

      What's in the Box

      • (2) Front Angled Control Arms
      • Installation Hardware
      2.5

      Customer Reviews (2)

        Brand Image

        Reviews of Supreme Suspensions Suspension products have an average rating of 4.6 out of 5

          Questions & Answers

          10 More Questions

          Will It Fit My F-150

          • 4.2L V6 - 05, 06, 07, 08
          • 4.6L V8 - 04, 05, 06, 07, 08
          • 5.4L V8 - 04, 05, 06, 07, 08