 FREE 1 to 3-Day Delivery on Orders $149+ Details
How to Install Smittybilt Street Light Bar on your F-150

Shop Parts in this Guide
Note: Read instructions entirely and carefully before installing this part.
INSTALLATION:
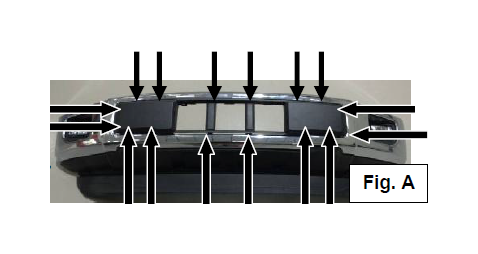
Step 1: Using a panel popper or flat head screw driver, release all 16 retaining clips holding the center bumper cover. Pull out and away to remove from bumper, exposing the six factory bumper bolts. (Fig. A)
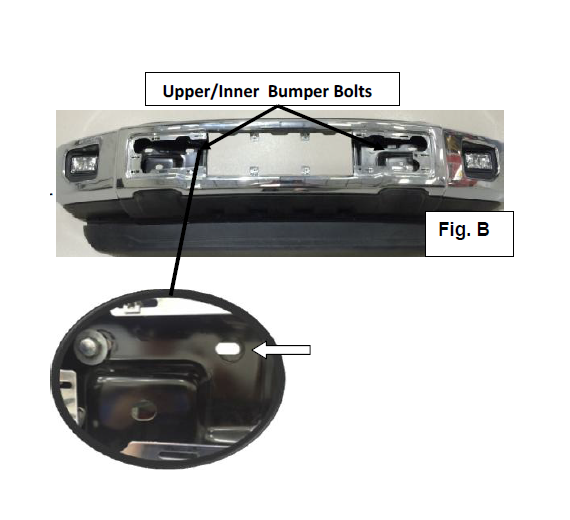
Step 2: Remove the two upper bumper bolts (passenger/driver) located towards the Inner side of the vehicle. (Fig. B)
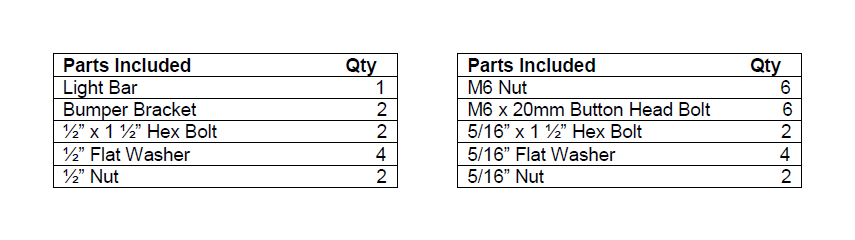
Step 3: Install the two mounting brackets Using the supplied 1/2”x 1 ½” Hex bolts nuts washers and leave loose.
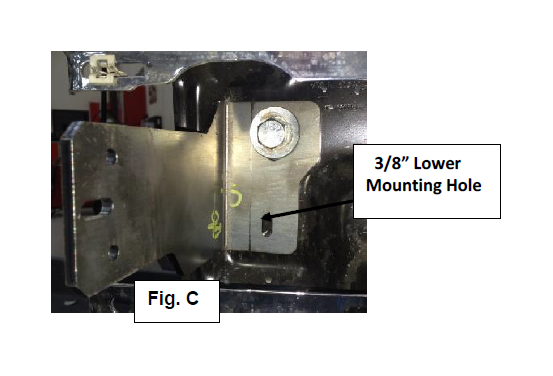
Step 4: Using a 3/8” drill bit, drill out the lower mounting hole through the bracket for Driver/Passenger. Secure with supplied 5/16”x1 ½” hex bolt, 5/16” nuts and 5/16” washer.
(Fig.C) NOTE: Test fit Light bar/Pre-runner to bumper brackets to insure proper alignment before drilling lower holes.
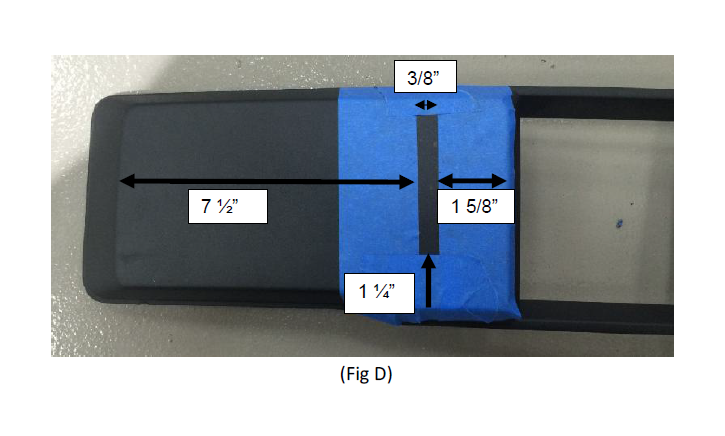
Step 5: Plastic bumper cover must be trimmed to expose mounting brackets. The measurements in this step are approximant. (Fig.D) NOTE: Take extra time and double check measurements before trimming the plastic.
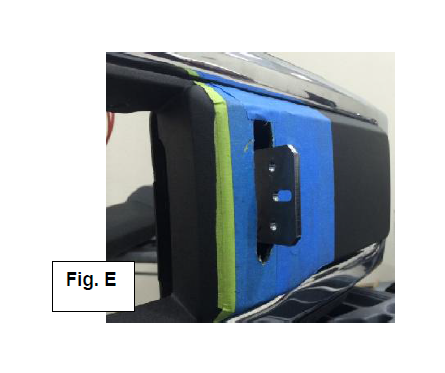
Step 6: Once plastic cover has been properly trimmed, re-install into bumper clips and secure. (Fig. E)
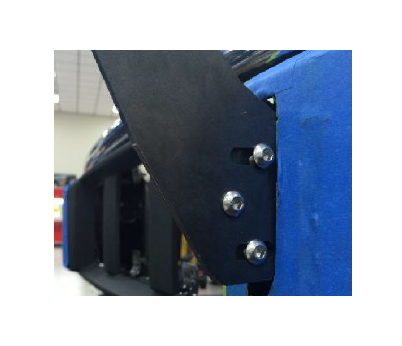
Step 7: Install Light bar/Pre-Runner to the bumper brackets using the supplied M6x20mm, M6 flange nuts and M6 washers and leave loose.
Step 8: After Light bar/Pre-runner has been properly adjusted, tighten all hardware. Your install is now complete.

