 FREE 1 to 3-Day Delivery on Orders $149+ Details
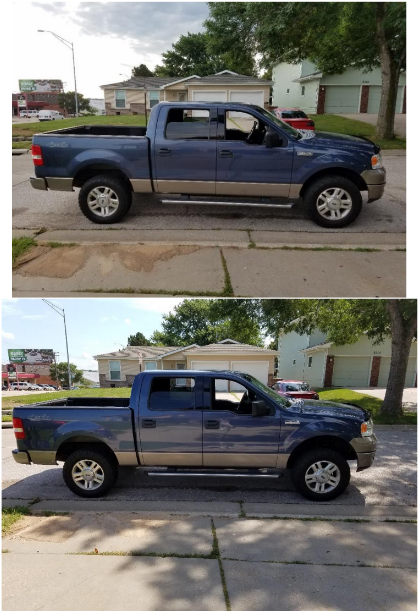
How to Install SkyJacker 3 in. Suspension Lift Kit w/ Hydro Shocks (04-08 4WD F-150) on your Ford F-150
Installation Time
3 hours
Tools Required
- Impact Wrench 1⁄2” Drive
- Jack and Jack Stands
- 1⁄2” Drive Breaker Bar
- 1⁄2” and 3/8” Drive Ratchets
- 15mm and 18mm Wrenches
- Coil Spring Compressor
- 6mm and 7mm Socket
- Small Sledgehammer
- 1⁄2” Drive Extension
- Lubricating/penetrating Oil
- Flat Blade Screwdriver
- Small Wire Brush
- Pry Bar
- 1⁄2” Drive Universal Joint
- 12mm 12pt, 15mm, 21mm, 22mm, 27mm, 30mm Sockets

Shop Parts in this Guide
FRONT LIFT
1. A few times in the days leading up to this project soak the ball joint nut, tie rod (steering link) nut, and the upper and lower strut mount nuts in penetrating oil.
2. Block the rear wheels. Lift and support the front of the vehicle using floor jack and jack stands.
3. Using flat blade screwdriver remove center cap. Using 21mm socket remove lug nuts. Remove wheel/tires.
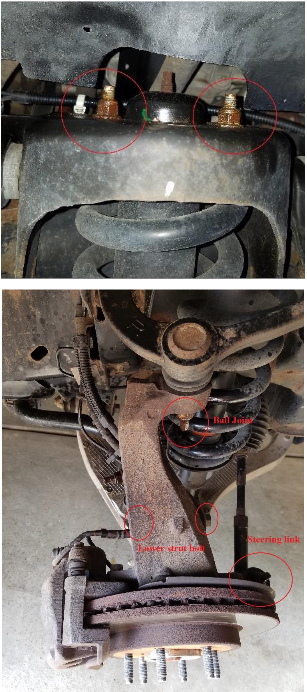
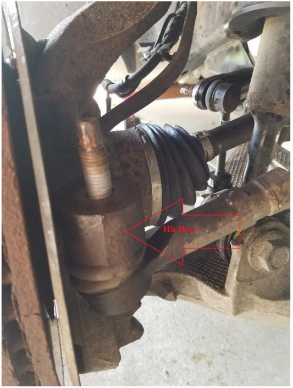
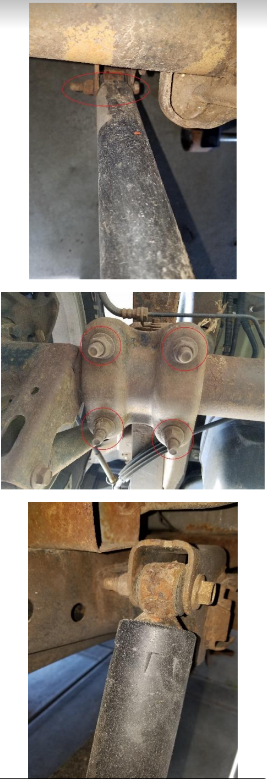
4. Remove tie rod end nut. Using sledge hammer beat on the side of the knuckle where the tie rod end connects until tie rod end drops out. Turn the knuckle out toward the rear of the vehicle.
5. Using 12mm 12 pt socket and extension remove the 6 bolts holding the cv shaft to the differential flange.
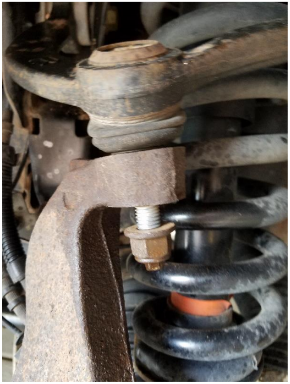
6. Using breaker bar and ratchet as well as 27mm and 30mm sockets remove the lower strut bolt.
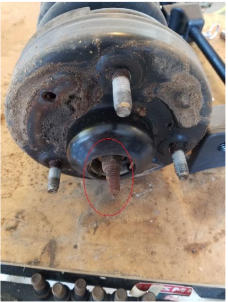
7. Using 21mm socket and universal joint remove the nut from the upper ball joint. Rethread the nut on a little and use the sledge hammer to hit the side of the upper control arm next to the ball joint until it pops out. Remove nut. The steering knuckle will want to fall forward. Just rotate it towards the back of the vehicle making sure that no brake hoses, wires, or vacuum lines are stretched. If they are find a way to secure the knuckle to relieve the tension.
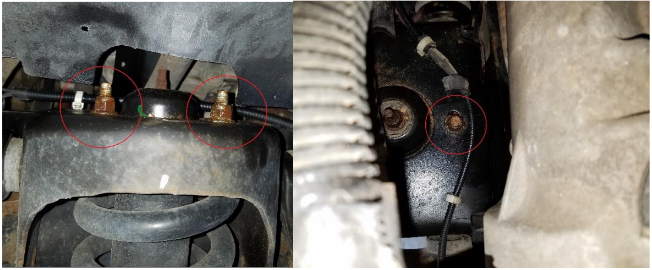
8. Using 15mm socket remove one top strut nut via the engine bay, and using 15mm wrench remove the 2 strut nuts via the wheel well.
9. Remove the strut from the vehicle.
10. Compress the coil spring as much as possible using the coil spring compressor. (Leave the coil spring compressor in place until you're done with step 14)
11. Use the impact wrench to begin to loosen the strut nut with 15mm socket. Then use a 7mm socket and 15mm wrench to remove the nut. I had to remove the nut as far as I could still hold the 7mm stem, then tighten it back down a bit. Clean the threads. Remove the nut as far as I could again. And the last little bit I had to use the impact to completely remove it.
12. Remove the upper strut mount (including rubber isolator and strut shaft cover) and spring from the oem strut.
13. Assemble the Skyjacker strut by installing the bottom spring perch, with or without the additional spacer, and slide the new bump-stop onto the strut shaft. Using a 6mm socket turn the strut stem
counter clockwise to expand the strut.
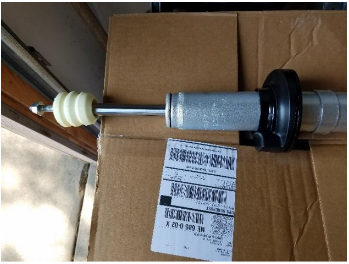
14. Slide the new strut through the spring and into the upper strut mount. Install new nut and tighten down as far as it will go. Often the spring compressor will not be able to compress the spring enough to tighten this nut all the way down so I had to re-tighten it after it was on the vehicle. But make sure at least 1⁄2” of thread is past the top of the nut minimum. (remove coil spring compressor)
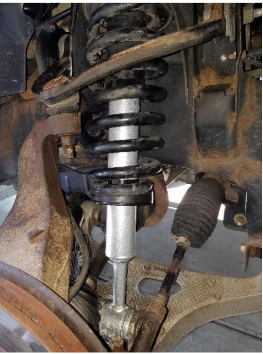
15. Install the new skyjacker strut top first and start the top nuts. Push the lower control arm down and slide the lower strut mount into position and install lower strut bolt and nut. Tighten them all down.
16. Install the upper ball joint nut. Using the floor jack to raise the lower control arm and a pry bar to bring the upper control arm down get the ball joint through the hole in the knuckle enough to start the nut. With and impact and 21mm socket tighten the ball joint nut. If the ball joint starts to spin use the pry bar to push the control arm down enough to create some friction and then the nut should be able to be driven on. Tighten to about 100ft/lbs.
17. Reinstall tie rod end through the steering knuckle and tighten the nut down, about 100ft/lbs.
18. Reinstall the cv shafts to the differential flanges and tighten the nuts to 60-65 ft/lbs.
19. Double check that all the nuts are tight.
20. Reinstall wheels and tires and lower front end to the ground.
21. Through the wheel well try to tighten down the upper strut nut further using 6mm socket and 15mm wrench.
REAR LIFT
Note: I chose not to install the rear lift as I prefer the leveled look over the factory rake towards the front. However, if you were able to complete the front leveling kit, the rear kit will be easily managed.)
1. A few times in the days leading up to this project soak the u-bolt nuts and the upper and lower shock mount nuts with penetrating oil.
2. Block the front wheels. Lift and support the rear of the vehicle placing the jack stands under the frame.
3. Remove center cap using flat blade screwdriver. Using 21mm socket and impact wrench remove lug nuts. Remove rear wheels and tires.
4. For steps 5-9 work on only one side at a time.
5. Place a jack under the axle on the side you’re working on.
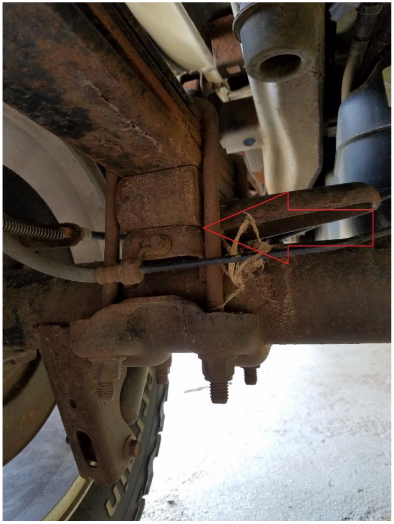
6. Using 15mm and 18mm wrenches remove the upper and lower shock bolts. Remove shock from vehicle.
7. Using impact wrench and 21mm socket remove the nuts from the u-bolts. Remove the u-bolts from the vehicle.
8. Lower the rear axle enough to make room for the new lift block. Install the skyjacker lift block BELOW the oem lift block. Raise the axle enough to keep them both in place.
9. Install new u-bolts through the mounting plate and install new nuts using 22mm socket and impact wrench.
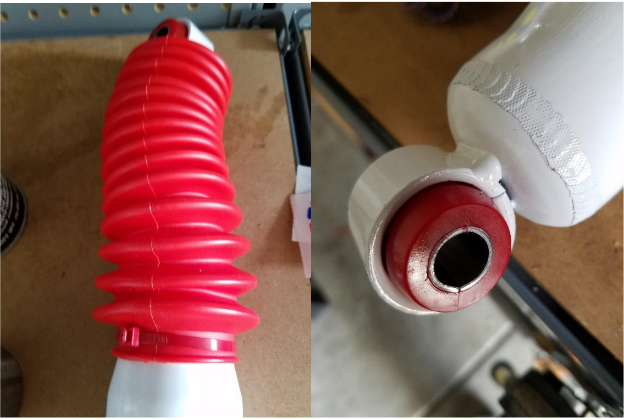
10. Assemble new rear shocks by installing rubber bushing and sleeve in each eyelet. Use silicone spray to allow them to be pressed in. If you can’t do it by hand use a bench vise. Also slide the rubber shaft protector over the top eyelet and use the supplied red zip-ties to secure it to the shock shaft.
11. Install the shock using the oem hardware.
12. Do the same thing on the other side.
13. Double check that all nuts are tightened.
14. Reinstall the wheels and tires.
Take the vehicle on a short and slow test drive to listen for odd noises, check for rubbing, and to get the suspension to settle into place. I went about 8 blocks total never exceeding 15 mph. When you get back use a 15mm wrench and 6mm socket to tighten the top strut nut further. Double check this again after about a week of normal driving. One alternative to this top strut nut issue is to have a professional shop use a
professional spring compressor to assemble your new skyjacker front struts with the oem upper strut mount and spring.
Installation Guide Created and Submitted by AmericanMuscle Customer, Stephen Vilcot, on 9/1/2016

