2019-2026
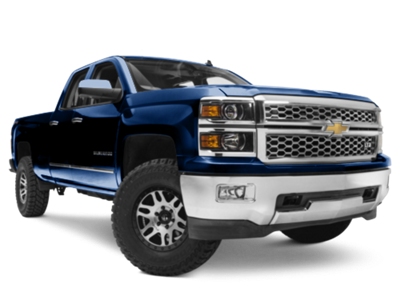 2014-2018
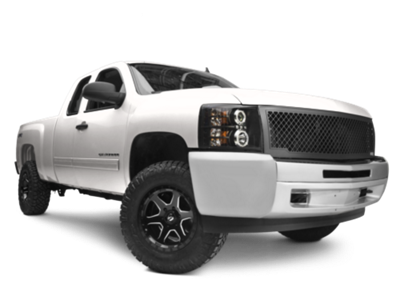 2007-2013
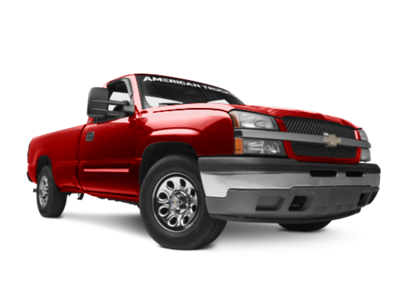 1999-2006


Installation Time
(approx) 1 Hour
Difficulty Level:
Simple installation for anyone.
Installation Guides
No guide available for this part yet.
 FREE 1 to 3-Day Delivery on Orders $149+ Details
$384.99 pair
Save with Open Box
From $173.25
CONFIRM THIS FITS YOUR VEHICLE!
Saved - View your saved items
We're sorry. We couldn't save this product at this time.
or use

Features, Description, Reviews, Q&A, Specs & Installation
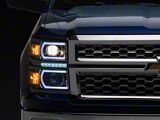
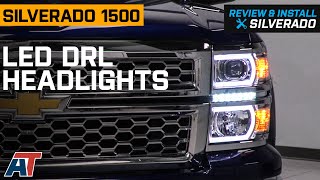
| Headlight Type | Projector |
| Headlight Housing Color | Chrome |
| Headlight Lens Color | Clear |
| Headlight Style | Aftermarket Style |
Meticulously and Rigorously Crafted. Looking for a headlight upgrade that will take your driving experience to the next level? Look no further than these LED DRL Headlights with Amber Corners. These headlights are meticulously crafted in a state-of-the-art facility and rigorously tested to ensure optimum performance.
Dependable Plug-and-Play. They offer a direct bolt-on installation with plug-and-play operation, so, you can enjoy their dependable output with no modification or drilling needed. Plus, they fit all 2014-2015 Chevrolet Silverado 1500s perfectly. With their chrome housing and clear lens, these headlights are sure to give your vehicle a sleek, modern look. Don't wait any longer - upgrade your ride today with these LED DRL Headlights.
Application. These LED DRL Headlights with Amber Corners fit all 2014-2015 Chevrolet Silverado 1500s.
CA Residents:  WARNING: Cancer and Reproductive Harm - www.P65Warnings.ca.gov
Installation Info
Installation Time
(approx) 1 Hour
Difficulty Level:
Simple installation for anyone.
Installation Guides
No guide available for this part yet.
What's in the Box
Sponsored