Talk to a Silverado 1500 Sales Tech
1-888-706-1096
M-F 8:30A-11P, Sat-Sun 8:30A-9P
$20K Sweeps! 10 Chances to Win! Enter Daily >

Crystal Headlights with Bumper Lights; Chrome Housing; Clear Lens (03-06 Silverado 1500)

Item S118859
Verify parts fit and get product recommendations.
Silverado 1500 Sales Techs: Connect Now M-F 8:30A-11P, Sat-Sun 8:30A-9P
$0.00
Our Price

$129.99 (pair)

FREE Shipping Market Price $150.99 You Save 14% ($21.00) Up to 10% off for Military & First Responders! See Details

Will this fit your Vehicle?

Select a different vehicle Help?
Update or Change Vehicle
Ship to: Ashburn - 20149
Sorry, please enter a valid US or CA postal code
We're sorry, zip can't be updated at this time.
Recommended Install Shops
How It Works
Install Shops are available near Ashburn - 20149

Add Local Shop Installation

Total cost of service $174.99
    Create a list
    Add to New List

    Saved - View your saved items

    We're sorry. We couldn't save this product at this time.

    or use

      Product Videos

      Jake: Jake here for American Trucks. And today, I'm taking a look at these Crystal Headlights and Bumper Lights with Chrome Housings and Clear Lenses, fitting 2003 to 2006 Silverado 1500s. Lighting updates are some of the best and easiest things you can do to improve not just the aesthetics, but also the safety and functionality of your truck. And these crystal headlights and bumper lights are going to be a great choice for the Silverado owner who's on the hunt for a replacement setup that will provide an improvement in overall lighting performance and look of their truck for a really palatable price.Now, the headlight lenses on these GMT800s are known to fade, crack, and get moisture in them with age, it's one of those cases where it's not a matter of if but when. So if your lights are looking a bit worse for wear, if you're thinking it's just time for a bit of a facelift, then these are certainly worth checking out. Now, these are essentially a full set of replacement lenses for your stock lights, they're designed to fit right in place of those stockers, with no modifications required to your truck. They're also gonna utilize the factory-style bulbs, or any bulbs that are compatible with your stock lights, anything that plugs into the wiring harness on the truck is gonna work here. So if you really wanted to put in LEDs or something else, you can certainly run them too.On the outside, you get these crisp, clear new lenses with those internal chrome housings, so you get some serious light output as well, certainly better than what your stock lights are right now. And they provide a nice little facelift too, given that sleek, chrome internal housing. They also maintain the amber reflectors on the sides as well, so if you like that stock look and just want something that's gonna be a nice replacement for what you've got there, these are gonna be a good ticket for you.And construction-wise these are built to meet or exceed OEM specifications. So that clear lens on the outside here is made of the industry standard polycarbonate material, you've got those chrome internal housings that we were just talking about, plus the external housing is made from ABS plastic. And of course, these are weather sealed as well to help keep out dirt and moisture.Pricing, however, might be the best part, as this full set as you see them here comes in right around $175, making them some of the least expensive options out there for a full set of replacement lenses. Now it is important to keep in mind that you are only getting the lenses here, no bulbs are included. However, these do far undercut most other replacements out on the market, especially the ones from GM themselves. And they're of similar quality as factory, but they're going to cost you quite a bit less. So go ahead and grab some new bulbs, we do have a ton of upgraded options on our site or you can just transfer your old ones over for an inexpensive, easy update.Installation comes in at an easy one out of three on our difficulty meter, and it should only take you about an hour to get them completely installed. Again, these are totally plug-and-play with no modifications or wiring necessary to get everything working, you're gonna utilize all of your stock bulbs and those harnesses as well. You do, however, get a new set of O-Rings in there. And this is a complete setup for all four of the bulbs that you're gonna put on each side of the truck. So this is gonna be a nice way to make sure that you keep more of that moisture and dirt out of it. Not much more we can say about it here. So to show you the process, let's throw it over to one of our AT customers.Speaker 3: Right here I have the tools that I'm gonna need for today's job. I've got a small pair of needle-nose pliers, also a large set, different applications might require a different thing. I've got this pin puller, you don't really have to have this, it just makes the job a little easier pulling the plates off. I also have a pin puller or a pry tool, both will work. I've got a flashlight, just to be able to see in the little dark spaces in the bottom. I also brought a flat-tip screwdriver and a knife just to cut open the box and the packaging and things like that.First step, we're gonna go ahead and pop the hood and we'll come to the seven pins that we're gonna need to remove, to remove this top piece. There's four down here on the bottom, three up here at the top. I got my pin pullers and I went ahead and got a flat-tip screwdriver as well to help me on any of it that don't come out too easy.I'm gonna go ahead and clamp in and they pop right out. And this is what the pin's gonna look like. So when they go in and it seats, it pushes that out so it won't come out. The next part, just simply remove this piece and set it up out of the way, set it to the ground where we can access this piece here. And the grille is gonna come out and pop out right here on the bottom sections and on the side on this part. The same thing goes for the bottom.Here, we can see that the bottom clip right here, this is the bottom clip, we can put a hand on the inside and outside and work that right out of that clamp. And here's the other side, I'll go ahead and use the pliers, clamp right around and it comes right out. Now that we got all the connectors loose, this will just lift right out and then go set this off to the side.Here at the driver's side light, you'll see this pin that sits down in this little cradle. You can wiggle this thing back and forth, and pull that right out. Right after that, this light will come right out. It just slid in here and two connecting points on the bottom. In the back of the headlight housing, the bulbs will just twist and come right out and then you'll have your old existing headlight.Here's the bottom section of the headlight, you'll see that it's pushed in. It's got a connection right here and then also right there, but the main thing is this clip right here. So, we can see how this clip is holding in to this housing section backplate. What I do is I take my needle-nose and then I go right along that clamp, and I'm gonna wiggle it back and forth to get it back out of that. Once that pops out, the rest of the housing should just come off. And then with these lights, you push down this tab and turn, push down and turn, and don't forget your other blinker over here. Once we get that loose, this is where it slides right in and out. Once again we'll just push down and turn to remove our lights, [inaudible 00:09:05.419] a blinker in the corner. This will also help with leaks in the future if you just go ahead and replace the rings.Now that we've gotten that all taken care of with these new rubber grommets, just go ahead and locate your new housing. So how you're gonna do this is the blinker's gonna be on the bottom of the outside. There's also an L if you look really close, that's indicated here for the left side of the vehicle. So we're gonna go ahead and pull these tabs, these are on there to prevent dust and debris from getting into the headlight assembly while shipping or manufacturing.So we'll just remove these and then we're gonna move on to the blinkers, [inaudible 00:10:44.027] it only goes in pretty much one way, you'll feel the grooves click, then you turn it until it doesn't turn anymore, you can feel it compress against itself, you know it's tight. With these, they've got three grooves from the bottom and there's three grooves in your headlight housing. So you're gonna basically line those up with this turnkeys here below this peg, that way, when you turn it, it clicks. You can do the same thing with this other side and click them into place.All right, here we can see that this tab here is gonna fit into here. This peg down here on the bottom will go into this peg here. And when we line those up, this clamp fits into this hole here in the back plating of your headlight, and just snap it in. Now we've got our top piece, we're gonna go ahead and remove these dust covers here. Now with this, these two bottom pieces are actually gonna slide into the bottom of these. So you can go ahead and line that up, make sure they get a good fit.All right, now we'll take our headlight, and it's the same thing as the other lights, there's three prongs on it, you're gonna slide in, and there's an on and off way, so you're just gonna turn it to that on way, till it clicks in. Same thing with the other one. So now we're gonna line them up with these bottom posts, make sure all our wires are tucked in. Once we're hooked into these bottom pieces and we have all our wires tucked up, the headlight just slides right into place. We can then take this pin that we removed first, and you can line your holes up with the mount of the backplate and the headlight itself, just in far enough to where it lays in the cradle.Now we're on to the passenger side, I've located the bar on the back for the right side of the vehicle. Notice my blinker is on the bottom, not the top. So we're just gonna put it there and secure them in place, same thing on this, we're gonna find the prong holes, and turn it right into place. There we go. And from here, we're gonna go ahead and slide this thin [SP] into that, these will both line up in their grooves and then we move it back and this clamp right here falls right into place.Here's the passenger side light. We're going ahead and removing the dust covers. Then we're gonna go ahead and make sure everything fits right, and this is fitting. Now we're gonna go ahead and take our bulbs and do the same thing we've been doing on all the other lights, line them up, turn them until they click into place.Then we'll go ahead and tuck these wires back in, some might not have these wires, I've got LED-converted headlights, we're gonna go ahead and push this hole back up in between that and grab our pin to fish it in, just wiggle it back and forth, if you have a hard time, some of the new stuff is pretty fresh, just wiggle it in and then lay it in its cradle here. I leave these plastics on until after I put the grille back on.Now that we have our headlights installed again, we're ready to put the grille back on. So, we take a look right here, right here, and right here, are the three points that our grille are gonna clip into, here, here, and here. So we're just gonna ease this in, and we kind of got a good placement on it right now. You're gonna wanna go ahead and take an eye and see where you're going right here to make sure that this is going in where it needs to go. I clip that in first.Since we've got the outside clipped in, we're gonna go ahead and make sure that our prong here and clip are lined up and push those into place, then come up top here and do the same thing. Then we move to the other side, there's that [inaudible 00:16:53.224], bring it up into its spot as we make sure this pin goes in its spot, we can grab the bottom of the grille, pop that in, it should be really easy pushes. Then the last side, you just wanna make sure that pops right into place.Once we have the grille back in place, you can go ahead and grab this cover and you can send it back over top of this grille [inaudible 00:17:20.299] piece and you'll see the holes starting to line up where the pins will need to go. So we'll just go around and pop these pins in and push them all the way down, it shouldn't need anything more than your hand pressure. Once you have the top plate in, we'll go ahead and remove these plastic shieldings from my new headlights. And that's how you replace the headlights in an '03 to '06 Chevy Silverado 1500.Jake: That's gonna wrap it up here for our review and install of the Crystal Headlights and Bumper Lights with Chrome Housings and Clear Lenses, for 2003 to 2006 Silverado 1500s. Thanks for watching. And remember for all things Silverado, be sure to keep it right here at americantrucks.com.

      Product Information

      Features, Description, Reviews, Q&A, Specs & Installation
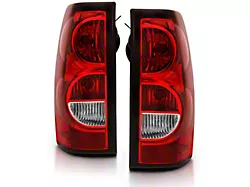
      Features & Specs

      • Crystal Headlights with Bumper Lights
      • Improves the Looks and Visibility of Your Vehicle
      • Works with Aftermarket or Stock Bulbs
      • Clear Lenses
      • Chrome Housing
      • Designed to Meet or Exceed OEM Specifications
      • Plug-and-Play Installation
      • Sold as a Pair
      • Created to Fit 2003-2006 Chevrolet Silverado 1500 Models

      Description

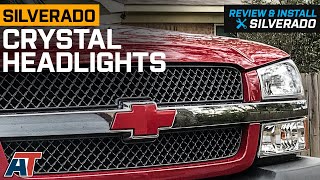
      Safer Nighttime Drives. Equipping your truck with these Crystal Headlights with Bumper Lights, Chrome Housing, and Clear Lenses guarantees to make your drives safer at night. With their powerful illumination, you’ll be able to easily spot and avoid any obstacles ahead. Moreover, more brilliant lighting helps make your vehicle more conspicuous to other road users.

      Outstanding Illumination. These crystal headlights offer outstanding illumination. With their clear lenses, they can deliver a brighter and increased width light output. What’s more, these headlights come with bumper lights that help supplement their illumination performance.

      Premium Construction. For superior strength and long-lasting functionality, these headlights are designed to meet or exceed OEM specifications. Each crystal headlight and bumper light is crafted with a clear lens that’s also highly resistant against impacts. Furthermore, the headlights are enclosed in a durable, chrome housing to protect them from various weather elements and road debris.

      Plug-and-Play Installation. These headlights are quite easy to install, thanks to their plug-and-play design. Each light assembly is built to directly mount at your truck’s factory location points and doesn’t require complicated electrical wiring work and modifications.

      Application. These Crystal Headlights with Bumper Lights, Chrome Housing, and Clear Lenses are created to fit 2003-2006 Chevrolet Silverado 1500 models.

      Bulb Application. To deliver brilliant lighting output, you can pair these headlights with your preferred aftermarket or stock bulbs.

      Fitment:

      CA Residents: WARNING: Cancer and Reproductive Harm - www.P65Warnings.ca.gov

      Installation & What's in the Box

      Installation Info

      What's in the Box

      • (1) Crystal Headlight with Bumper Light, Driver Side
      • (1) Crystal Headlight with Bumper Light, Passenger Side
      4.5

      Customer Reviews (86)

        Questions & Answers

        10 More Questions