
How to Install Roush Side Stripe Kit on your F-150
Installation Time
2 hours
Tools Required
- Cutting Knife
- Measuring Tape
- Grease Pencil
- Isopropyl Alcohol (70%)
- Lint Free Rag
- Vinyl Application Fluid
- Regular Squeegee and Felt Squeegee
- Sharp Needle
- 1” and 2” low-tacking masking tape
Installation Instructions
Application: 2005-07 Ford F150 SuperCab and SuperCrew with or without the following Roush accessories: Roush Hood Scoop, Roush Tailgate Spoiler, and Roush Chin Spoiler
Important: Before installing your Roush Performance Product(s) Stripe Kit, verify that the stripe kit matches your vehicle. If the kit does not match your vehicle, please return it unaltered for the correct kit.
Limit of Liability Statement:
The information contained in this publication was accurate and in effect at the time the publication was approved for printing and is subject to change without notice or liability. Roush Performance Products (RPP) reserves the right to revise the information presented herein or to discontinue the production of parts described at any time.
Important safety precautions and warnings before proceeding:
Safety Requirements:
Appropriate disassembly, assembly methods and procedures are essential to ensure the personal safety of the individual performing the kit installation. Improper installation due to the failure to correctly follow these instructions could cause personal injury or death. Read each step of the installation manual carefully before starting the actual installation.
1. Always wear safety glasses for eye protection.
2. Place ignition switch in the OFF position.
3. Always apply the parking break when working on a vehicle.
4. Block the front and rear tire surface to prevent unexpected vehicle movement.
5. Operate the engine only in well-ventilated areas to avoid exposure to carbon monoxide.
6. Do not smoke or use flammable items near or around the fuel system.
7. Use chemicals and cleaners in well ventilated areas.
8. Batteries produce explosive gases, which can cause personal injury. Therefore, do not allow flames, sparks or flammable substances to come near the battery.
9. Keep hands and any other objects away from the radiator fan blades.
10. Keep yourself and your clothing away from moving parts when the engine is running.
11. Do not wear loose clothing or jewelry that can get caught in rotating parts or scratch surface finishes.
WORK SAFELY!
Perform this installation on a good clean level surface for maximum safety and with the engine turned off.
I. Center Stripe Kit Installation:
Note: Only apply steps that are relevant to your kit.
Important: This is a wet application process.
1. Check / Inspect decals for imperfections before application.
Note: Make sure your vehicle exterior is very clean and free of debris before beginning the installation.
2. Clean the surface where the decal is to be applied, with Isopropyl Alcohol (70% Isopropyl to 30% water mix) and wipe dry with a lint free rag.
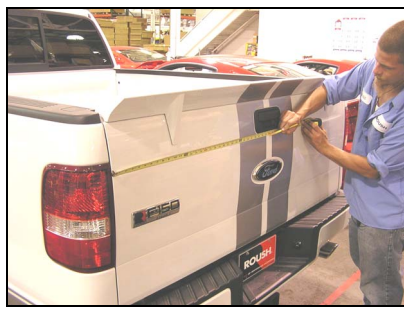
3. Measure the cross truck dimension (side to side) of each panel. With a grease pencil, mark the center point on each end of the panels.
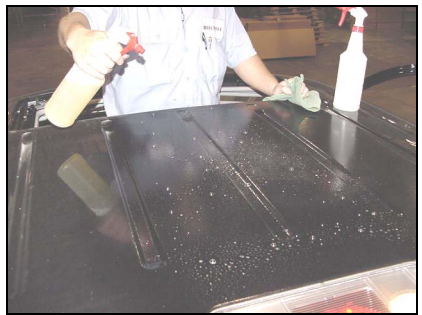
4. Liberally spray surface with vinyl application fluid as shown below.
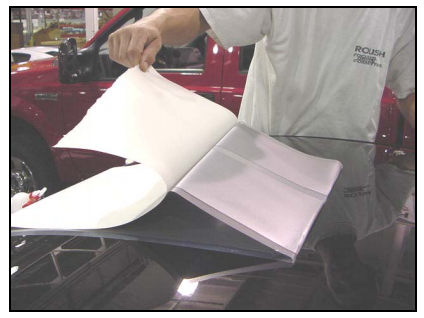
5. Carefully remove paper backing from decal. Line up decal using the center marks as a guide and apply decal to surface.
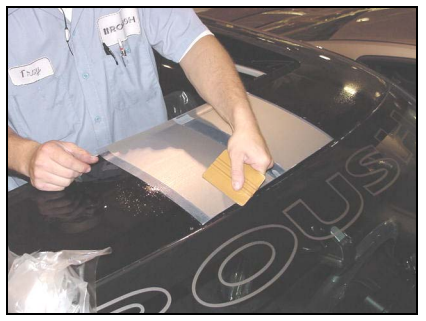
6. CAUTION: DO NOT PRESS THE DECAL WITH HANDS – ONLY USE A REGULAR SQUEEGEE
7. Working from the center outward, use a sweeping motion with the regular squeegee to press out the air bubbles and adhere the decal to the flat surface.
8. Step back from the vehicle and visually check to see if the decal is aligned correctly.
9. Repeat steps 2 through 8 for the tail gate as shown below.
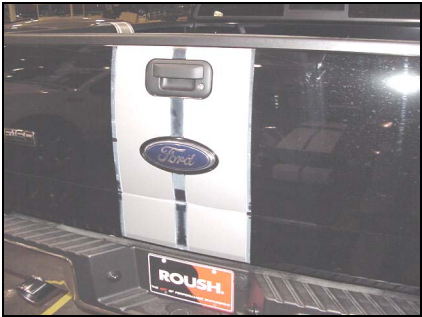
10. Repeat steps 2 through 8 for the spoiler as shown below.
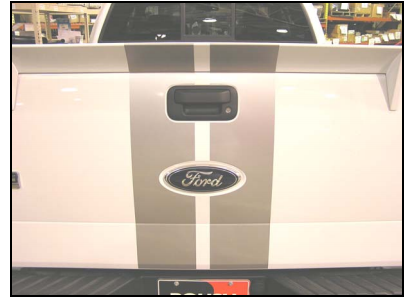
11. Repeat steps 2 through 8 for the grille top, front bumper cover, upper bumper, lower bumper, and chin spoiler as shown below.
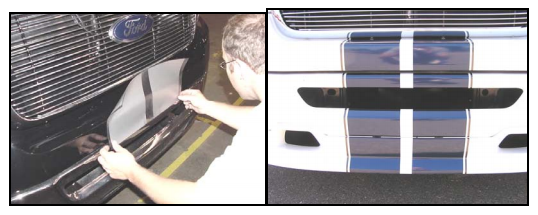
Roof and Hood Installation:
12. Line up each decal on the car using the marked center points to help center the decal. Tape in place using 1” low-tacking masking tape as shown below.
Note: If vehicle has sunroof, cut off excess material as shown below.
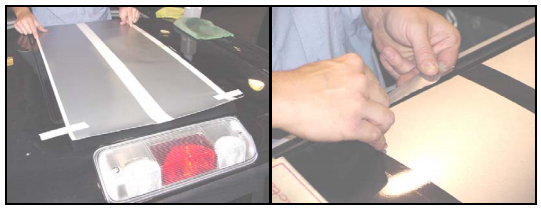
13. Step back from the vehicle and visually check to see if the decal is aligned correctly. If not remove tape and re-align.
14. On long panels such as Hood & Roof, use 2 “ low-tack masking tape and tape down the center of the decal from side to side as shown in the diagram below.
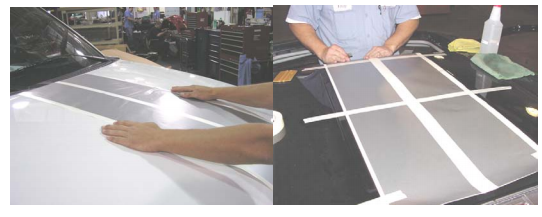
15. Remove tape from the corners of one side, pull back decal to center 2” masking tape line. Carefully remove the paper backing from the loose half of the decal and carefully cut away the pealed back part of the paper backing just before the 2” tape line as show below.
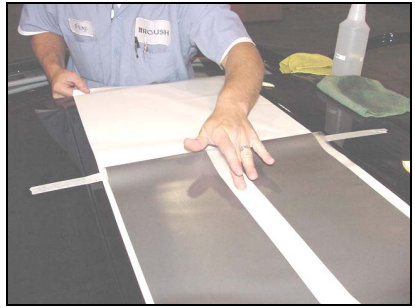
16. Liberally spray surface with Vinyl application fluid and apply the exposed half of decal to surface.
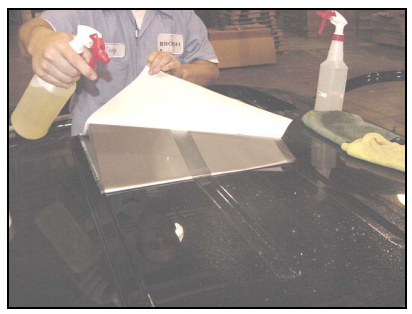
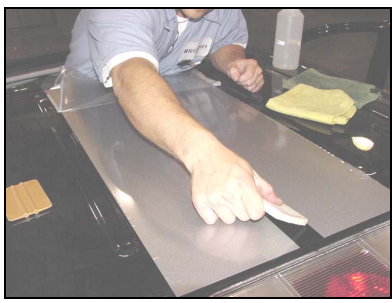
17. Working from the center outwards, use a sweeping motion with the felt squeegee to press out the air bubbles and adhere the decal to the flat surface as shown below.
18. Once the one half of the decal has been applied to the surface, remove the 2” tape and apply the same procedure to the second half of the decal.
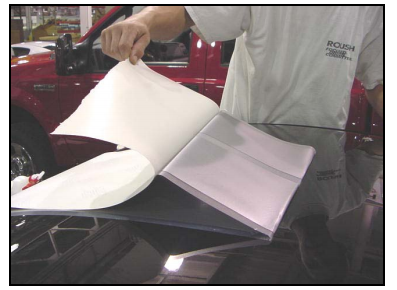
19. Use squeegee to ensure that all air bubbles are removed and that the decal has adhere to the flat surface.
20. Repeat steps 2 through 8 for the hood scoop.
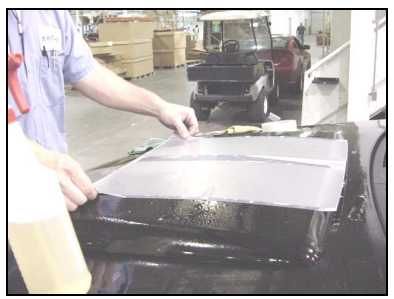
21. Also for hood scoop, fold around front edge of scoop as shown below.
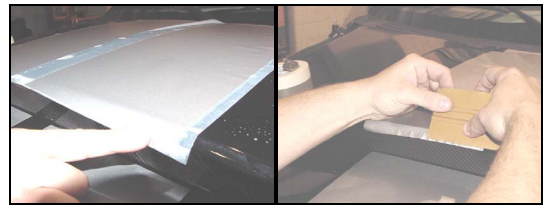
22. Allow 15-20 minutes to dry for decals, once dry remove plastic layer from decals as shown below. If decal starts to lift from the vehicle, allow more dry time before removing plastic layer. If the edges of the decal are the only parts to slightly lift from the vehicle while removing the plastic, use the felt squeegee to press these areas back to the vehicle and continue removing the plastic.
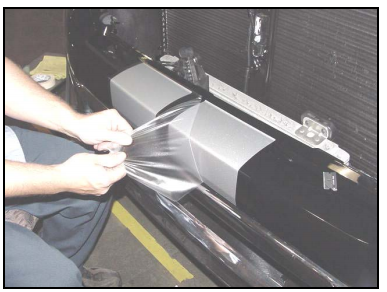
23. Check for air bubbles and remove by using the felt squeegee. If neither of these is working, then use a sharp needle to burst the bubble and smooth out with the felt squeegee. DO NOT SLICE WITH KNIFE. (This will ruin the decal). Once all air bubbles are removed, wipe dry to prevent water spotting.
II. Side Stripe Kit Installation:
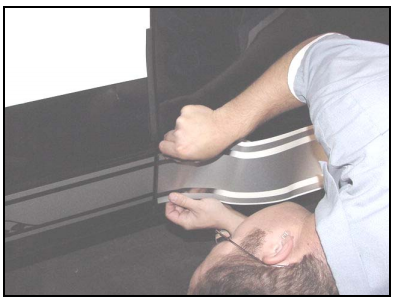
1. Line up decal about ¼” below door panel indent as shown below.
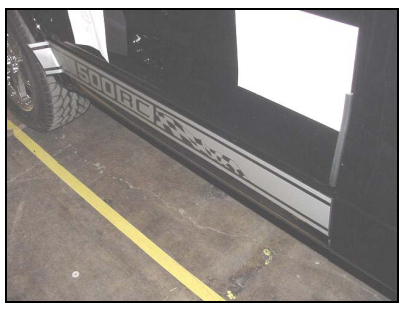
2. Make sure any writing on the decal is read from front of the vehicle to the back as shown.
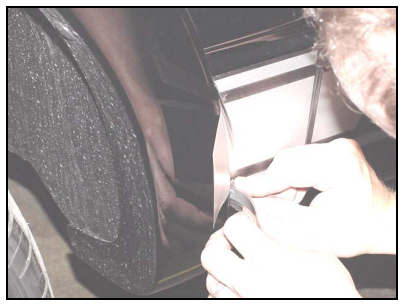
3. Trim any excess decals in order for a precise fit.
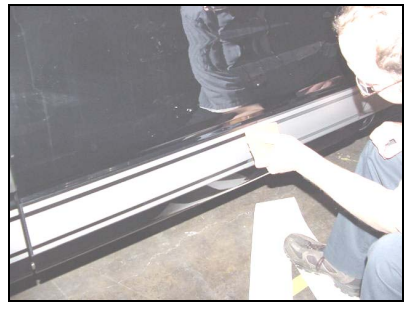
4. Working from the center outward, use a sweeping motion with the regular squeegee to press out the air bubbles and adhere the decal to the flat surface.
5. Allow 15-20 minutes to dry for side decals, once dry remove plastic layer from all decals as shown below. If decal starts to lift from the vehicle, allow more dry time before removing plastic layer. If the edges of the decal are the only parts to slightly lift from the vehicle while removing the plastic, use the felt squeegee to press these areas back to the vehicle and continue removing the plastic.
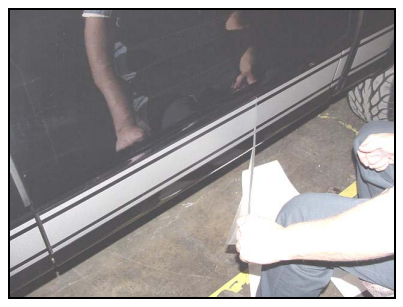
6. Check for air bubbles and remove by using the felt squeegee. If neither of these is working, then use a sharp needle to burst the bubble and smooth out with the felt squeegee. DO NOT SLICE WITH KNIFE. (This will ruin the decal). Once all air bubbles are removed, wipe dry to prevent water spotting.
Note:
If items are missing or for any questions regarding the installation of this kit, please contact Roush Performance toll free at 1-800-59-ROUSH.
WARRANTY
All retail parts carry a 90-day warranty from the date of purchase. This warranty covers defects in materials or workmanship, and does not include:
(i) Normal wear and tear, environmental conditions, improper installation.
(ii) Road hazards, misuse, abuse, neglect, accidents, collision, fire, theft, freezing, vandalism, riot, explosion, or objects striking the vehicle.
(iii) Misusing the vehicle, such as driving over curbs, overloading, racing, or using the vehicle as a stationary power source.
(iv) Altering, disassembling or modifying the parts.
(v) Defects caused or induced by failures, breakdowns, or damage by other parts, components or the vehicle.
(vi) Subjecting the parts to excessive moisture or water or any motor vehicle fluids (e.g. oil, anti-freeze, battery acid, brake fluid, etc.).
(vii) Application of chemicals that affect the parts. This Limited Warranty does not cover surface deterioration of paint, trim, and appearance items that result from use and/or exposure to the elements, such as stone chips, scratches, bird droppings, lightning, hail, windstorm, dings, dents, earthquake, road salt, tree sap, water or flood.
ROUSH SHALL NOT BE LIABLE TO REIMBURSE CUSTOMER/DEALER FOR INCIDENTAL OR CONSEQUENTIAL DAMAGES RESULTING FROM THE INSTALLATION OF USE OF ANY PRODUCT SOLD THROUGH THIS CATALOG OR ARISING OUT OF ANY BRANCH OF WARRANTY, EXCEPT AS MAY BE STATED IN THIS CATALOG, ROUSH DISCLAIMS ALL EXPRESS AND IMPLIED WARRANTIES, INCLUDING THE WARRANTIES OF MERCHANTABILTIY AND FITNESS FOR A PARTICULAR PURPOSE. IN NO EVENT SHALL ROUSH’S LIABILITY EXCEED THE PRICE PAID BY CUSTOMER/DEALER FOR PRODUCTS SOLD REGARDLESS IF ROUSH HAS BEEN ADVISED IN ADVANCE OF ANY POTENTIAL PROBLEM OR IF A CLAIM IS BASED ON CONTRACT, TORT, STRICT LIABILITY, PRODUCT LIABILITY OR OTHERWISE. SOME STATES DO NOT ALLOW THE EXCLUSION OR LIMITATION OF IMPLIED WARRANTIES OR THEIR DURATION, OR LIABILITY FOR INCIDENTAL OR CONSEQUENTIAL DAMAGES, SO THE ABOVE EXLCUSIONS OR LIMITATIONS MAY NOT APPLY.

