FREE 1 to 3-Day Delivery on Orders $149+ Details
How to Install a Roush Vent Gauge Pod on your Ford F-150
Installation Instructions
P/N: EHP-2005-S197VP
Applications: 2005-08 Ford Mustang
2007-08 SVT Shelby GT500
2004-08 Ford F150
Important Notes:
• This product was designed to accommodate both the 2005-08 Ford Mustang and the 2004-08
Ford F150. The following steps and pictures will guide you through a complete Mustang
installation. F150 customers will follow the same steps, however, the parts (ie. Vent register,
decorative bezel/trim ring, dash, etc.) will look slightly different.
• No wiring or gauge-related information is included in this manual. Please refer to your gauge
and vehicle manufacturer’s recommendations before installing gauge(s) into your vehicle.
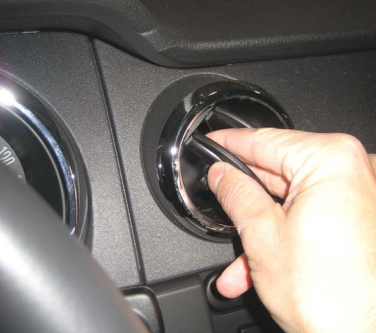
1. Carefully remove the factory air vent by placing fingers inside and pulling gently on the louvers.
NOTE: You will hear a loud “click” just before it pulls free from the dash. Do not be alarmed, it is just the release spring/mechanism.
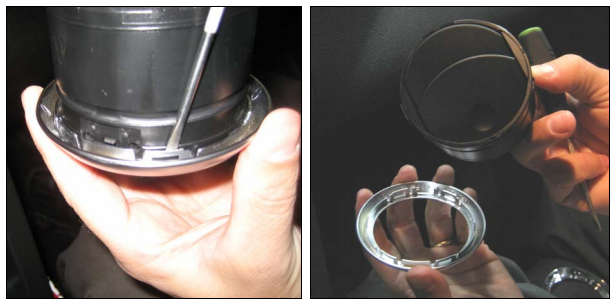
2. The VentPod will reuse the factory trim ring/bezel which is secured to the stock vent with four locking tabs (only two locking tabs for F150 customers). To remove the bezel, CAREFULLY wedge a small, flat head screwdriver between the base and bezel locking tabs.
NOTE: Apply a small amount of downward force on the bezel to force them apart and prevent locking tabs from re-setting while attempting to release other tabs. Take your time and get an extra set of hands if possible to ensure that no tabs are broken on the bezel during this step.
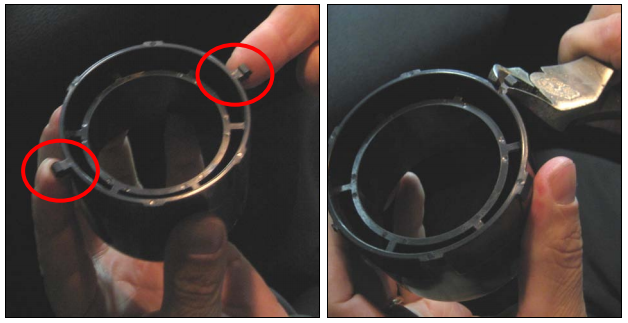
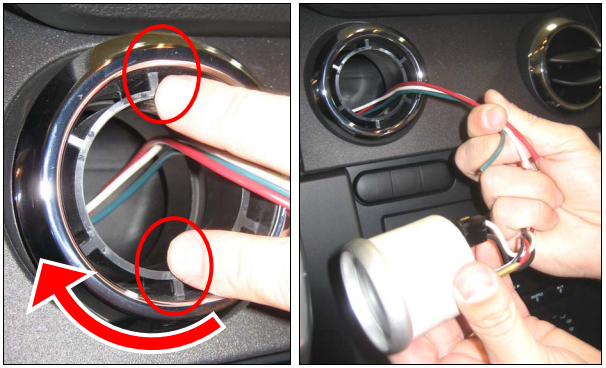
3. THIS STEP IS FOR MUSTANG CUSTOMERS ONLY! Using a set of side cutters, remove the F-150 bezel retainers (circled in RED in the picture below). You may need to file this area to ensure these surfaces are now flush with the outer bore.
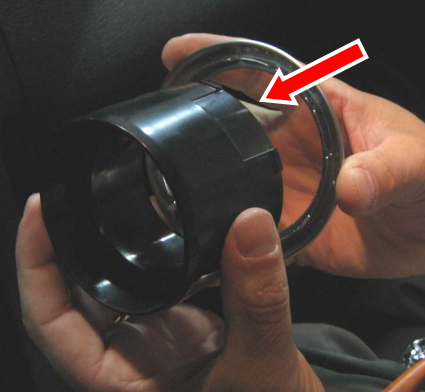
4. Align the locking tab features and carefully insert the VentPod into the bezel until it is fully engaged.
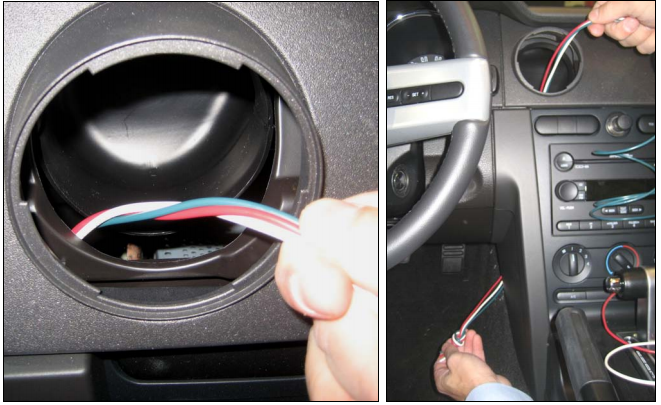
5. Using a flat head screwdriver, lift the retaining features (three places circled in red below) and remove the inner vent structure from the dash.

6. Route wiring through the large gap (located between the outer dash and the HVAC tubing) and leave the excess in the footwell. Final wiring connections must be made at a later step.
7. Feed the wiring through the inner vent structure and re-install into the dash. Press firmly to ensure the three retaining tabs have properly engaged and the structure is locked in place.
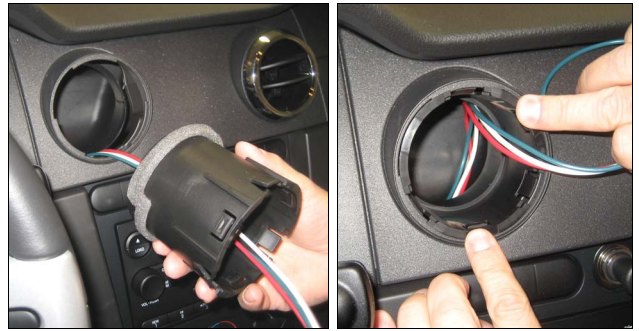
8. Feed the wiring through the VentPod and install the VentPod into the inner vent structure (see note below). Make all necessary wiring connections with the gauge as per the gauge manufacturer’s recommendations.
NOTE: Before installing the VentPod, orient the part such that any two of the support ribs align with the 12 and 6 o’clock positions (circled in RED) and press firmly in place.
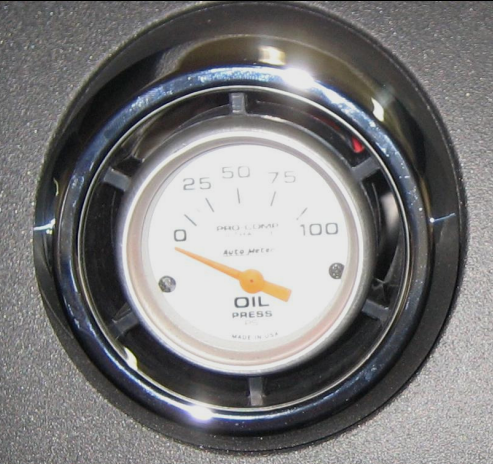
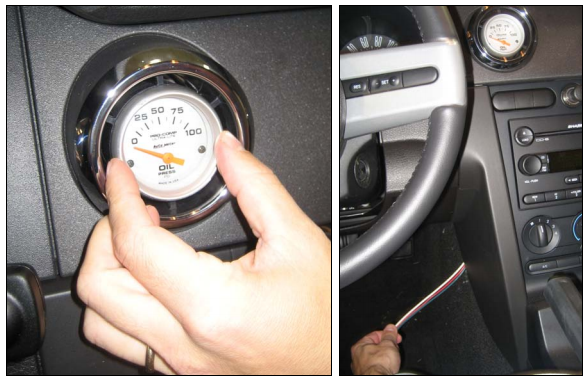
9. Insert the gauge into the VentPod and adjust the amount of “slack” wiring if necessary. Make all gauge hardware and vehicle connections as required as per the manufacturer’s recommendations.
NOTE: Make sure to leave enough slack in the wiring to allow for the removal of the gauge if required at a later date.
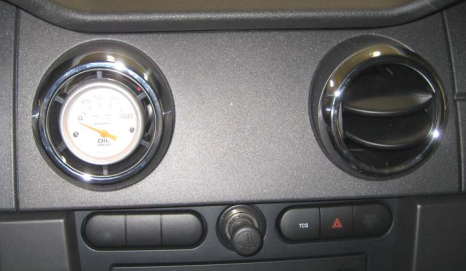
10. CONGRATULATIONS! You have successfully installed your VentPod. For those customers who intend to install multiple VentPods in their vehicles, repeat these steps for each vent.
NOTE: THIS MANUAL ILLUSTRATED THE INSTALLATION OF THE LEFT-CENTER VENT ONLY. VENTPODS CAN BE INSTALLED IN ANY OR ALL OF THE VENTS USING THIS SAME PROCEDURE!!!