 FREE 1 to 3-Day Delivery on Orders $149+ Details
How to Install Roush Phase 1 to Phase 2 Supercharger Upgrade Kit - 650HP on your F-150

Shop Parts in this Guide
SECTION A – DISASSEMBLY
The following section will guide you through the preparation for the installation of your ROUSH F-150 Phase 2
Upgrade Kit.
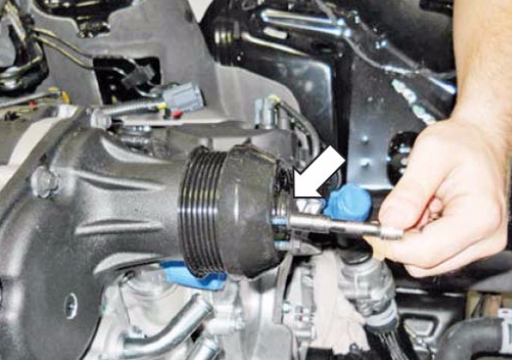
1. Loosen the M6 bolts from the supercharger hub.

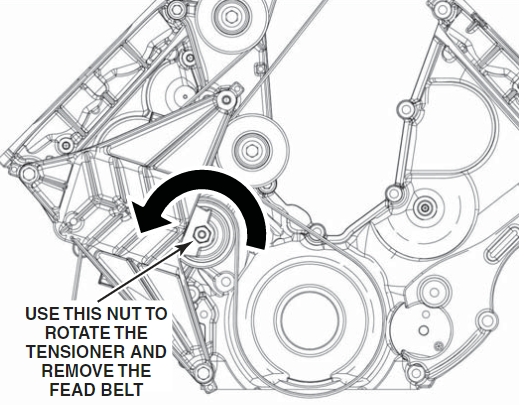
2. Remove the belt from the supercharger by rotating the tensioner counterclockwise and removing the FEAD belt from the supercharger pulley. Then remove the supercharger pulley
SECTION B – INSTALLATION
1. Install the new 75 mm supercharger pulley onto the hub of the supercharger using the six (6) M6 x 16 bolts. Apply a small amount of thread locking compound to each bolt and torque to 8-12 Nm. NOTE: You will need to torque the supercharger pulley bolts once the FEAD belt is installed.
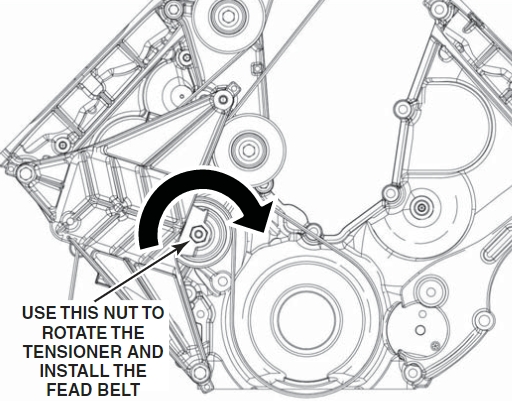
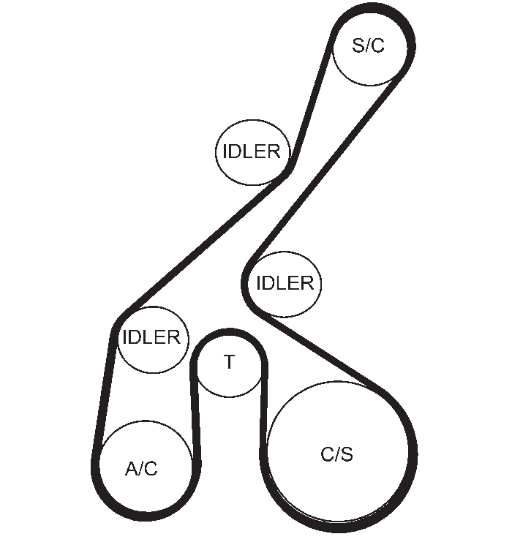
2. Re-install the FEAD belt on the supercharger by rotating the tensioner clockwise and routing the belt as shown in the routing below.
PCM Flashing 1. If equipped with a SAE J2534 pass through device, refer to the RDT-CALIM manual found on our website. The RDT-CALIM manual will guide you through the ROUSH Diagnostic Tool (RDT) software installation process and the ROUSH PCM fl ashing procedure. OPERATING THE ENGINE WITHOUT THE RECALIBRATED PCM WILL RESULT IN ENGINE DAMAGE OR FAILURE AND WILL VOID THE WARRANTY. 2. Once the PCM has been successfully recalibrated, start the engine and check for unusual noises, dash service lights, and unusual operation. If problems are detected, immediately stop the engine or vehicle, diagnose and repair the problem. If you do not have a SAE J2534 device, you can send your PCM to Roush Performance along with the voucher card. Upon receipt, a customer service representative will contact you to arrange payment.

