FREE 1 to 3-Day Delivery on Orders $149+ Details
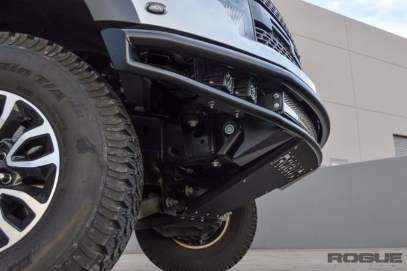
How to Install Rogue Racing Renegade Front Bumper on your F-150
Tools Required
- -3/16 Allen socket or wrench
- -3/4 socket
- -1/2 socket or wrench
- -8 mm socket or wrench
- 10 mm socket or wrench
- 15 mm socket or wrench for front skid plate
- 21 mm socket for front bumper
- -GRINDER WITH CUT OFF WHEEL
- SAFTEY GLASSES & GLOVES
- SILVER SHARPIE
- STRAIGHT EDGE & MEASURING TAPE

REMOVING OEM BUMPER STEPS
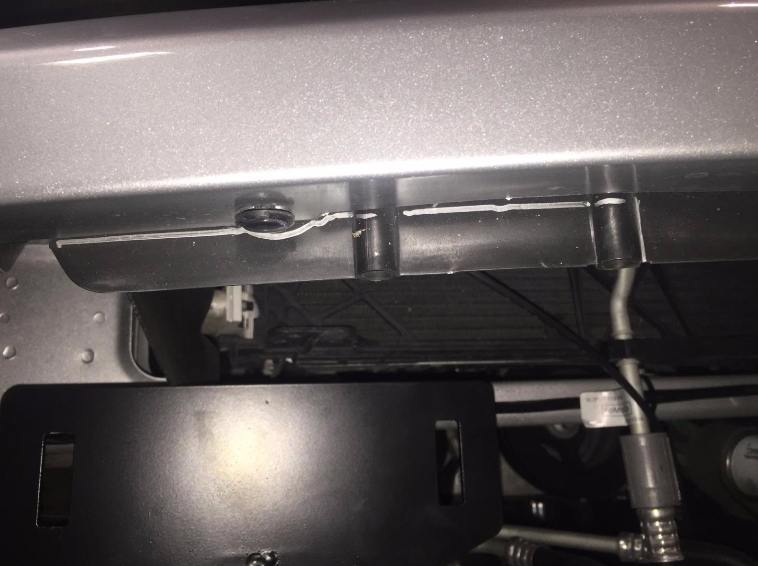
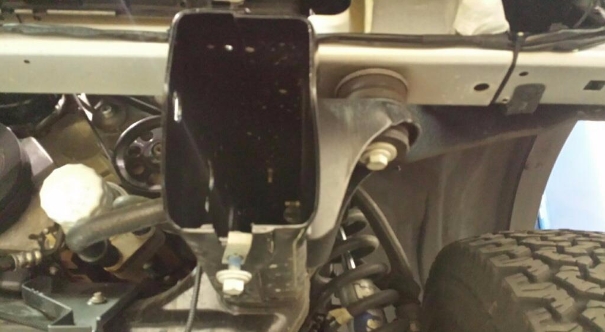
1-5 1- Open hood, behind bumper there are rubber flaps to seal off area, remove the flaps retainer plastic plugs at bumper frame under condenser. This flap will not be re used.
2- Remove 10mm bolt holding hood release from bracket behind bumper and slide assembly out unclip any cable retainers that are attached to bumper.
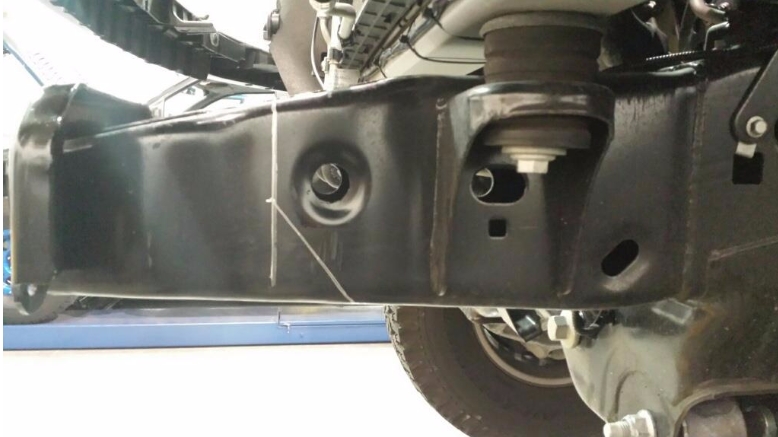
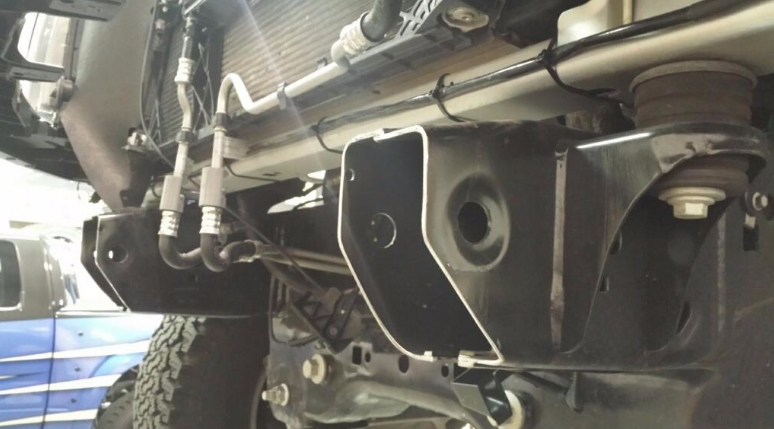
3- Remove skid plate from under bumper/engine plus the 2 brackets at the top end of the skid plate. (you will reuse the speed clips & bolts in step #2 of the sup assembly install instructions)
4- Loosen but do not remove the 4 nuts that hold the bumper to the frame horns, (where the frame ends and the bumper meets) this will allow the bumper to drop down but not fall off.
5- Remove the 4 fasteners from the bumper while supporting the assembly to prevent it from falling or twisting sideways and damaging the truck.
6- Remove the 4x4 tow hooks
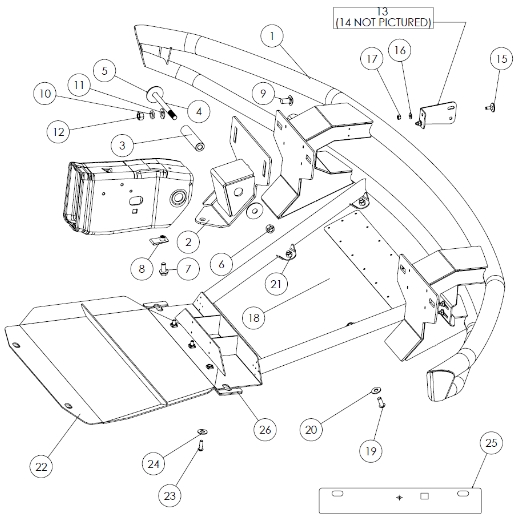
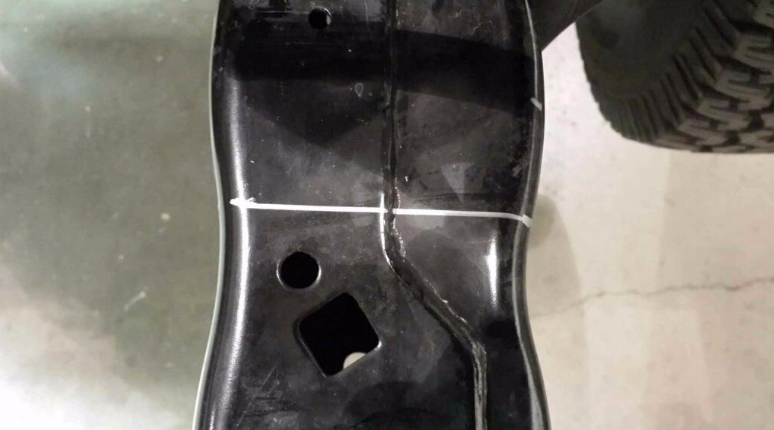
1- CUT OFF THE STOCK FRAME HORNS FOLLOW DIAGRAM SHEET PROVIDED ***The bumper does NOT use the cuts you make to align the bumper, so your measurements and cuts do not have to be 100% accurate.
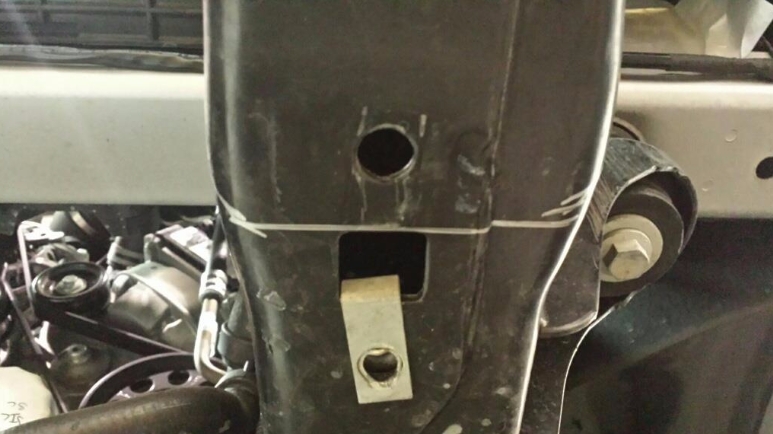

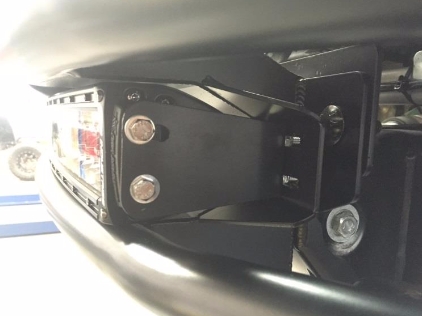
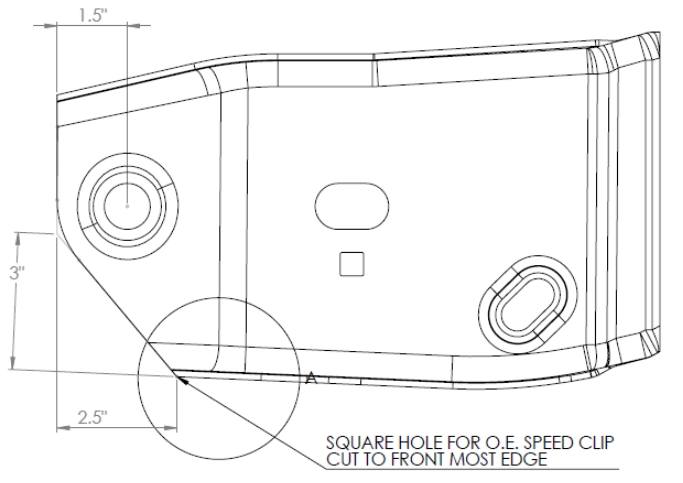
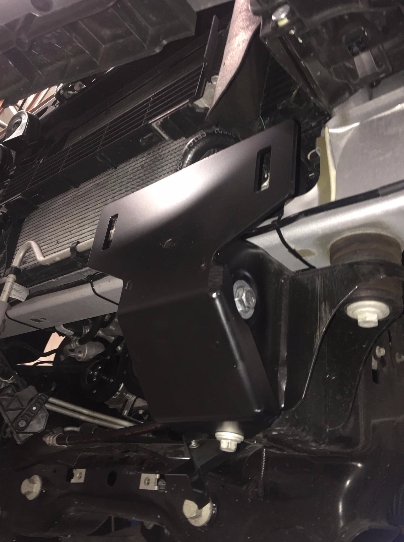
INSTALLING THE SUB ASSEMBLY BRACKET 1- DRILL OUT THE OEM HOLES TO 1” THEY ARE .98” STOCK SO THIS WILL NOT TAKE MUCH EFFORT AND CAN BE ACHIEVED WITH A DREMEL OR FILE IF A 1” DRILL BIT IS NOT AVALIABLE 2- Using the OEM speed clips & Bolts (from step #3 in “REMOVING OEM BUMPER”) (Diagram #7 & 8) slide in the speed clip to the square cut out. ***If you do not have the OEM speed clips, or prefer to re install the factory 4x4 Tow Hooks, then you must use the 4x4 tow hook nut plate & bolt hardware that was removed earlier. Use the nut plate to scribe & drill a second hole behind the current factory hole. After hole is drilled hand tighten bolt from bottom through to nut plate placed inside frame. Leave off front bolt until sub assembly bracket is installed. When you go to install the sub assembly: 1) Install the front bolt by hand through the tab. 2) Then tilt up and install the 1” frame bung & hardware (diagram #3,4,5,6) 3) Finally hand loosen the back bolt to give about a ¼” gap. Carefully remove the front bolt and slide on the 4x4 tow hook, and then reinstall the front bolt. The 4x4 Tow Hook will have a slight angle due to the sub assembly creating a shim (you can add a spacer washer to the back if needed)
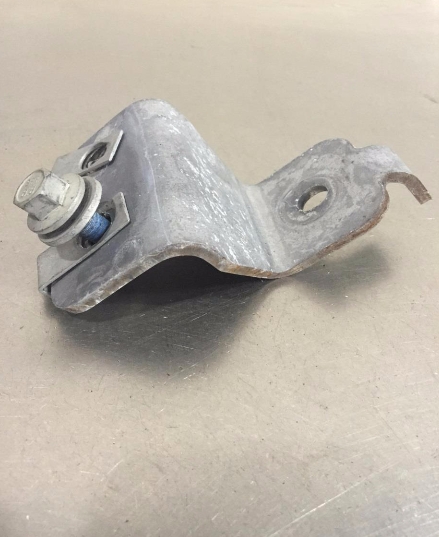
3- Install the Sub Assembly Frame Bung & hand tighten Bolt Diagram # 2-8 **Note There is a Left & Right Sub Assembly Bracket. (the bent Flange faces out)
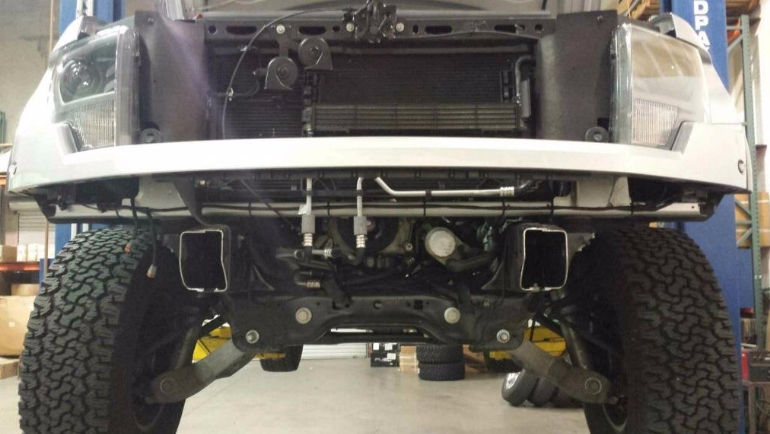
INSTALLATION OF MAIN BUMPER
4- Using the 4 black carriage bolts provided, pre-install the bolts into bumper to provide support during install process. Slide the new bumper into position and install bolts into frame horns. *Do not let go of bumper until washers and nuts are hand secured to bolts. Carefully snug up the bolts, but do not fully tighten at this time.
5- Install the Rogue Racing provided hood latch and the valance plate using OEM speed clips and hardware off original bumper latch location. ***Do not use the OEM hood Latch and valance plate.
6- At this time align the bumper side to side & Height ** it is Recommended to allow a ½” gap between the valance & the top tube of the bumper. Some people prefer to run the top tube of the bumper directly underneath the valance for looks; however this will cause rubbing as the body and frame move independently. If you do wish to run the bumper directly under the valance, then it is recommended to run a foam strip on the under edge of the valance. (not included) Also the OEM valance is not straight; it curves up from the headlight inner edge to the outside of the flair. (This may lead you to believe the bumper is not straight) To solve this illusion when running the bumper directly under the valance you must apply more pressure to the center of the valance. The center of the valance may slightly look pushed up to close the gap on the outer edges.
7- Slide under the nose of the truck and using the OEM skid plate bolts & speed clips. Install the 2 step washers at cross member plate. If you are running the bumper with a ½” gap between the valance and top tube then you will have to use a jack or a lot of force to push up the bumper cross member plate to thread in the speed clip bolts through the step washer.
8- Final Alignment of bumper in relation to truck (left/right, up down to make even) and the tighten bolts making sure to maintain alignment. Take your time and check visually as this may take a few adjustments before it looks perfect. Check corners of the bumper for even spacing at the valance.
9- Once bumper is tightened at frame horns return below and tighten step washers fully. Bumper should now be secured.
10- Install Belly Skid Plate *hand start 5/16 Button head Bolts into belly skid so they do not cross thread.
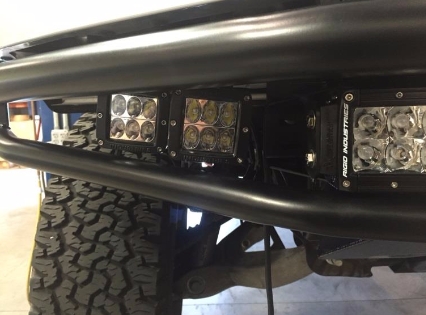
INSTALLING LIGHTS *Light hardware is provided with this bumper (diagram #13-17) however, Rogue Racing Manufactures the lighting hardware to be as universal as possible but does not guarantee any lights will fit our brackets except for Lights Sold Thru Rogue Racing. Wiring Lights: Rogue Racing Lights are sold with Wiring harnesses for all lights 20” & up the harnesses simply plug to & - Terminals on battery & switch installed inside cab. **Or use up fitter switches with harness 40” light bars will only run off toggle 1 &2 **Wiring harness is recommended to run in line with up fitter switch 3&4. ***Rogue Racing recommends a professional install the lights if you are not familiar with 12V wiring.