 FREE 1 to 3-Day Delivery on Orders $149+ Details
How to Install Recon Side Mirror Lenses w/ Amber LEDs - Clear Lens on your F-150
1. Step one is to push the bottom section of your glass mirror so the top has as much of an opening as possible. Using a long flat head screwdriver locate the clip section with the tab in it. Put the screwdriver in between the tab and the mirror and twist until they begin to separate. Continue this while working your way around the mirror.
NOTE: On the driver side you will need to access this tab from the bottom.
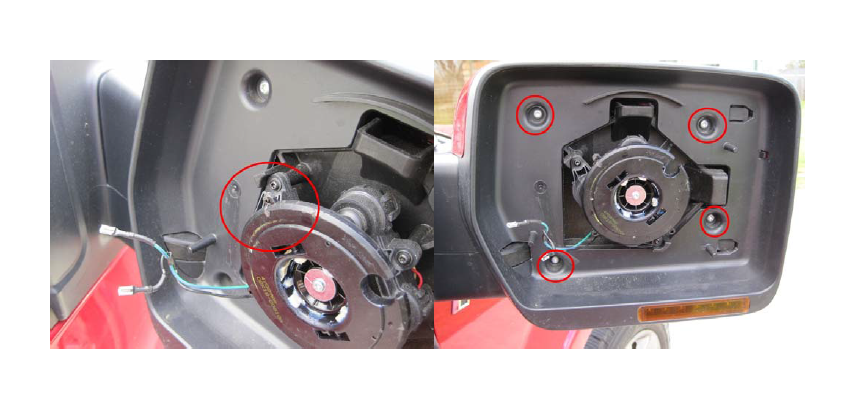
2. Once the mirror is free, very gently unplug the heated mirror wires (assuming your truck is equipped with them). Then remove the four (4) T15 torx screws. NOTE: If your heated mirror wires look fragile or frayed, we recommend you do not unplug them. You can still install RECON mirror lenses without unplugging these wires; however, you must be careful so you do not apply too much pulling pressure on these wires.
3. If your truck has heated mirrors and you choose to unplug the wires, be sure to mark the negative side so you will correctly connect them back again.
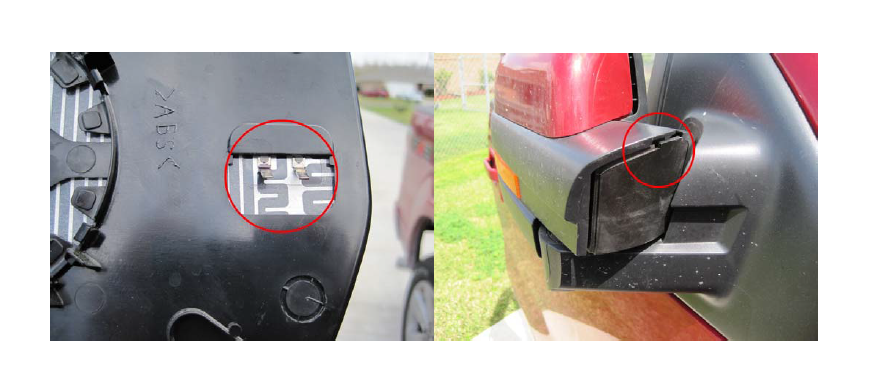
4. Now fold the mirror in towards the door of the truck so you can remove the front half of the housing. Start at the door side of the mirror and pry up as shown. Once you have this part up the housing should pop right off.
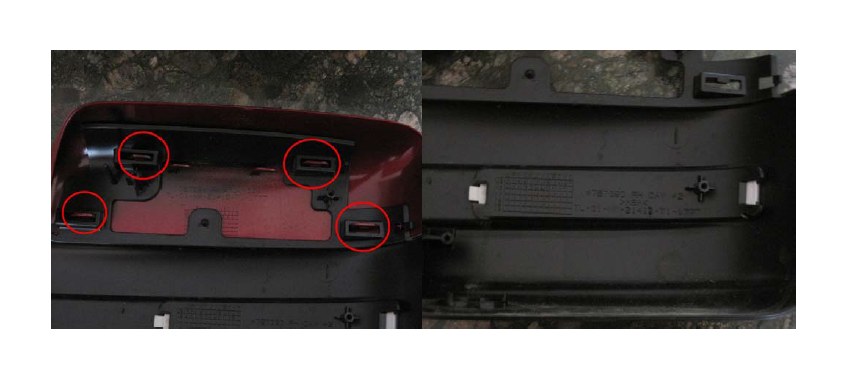
5. If you have PTM caps, you will want to remove them so you don't scratch them. Just release the tabs as shown and the cap will pop right out.
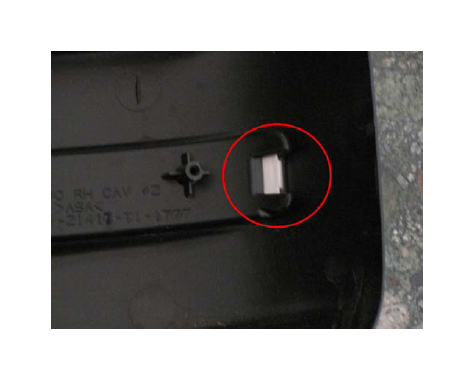
6. Now you can remove the reflector from the housing. Using a flat head screwdriver, gently pry the tab on the outside curved part of the reflector. NOTE: The driver mirror reflector tab on the door side is a fork shape instead of one solid tab.
7. NOTE: This last step is ONLY if you are installing part # 264241Bk or CL which include LED turn signals &/or running lights. We recommend taking the strip of LED’s and using it as a template to cut out the plastic with a Dremel tool using a cut-off wheel on it. Be sure not to run the Dremel too fast and don't cut too deep. Only cut deep enough to cut through the white plastic and then stop.
8. The final step assuming you have part # 264241BK or CL is to wire in the LED turn signal &/or running lights. Our suggestion is to wire the LEDs to function as turn signals & to do this you simply hardwire the positive wire to the positive wire coming off your front turn signal bulb and ground the negative to the chassis or find a suitable ground for the negative wire coming off your RECON LED turn signal mirror lenses.

